How to Make a Macrame Plant Hanger (For Beginners)
This post may contain affiliate links, which means that I may receive a commission if you make a purchase using these links. As an Affiliate, I earn from qualifying purchases but this comes at no extra cost to you.
It all Started with a Plant Hanger.
When I started my fiber art journey three years ago, I looked up how to make a macrame plant hanger and I have been hooked ever since. So many fiber artists I’ve talked to have a similar story, so I’m assuming you aren’t too far behind the rest of us.
In this post, I am going to break down step by step how to make a basic macrame plant hanger. Please feel free to let me know if you have any questions.
Let’s do the damn thing!
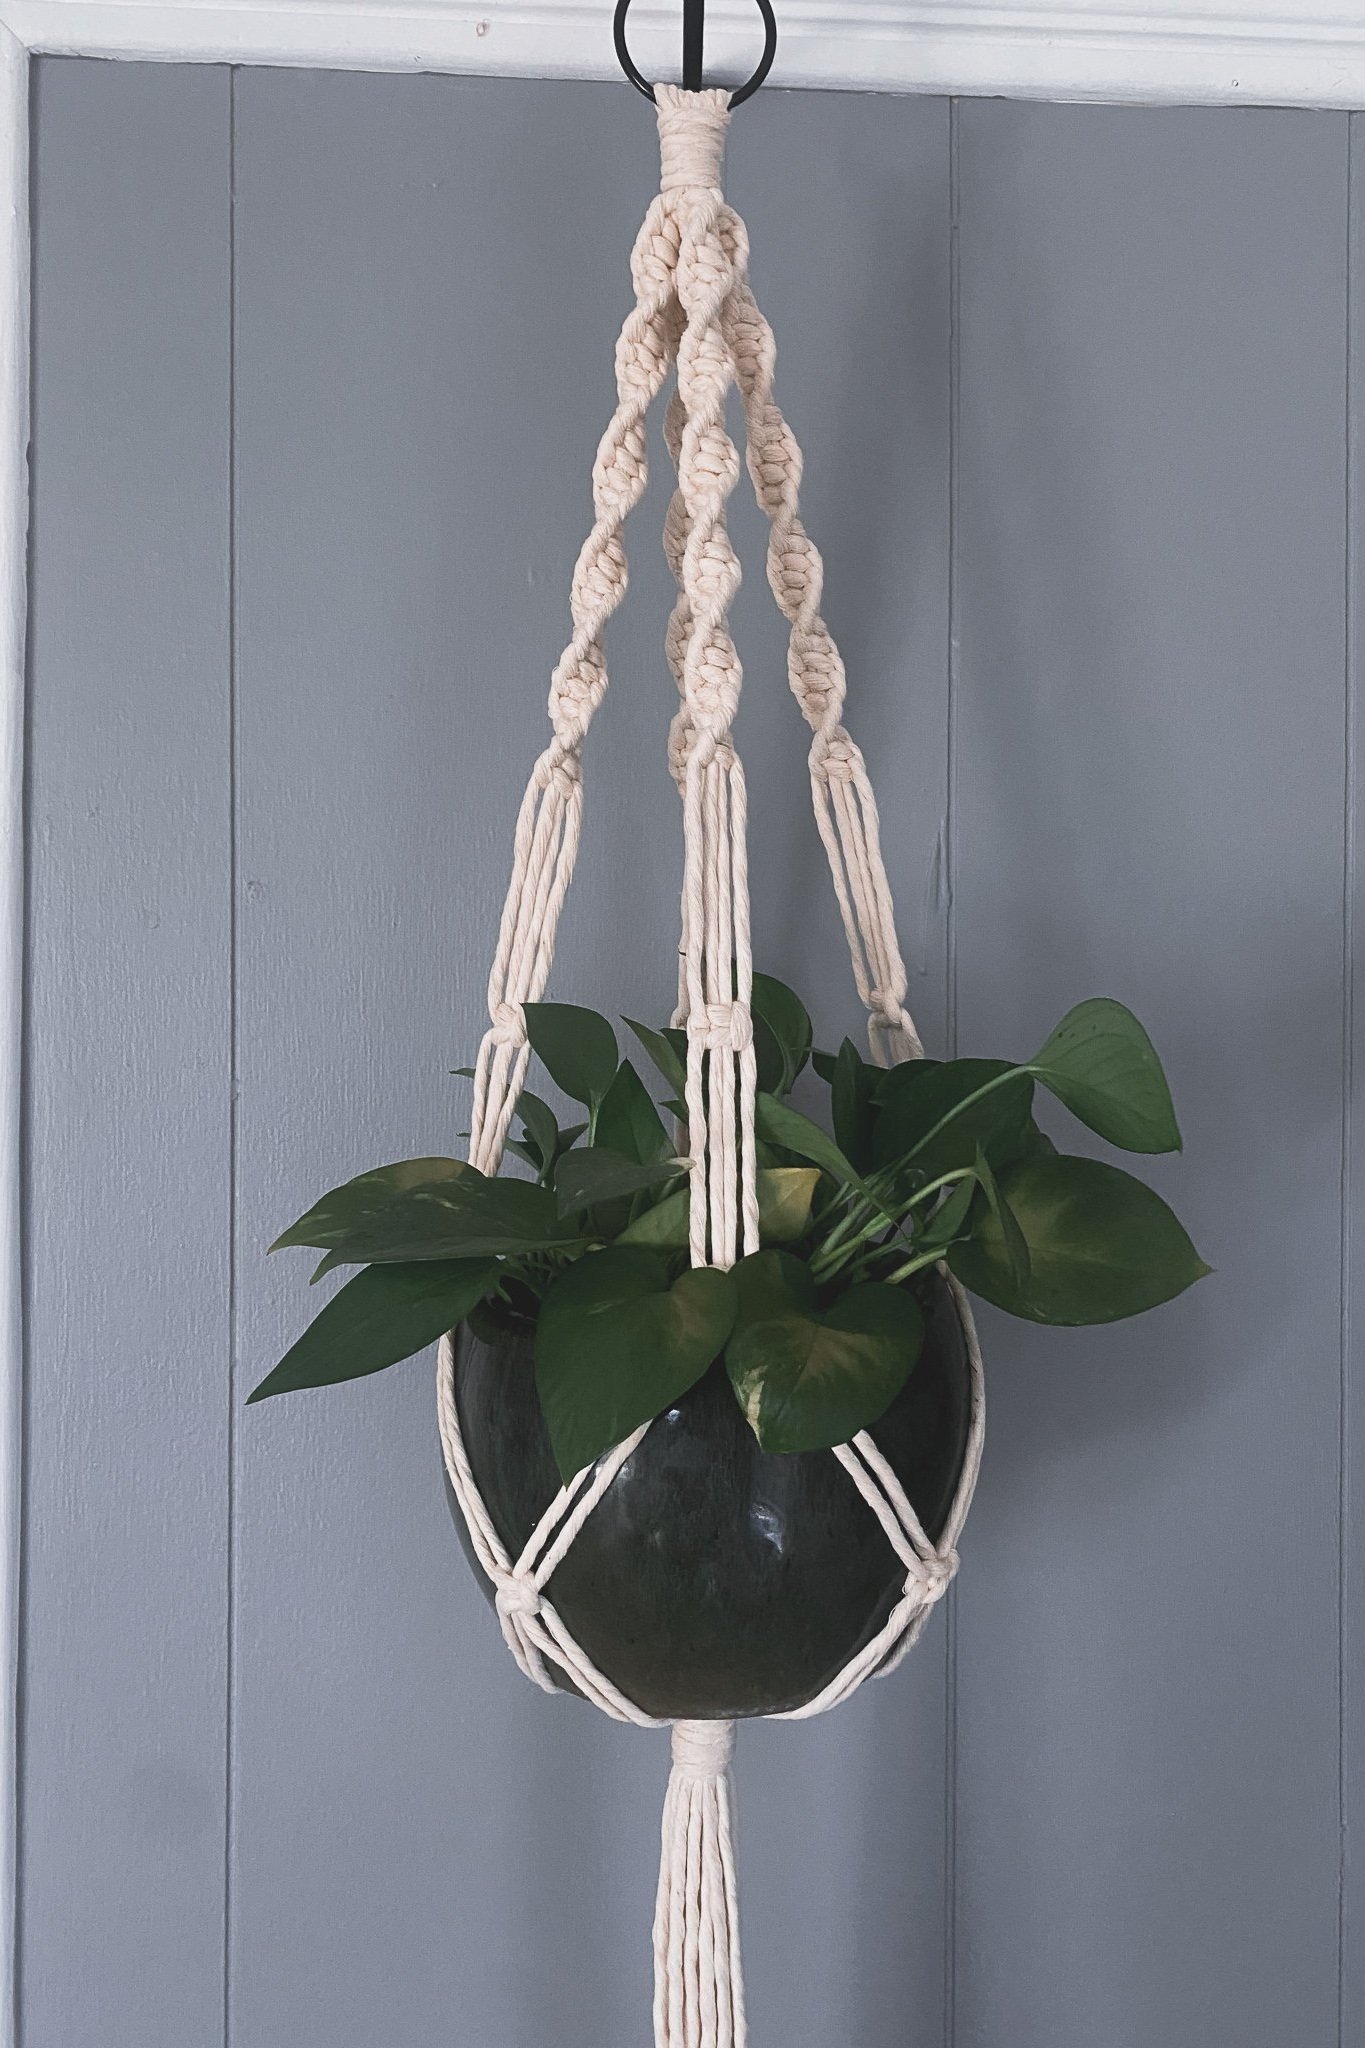
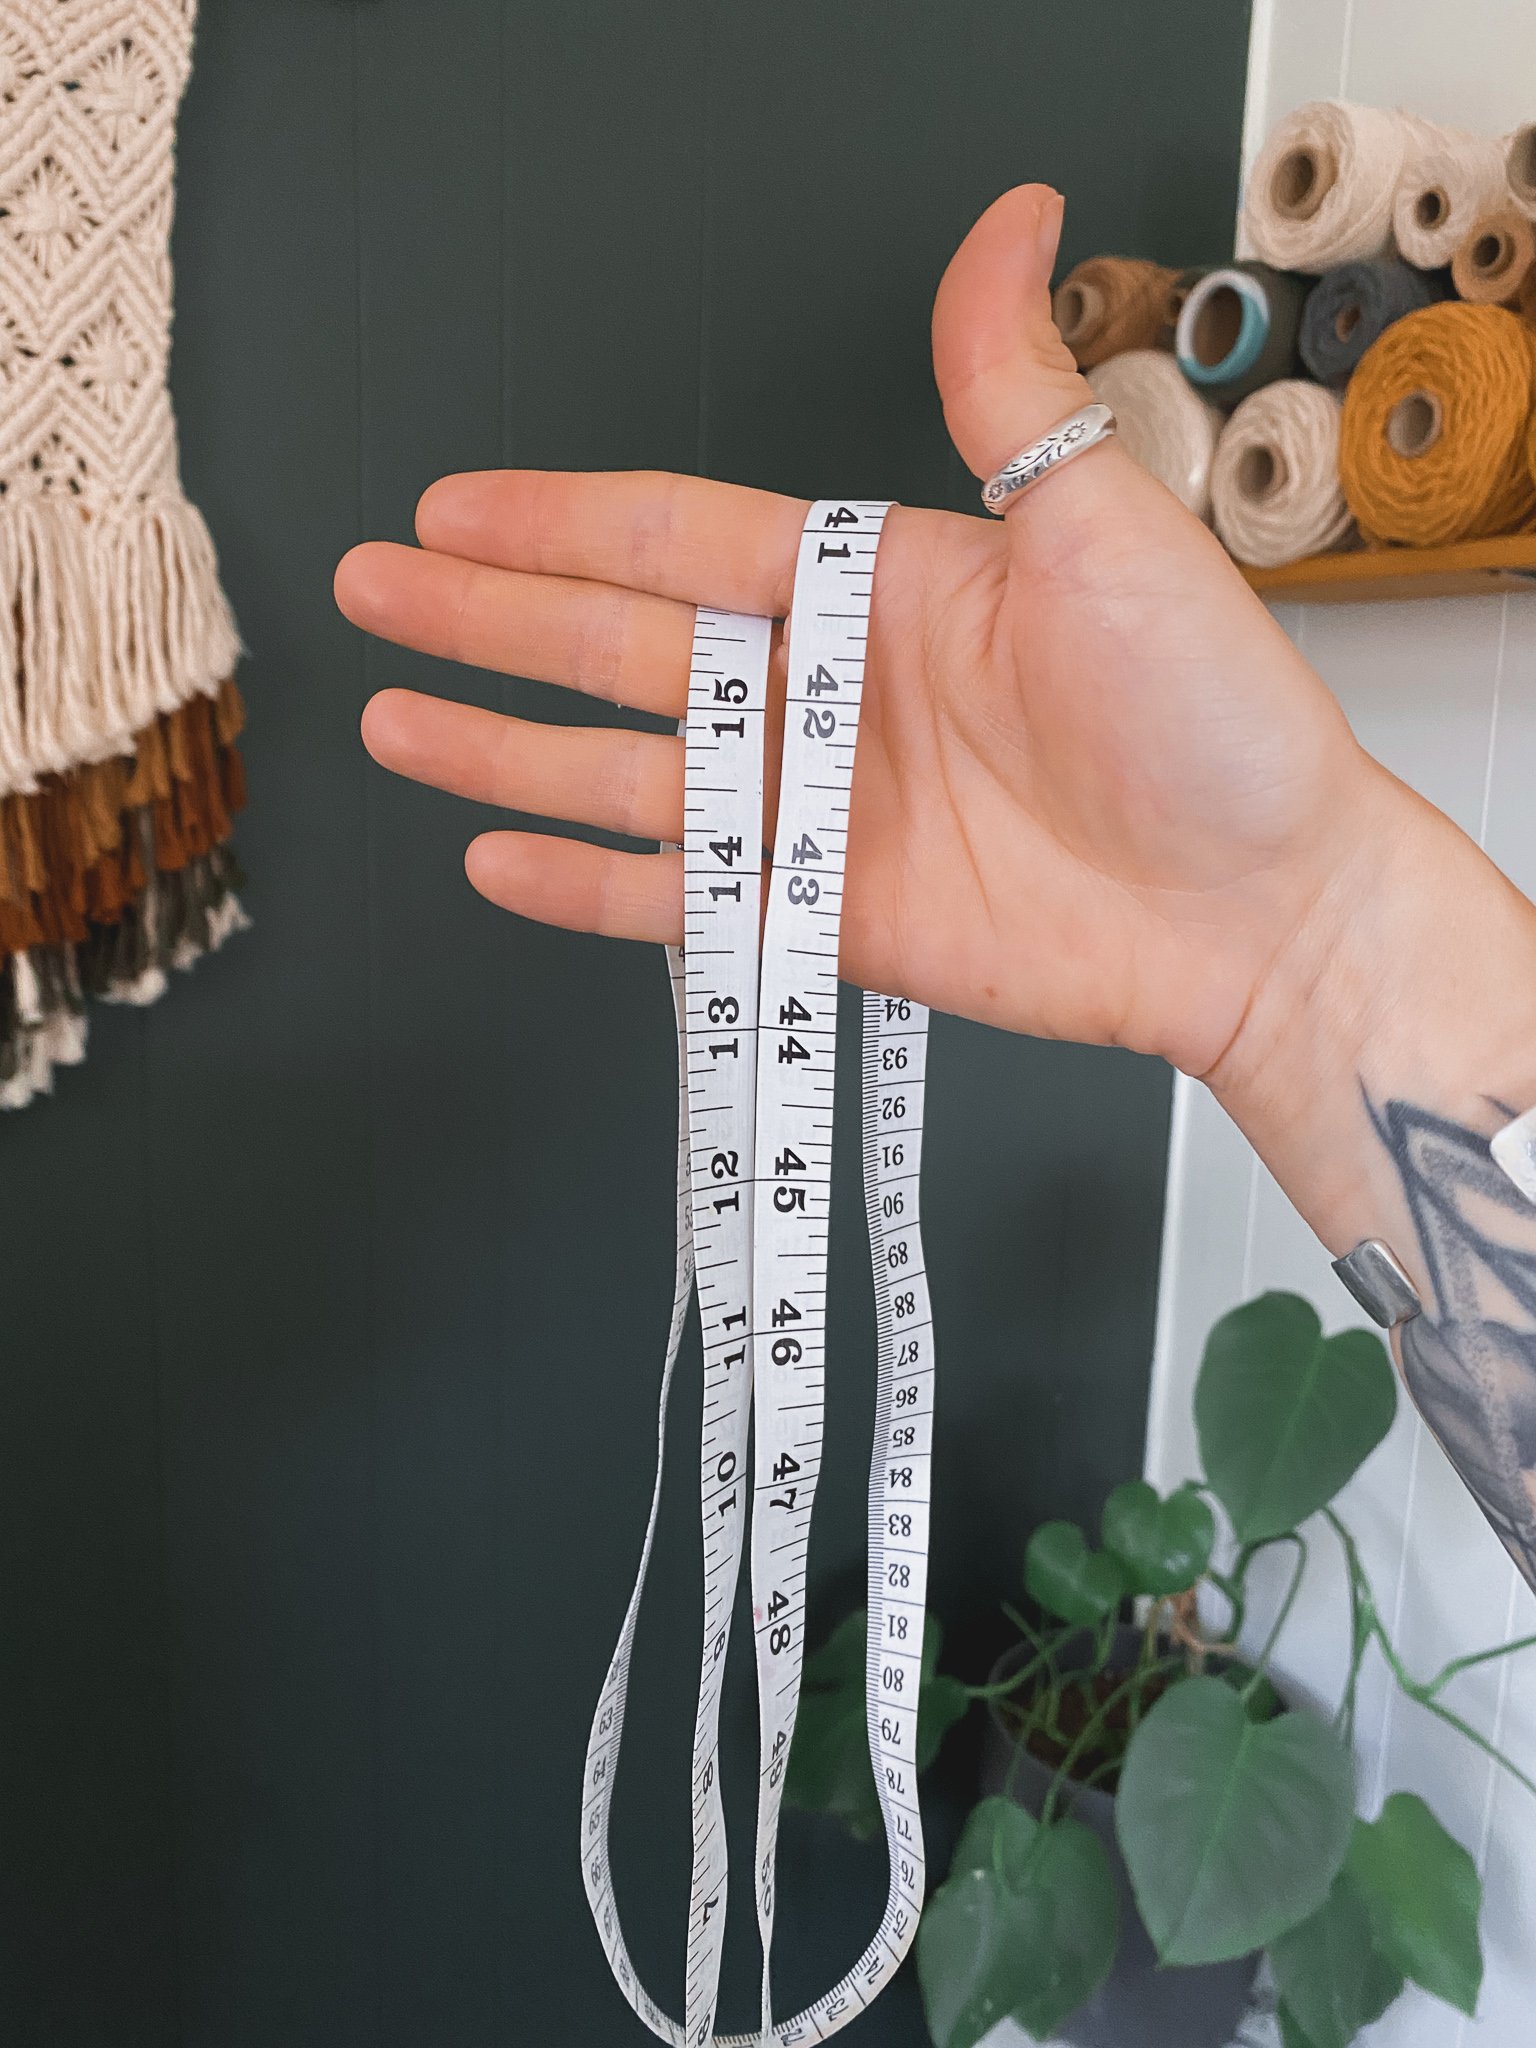
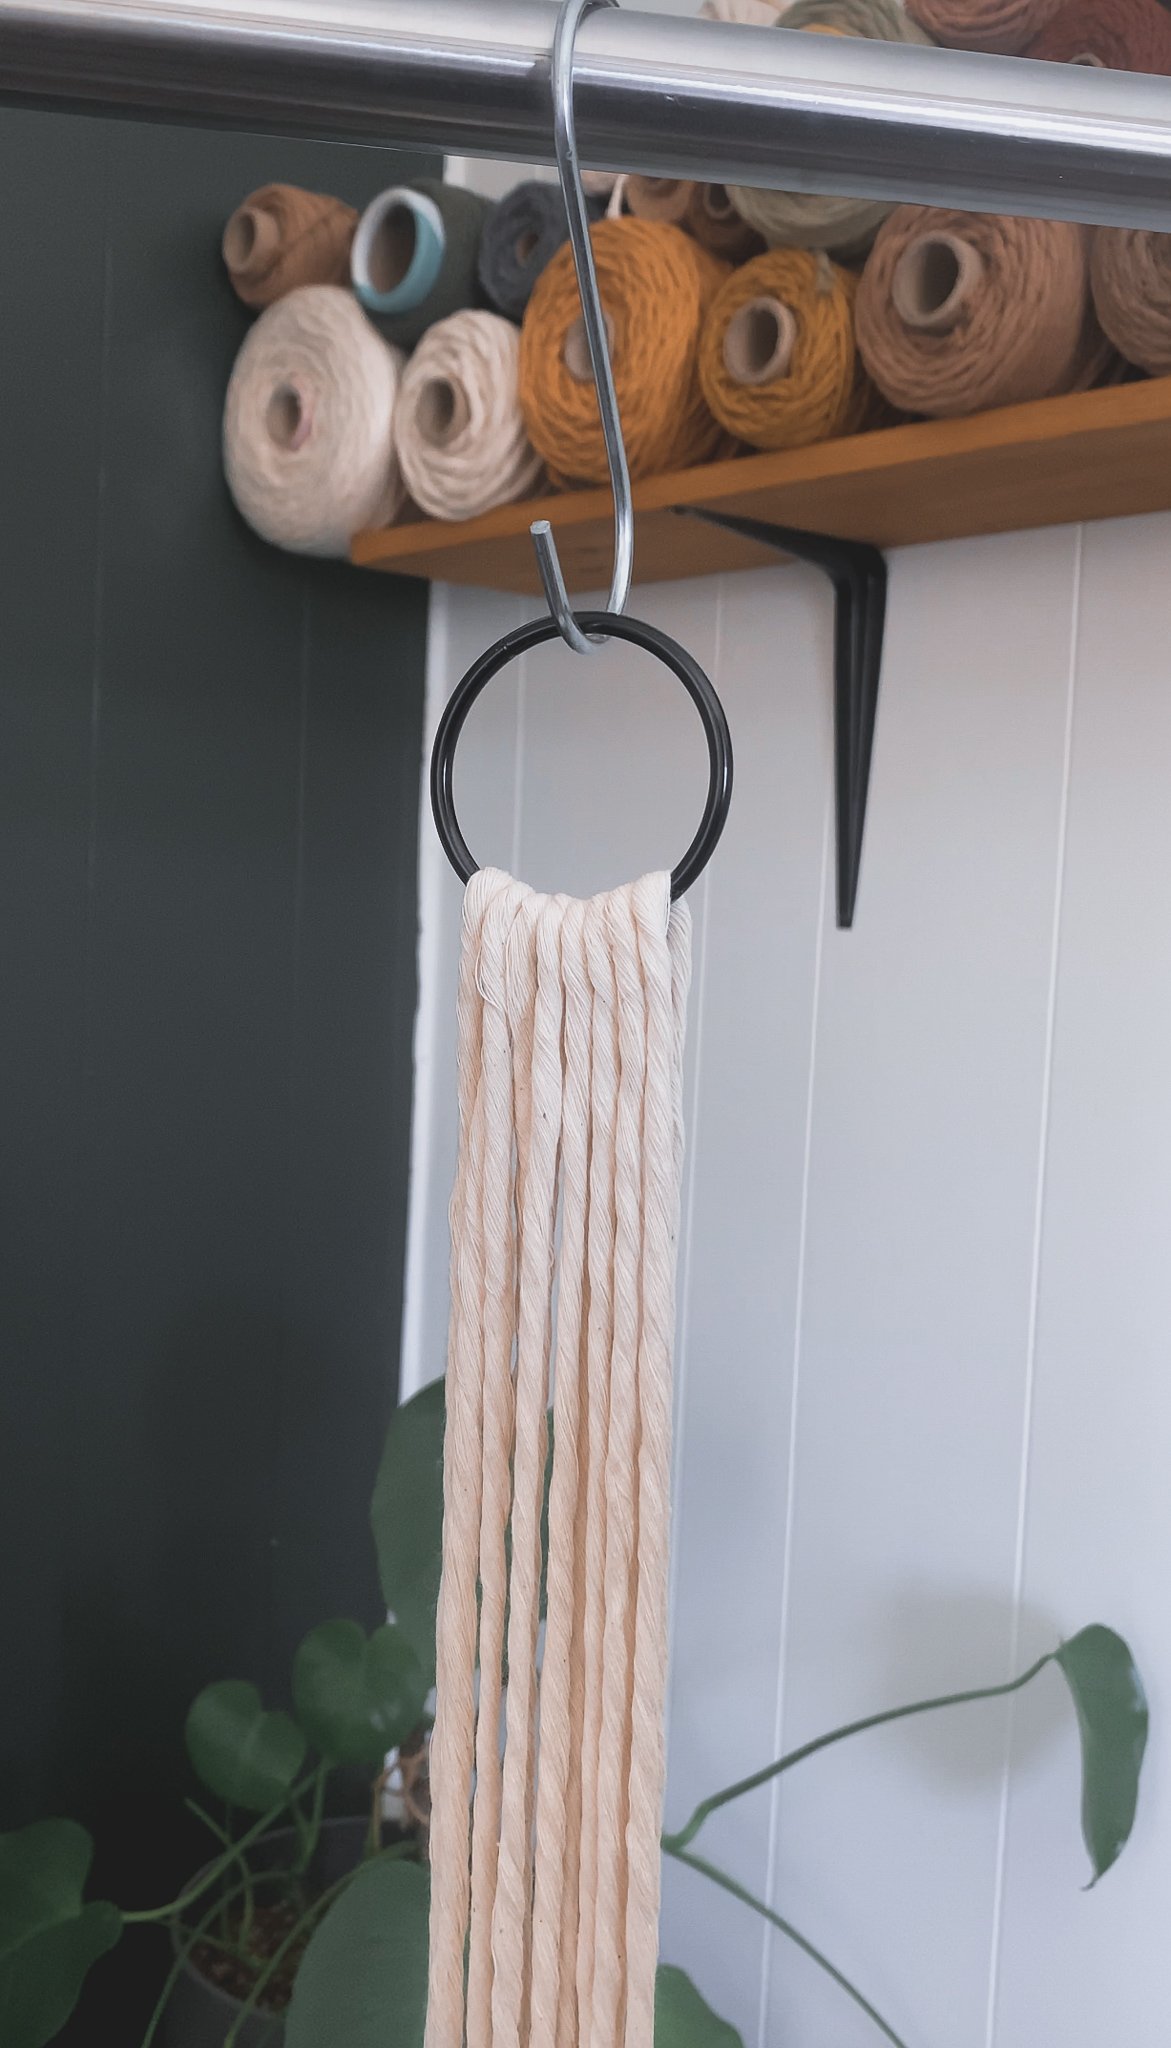
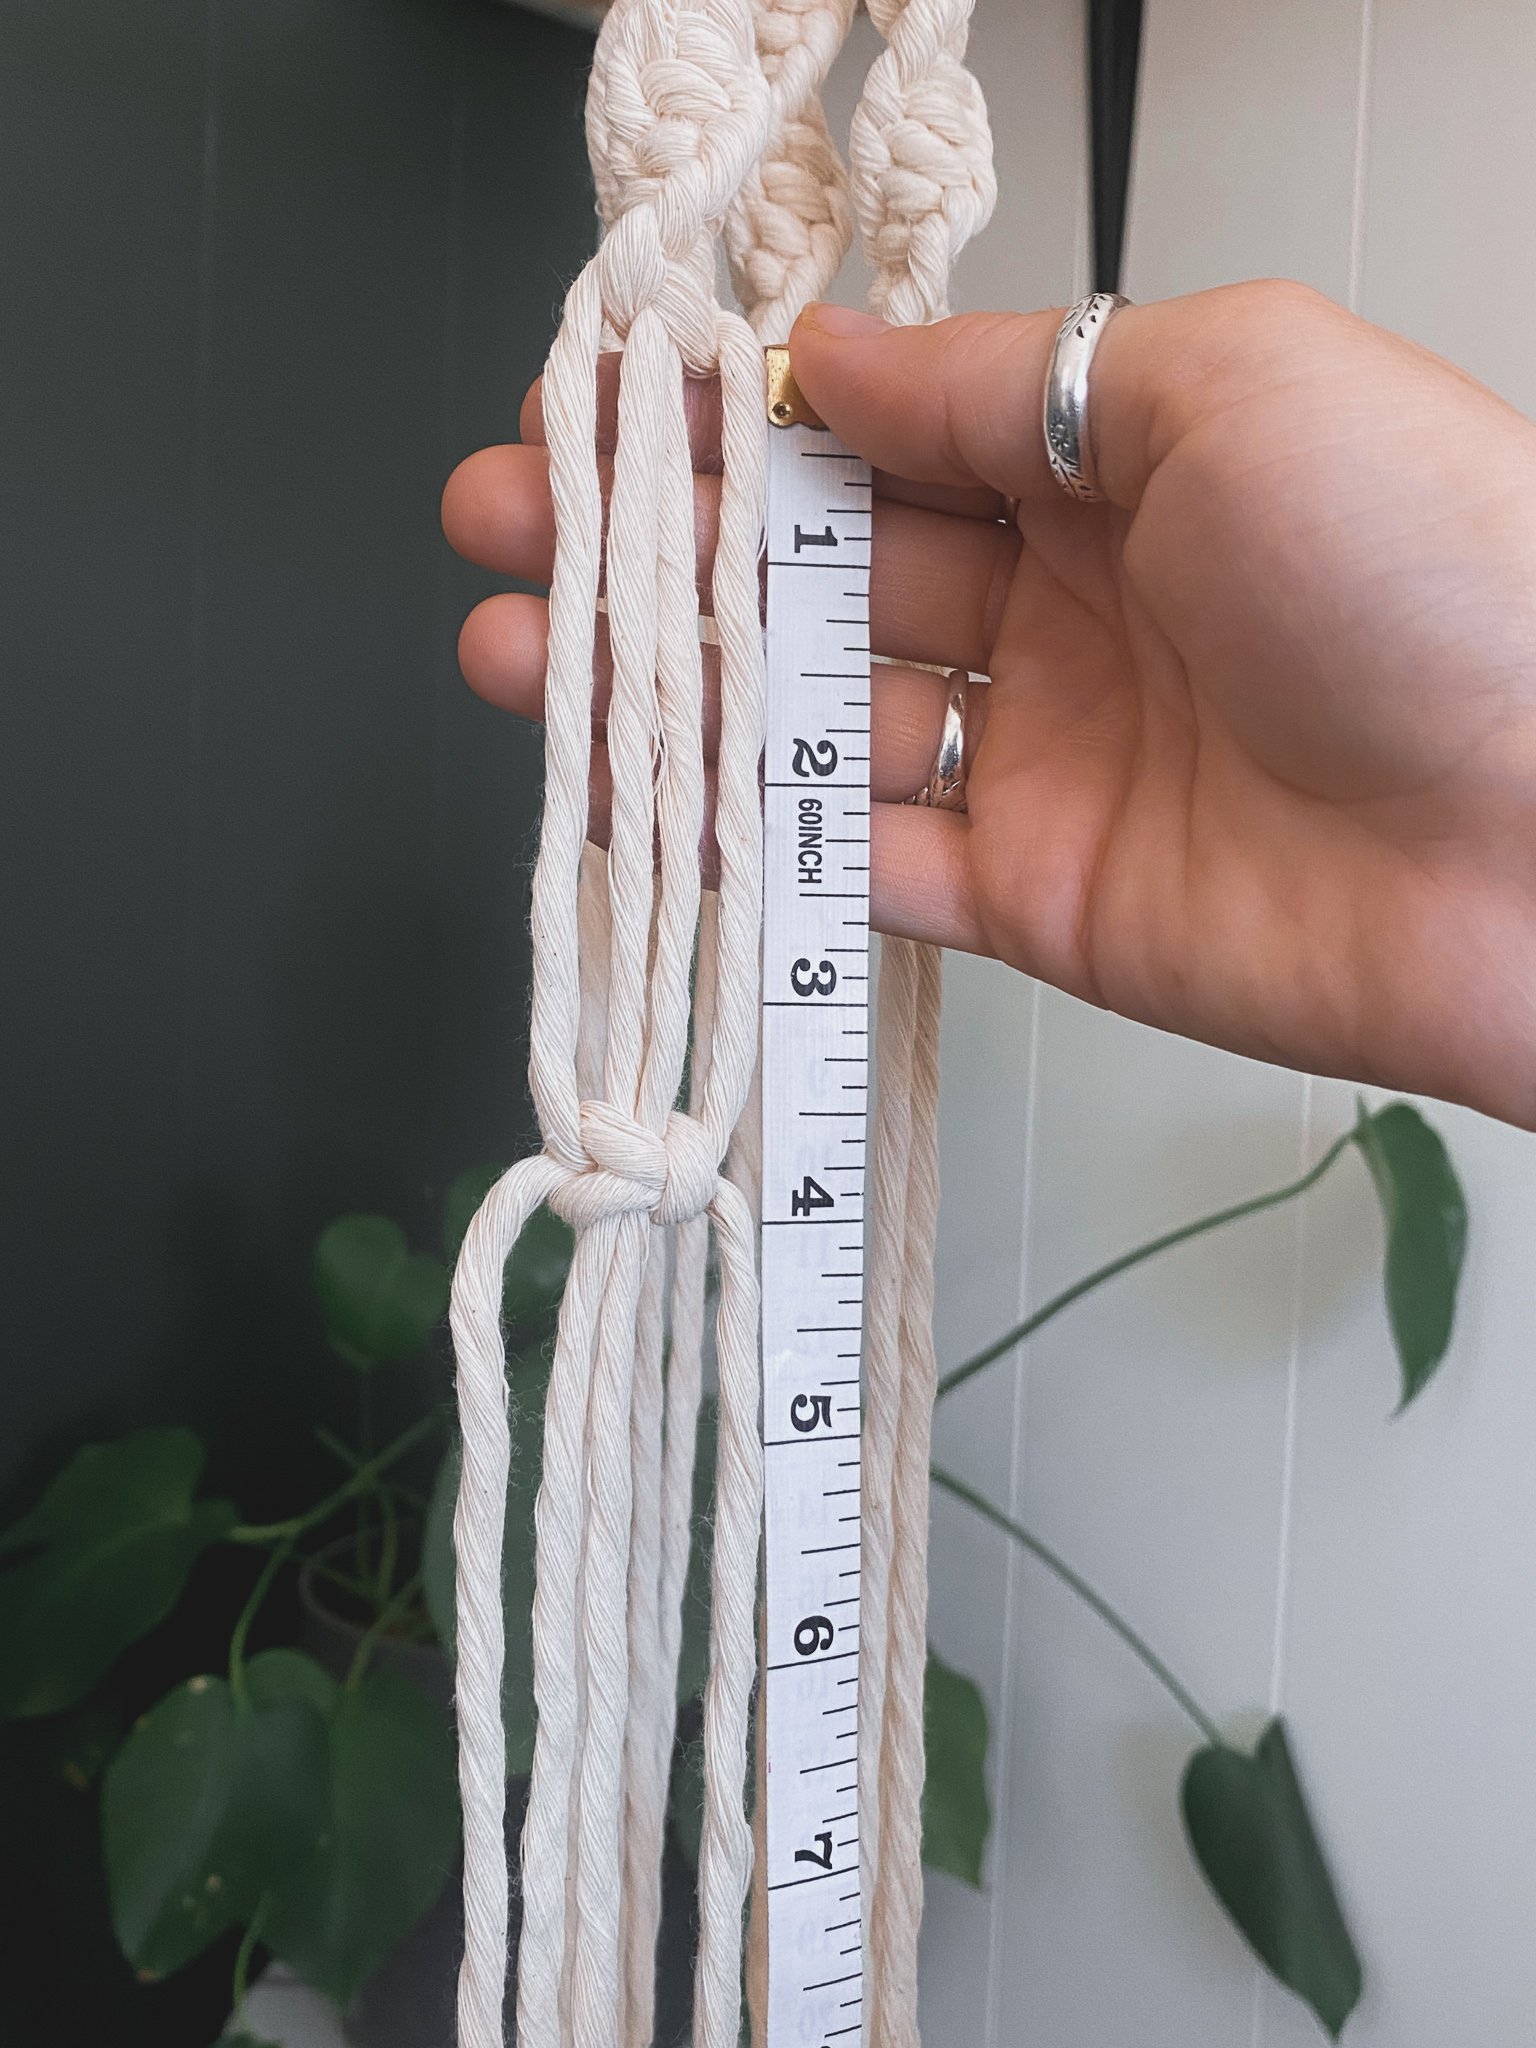
This tutorial is for a 38in long plant hanger that ideally fits a medium to large sized pot. The pot I used for this hanger is 7in wide and 5.5in tall.
Step 1: Gather your supplies
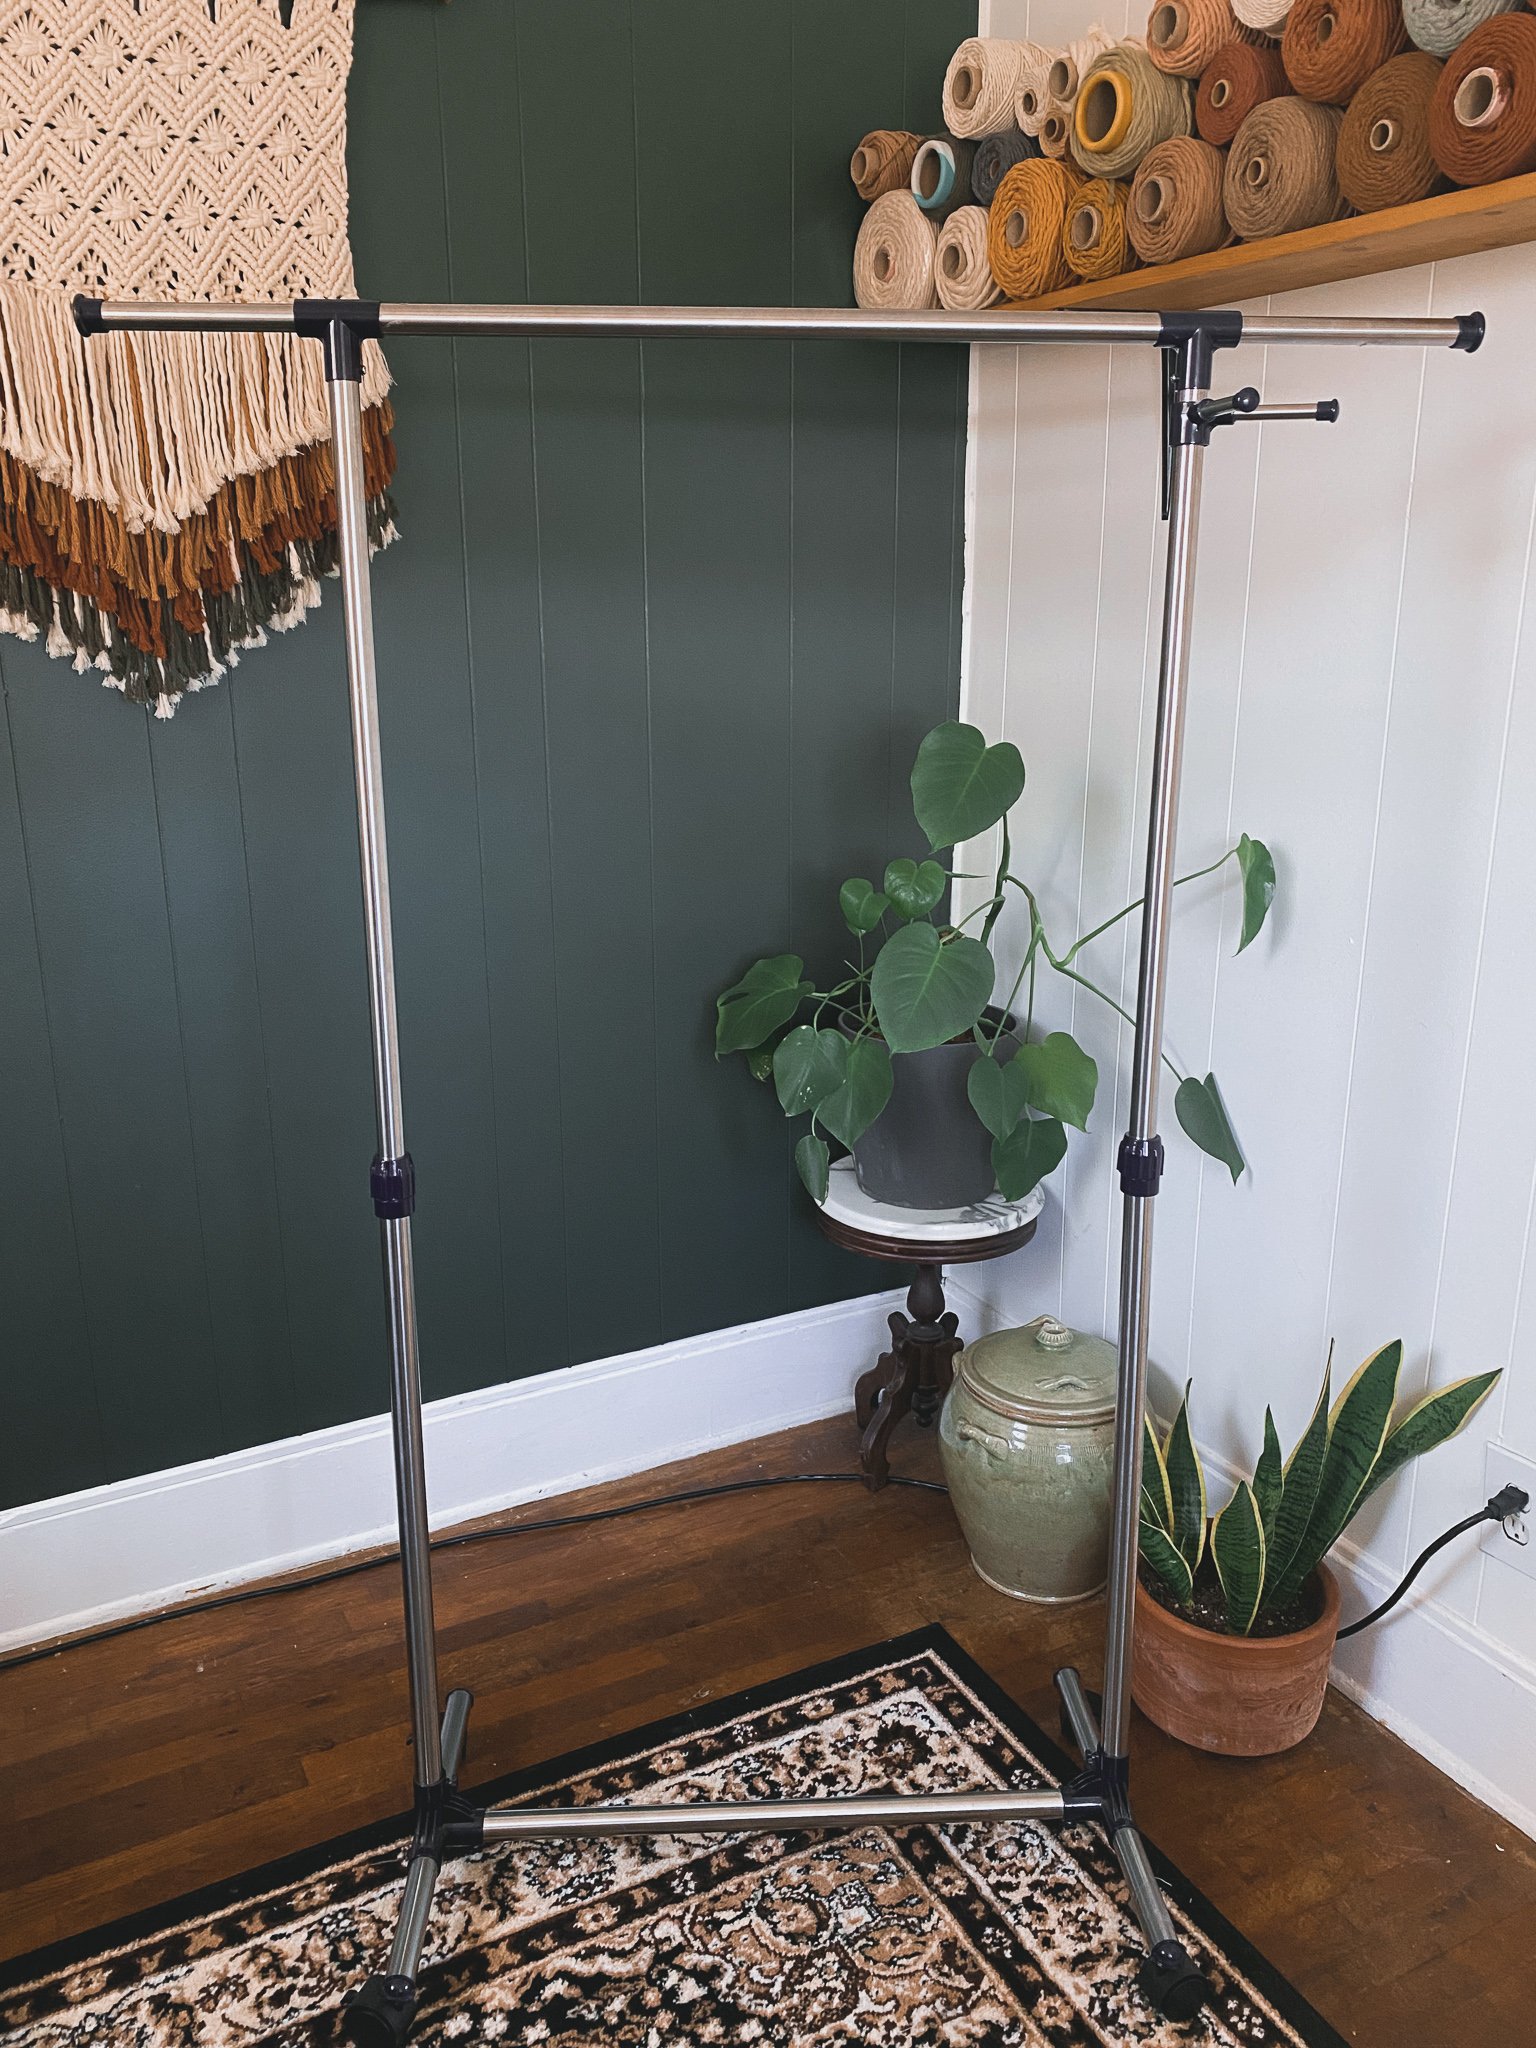
The supplies you will need to make a plant hanger are:
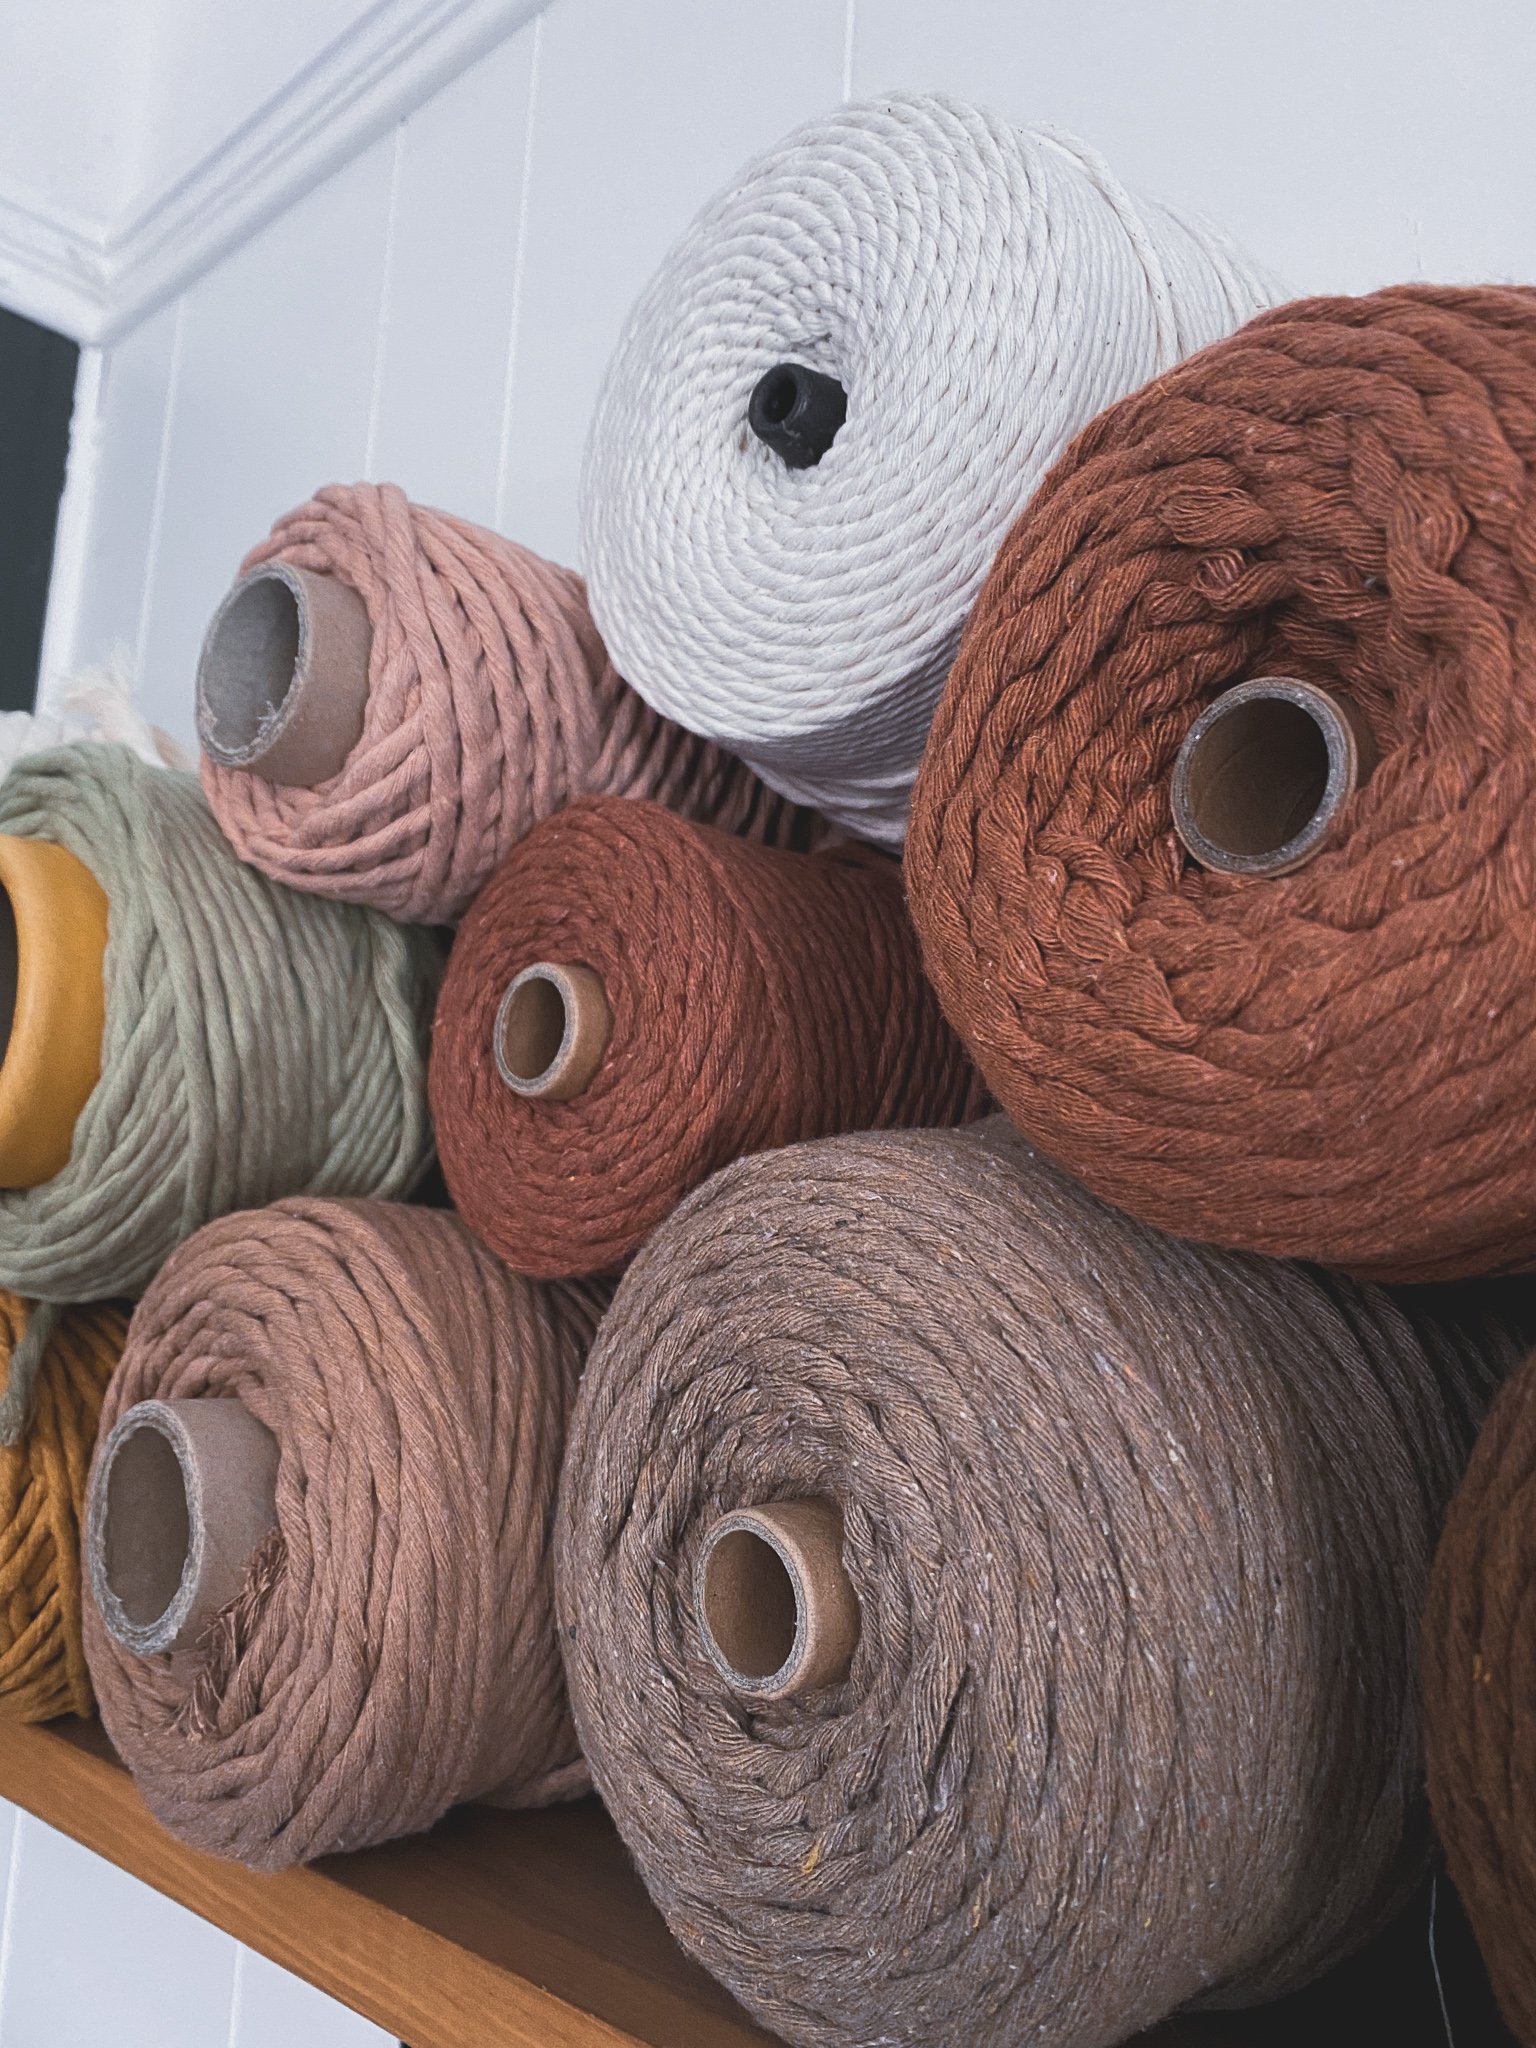
Macrame rope (The rope I used is this “5mm super soft single strand cotton cord”)
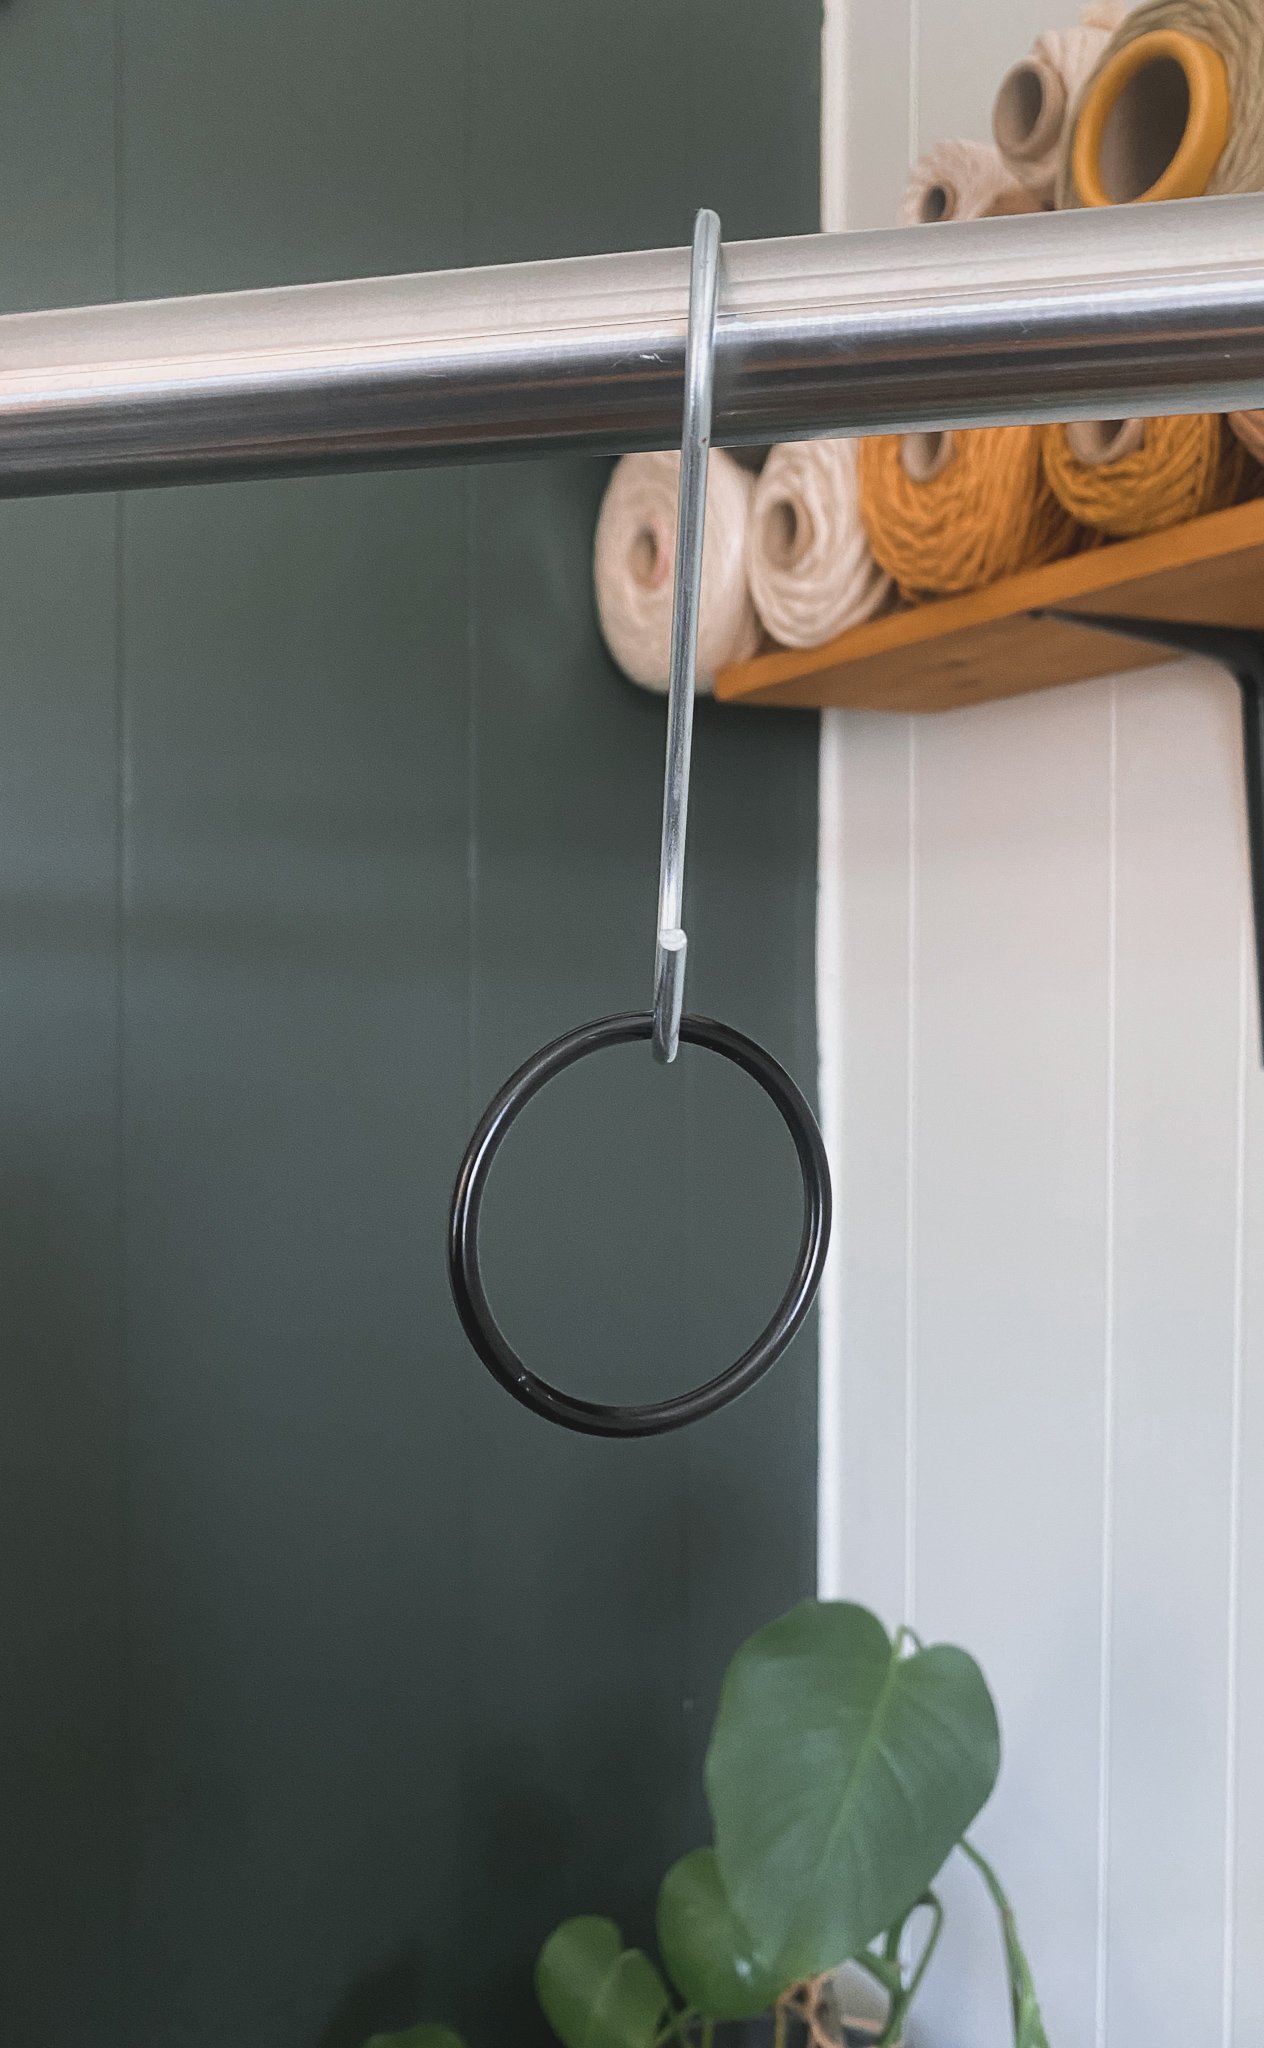
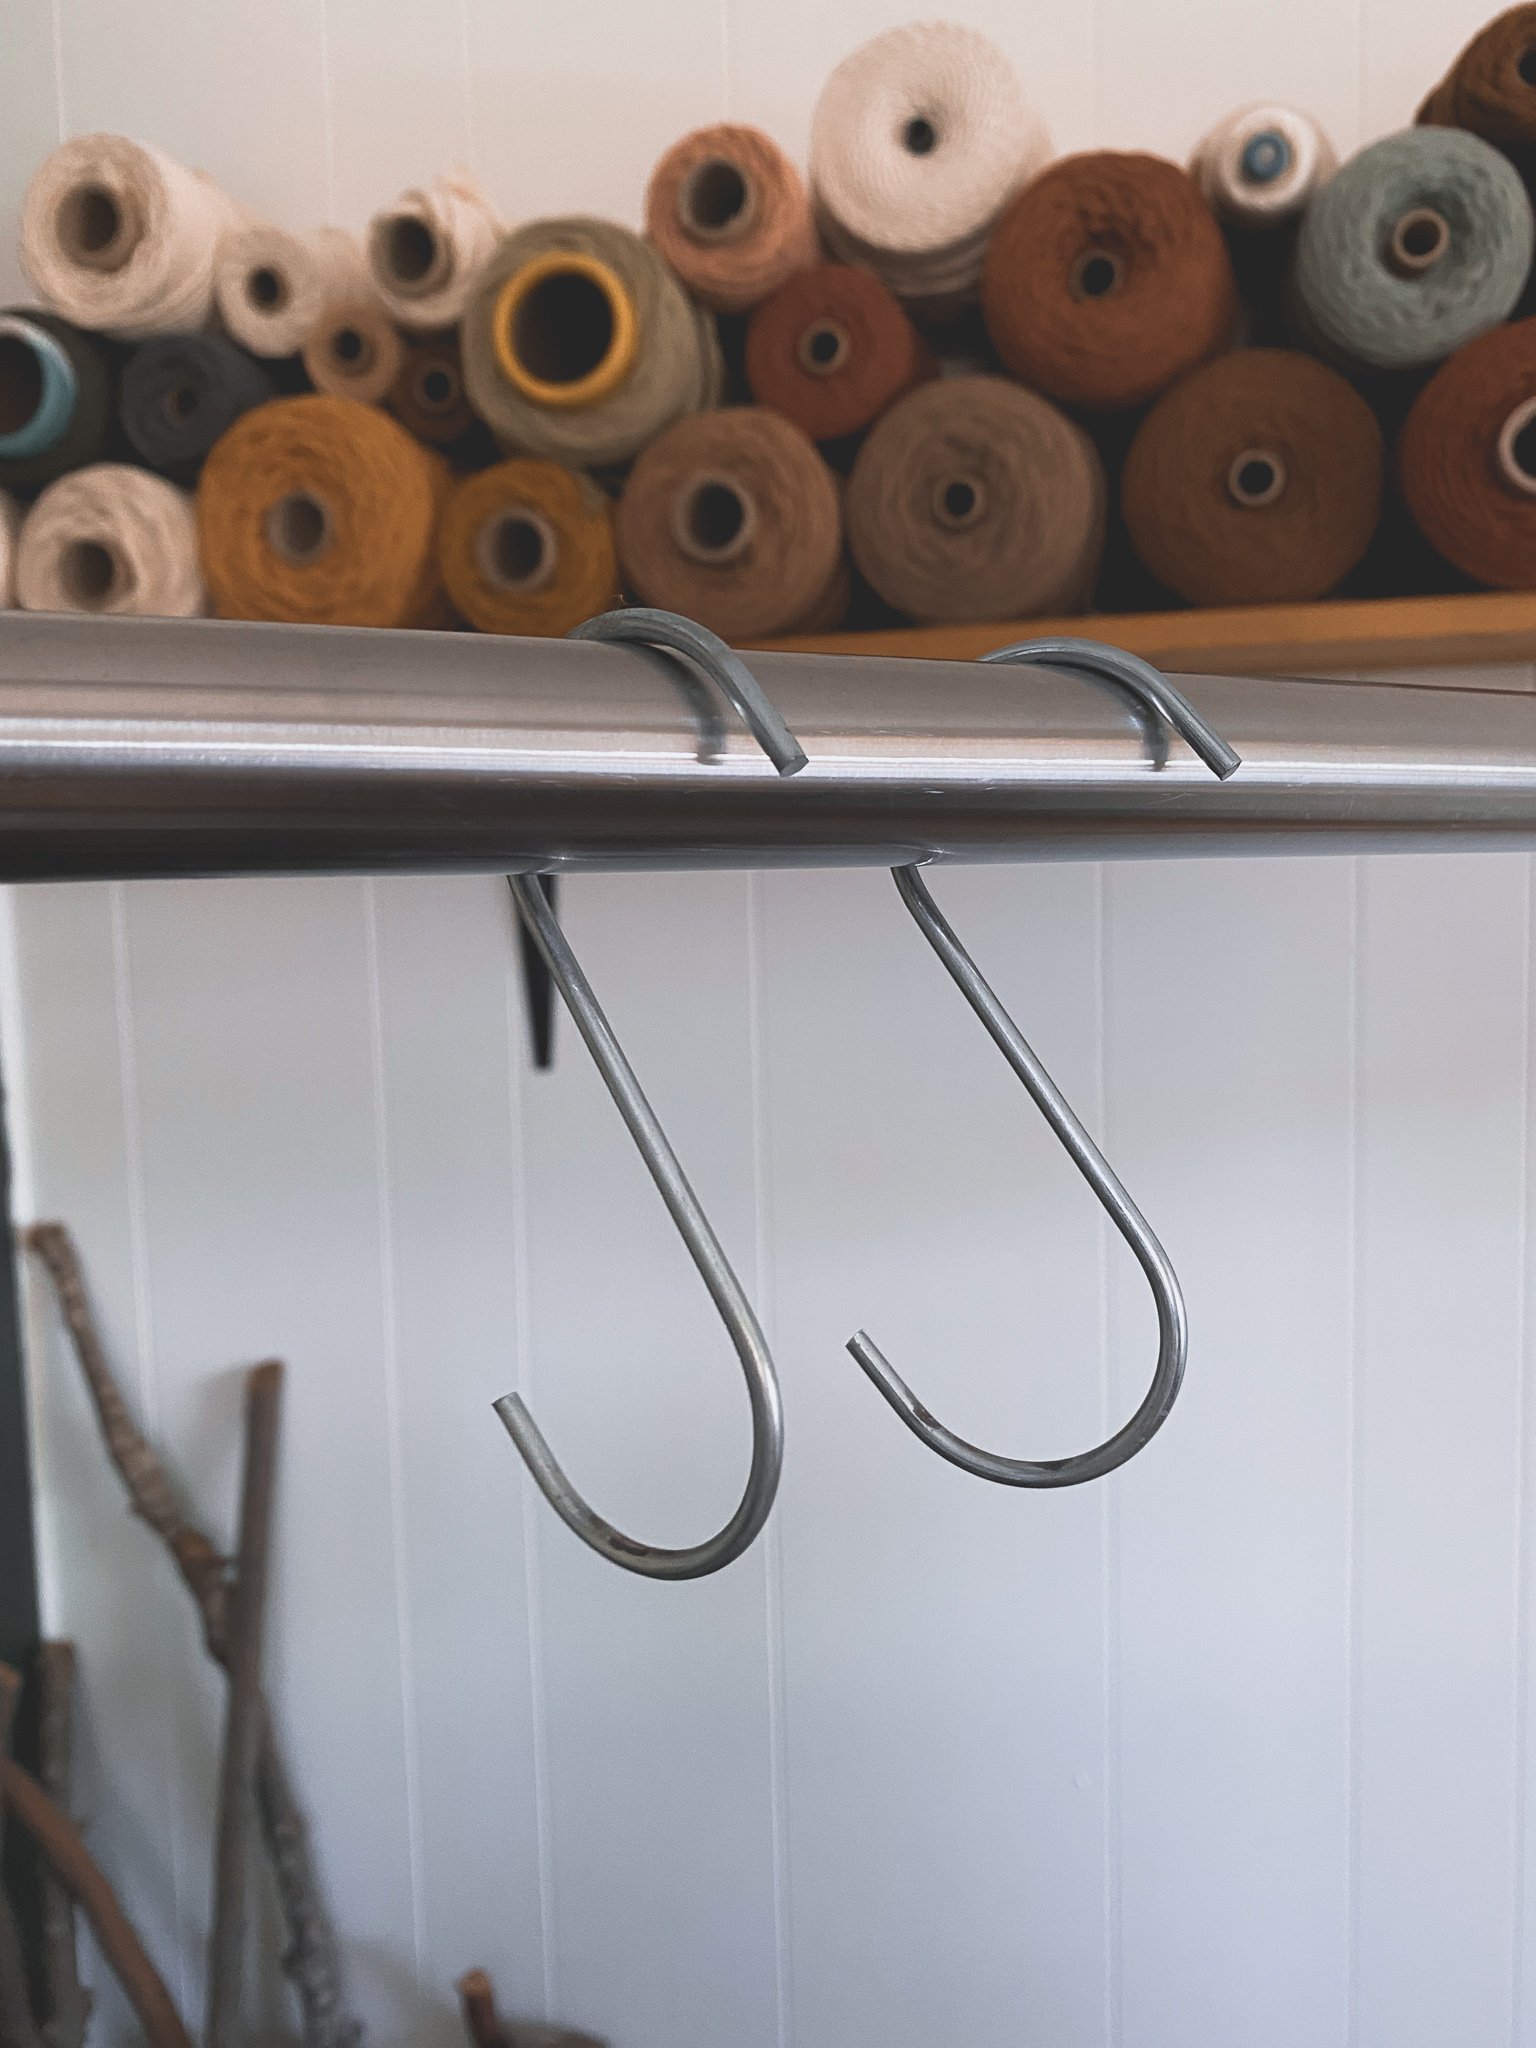
S Hook (you can find at your local hardware store)
Step 2: Cut Rope
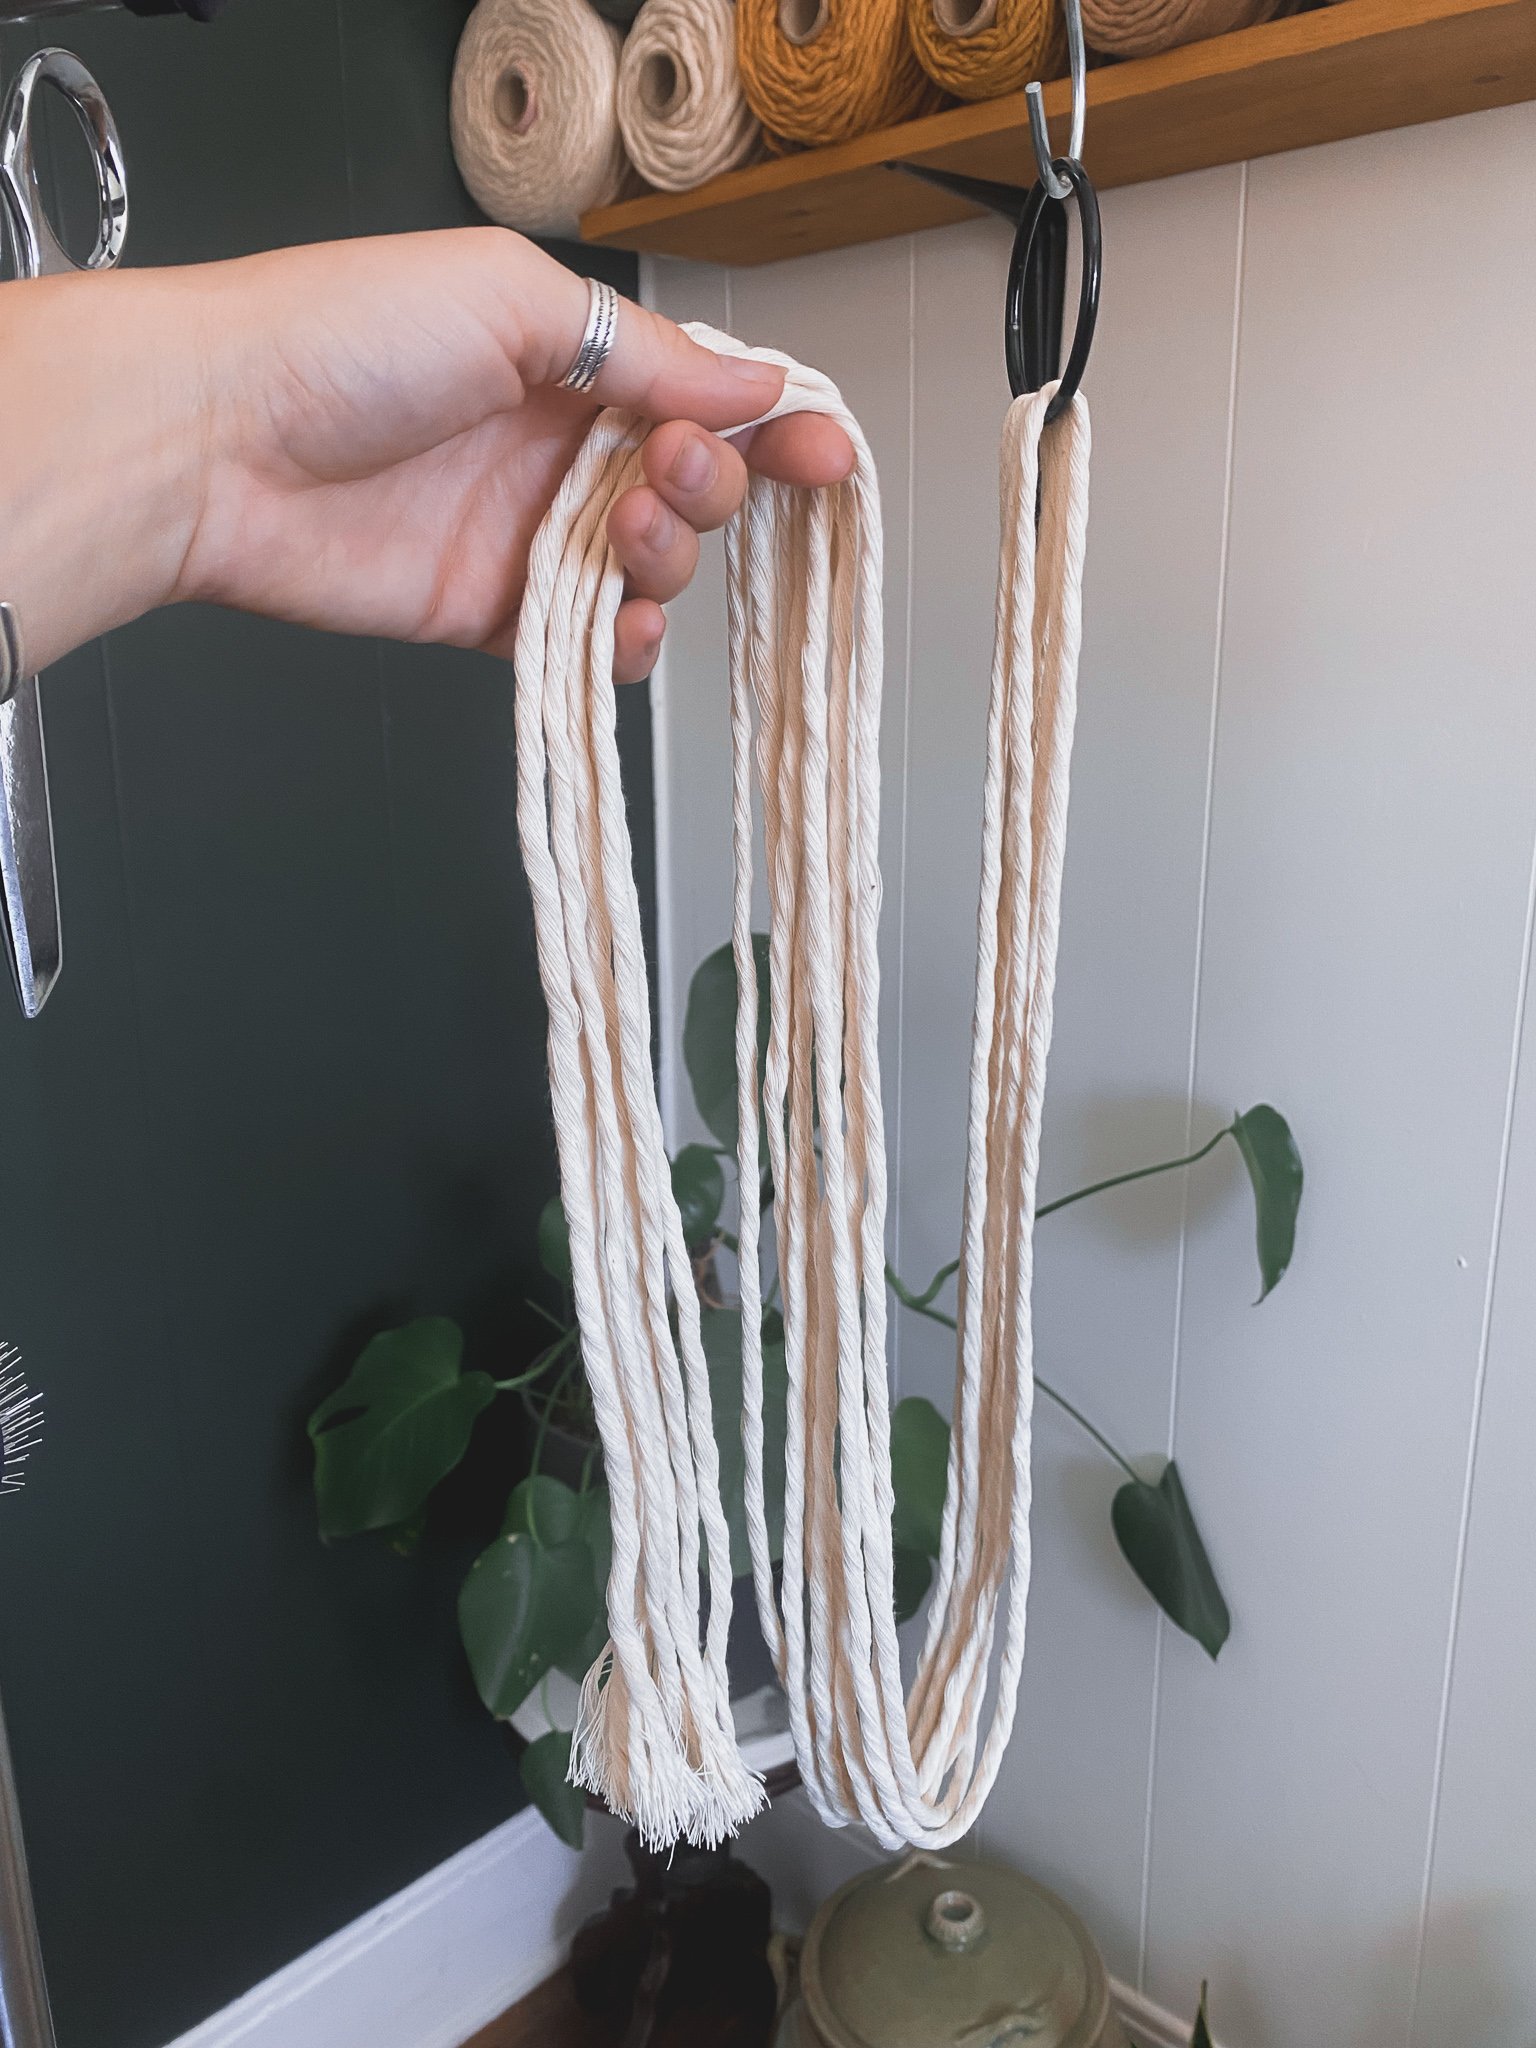
You will need to cut a total of 8 pieces of rope. Cut four strands that are 40in halved (or 80in full length) & four strands that are 75in halved (or 150in full length). The reason I say “halved” is not only because it’s easier to measure the rope when it is shorter, but also because once the rope is on the ring it will be folded in half.
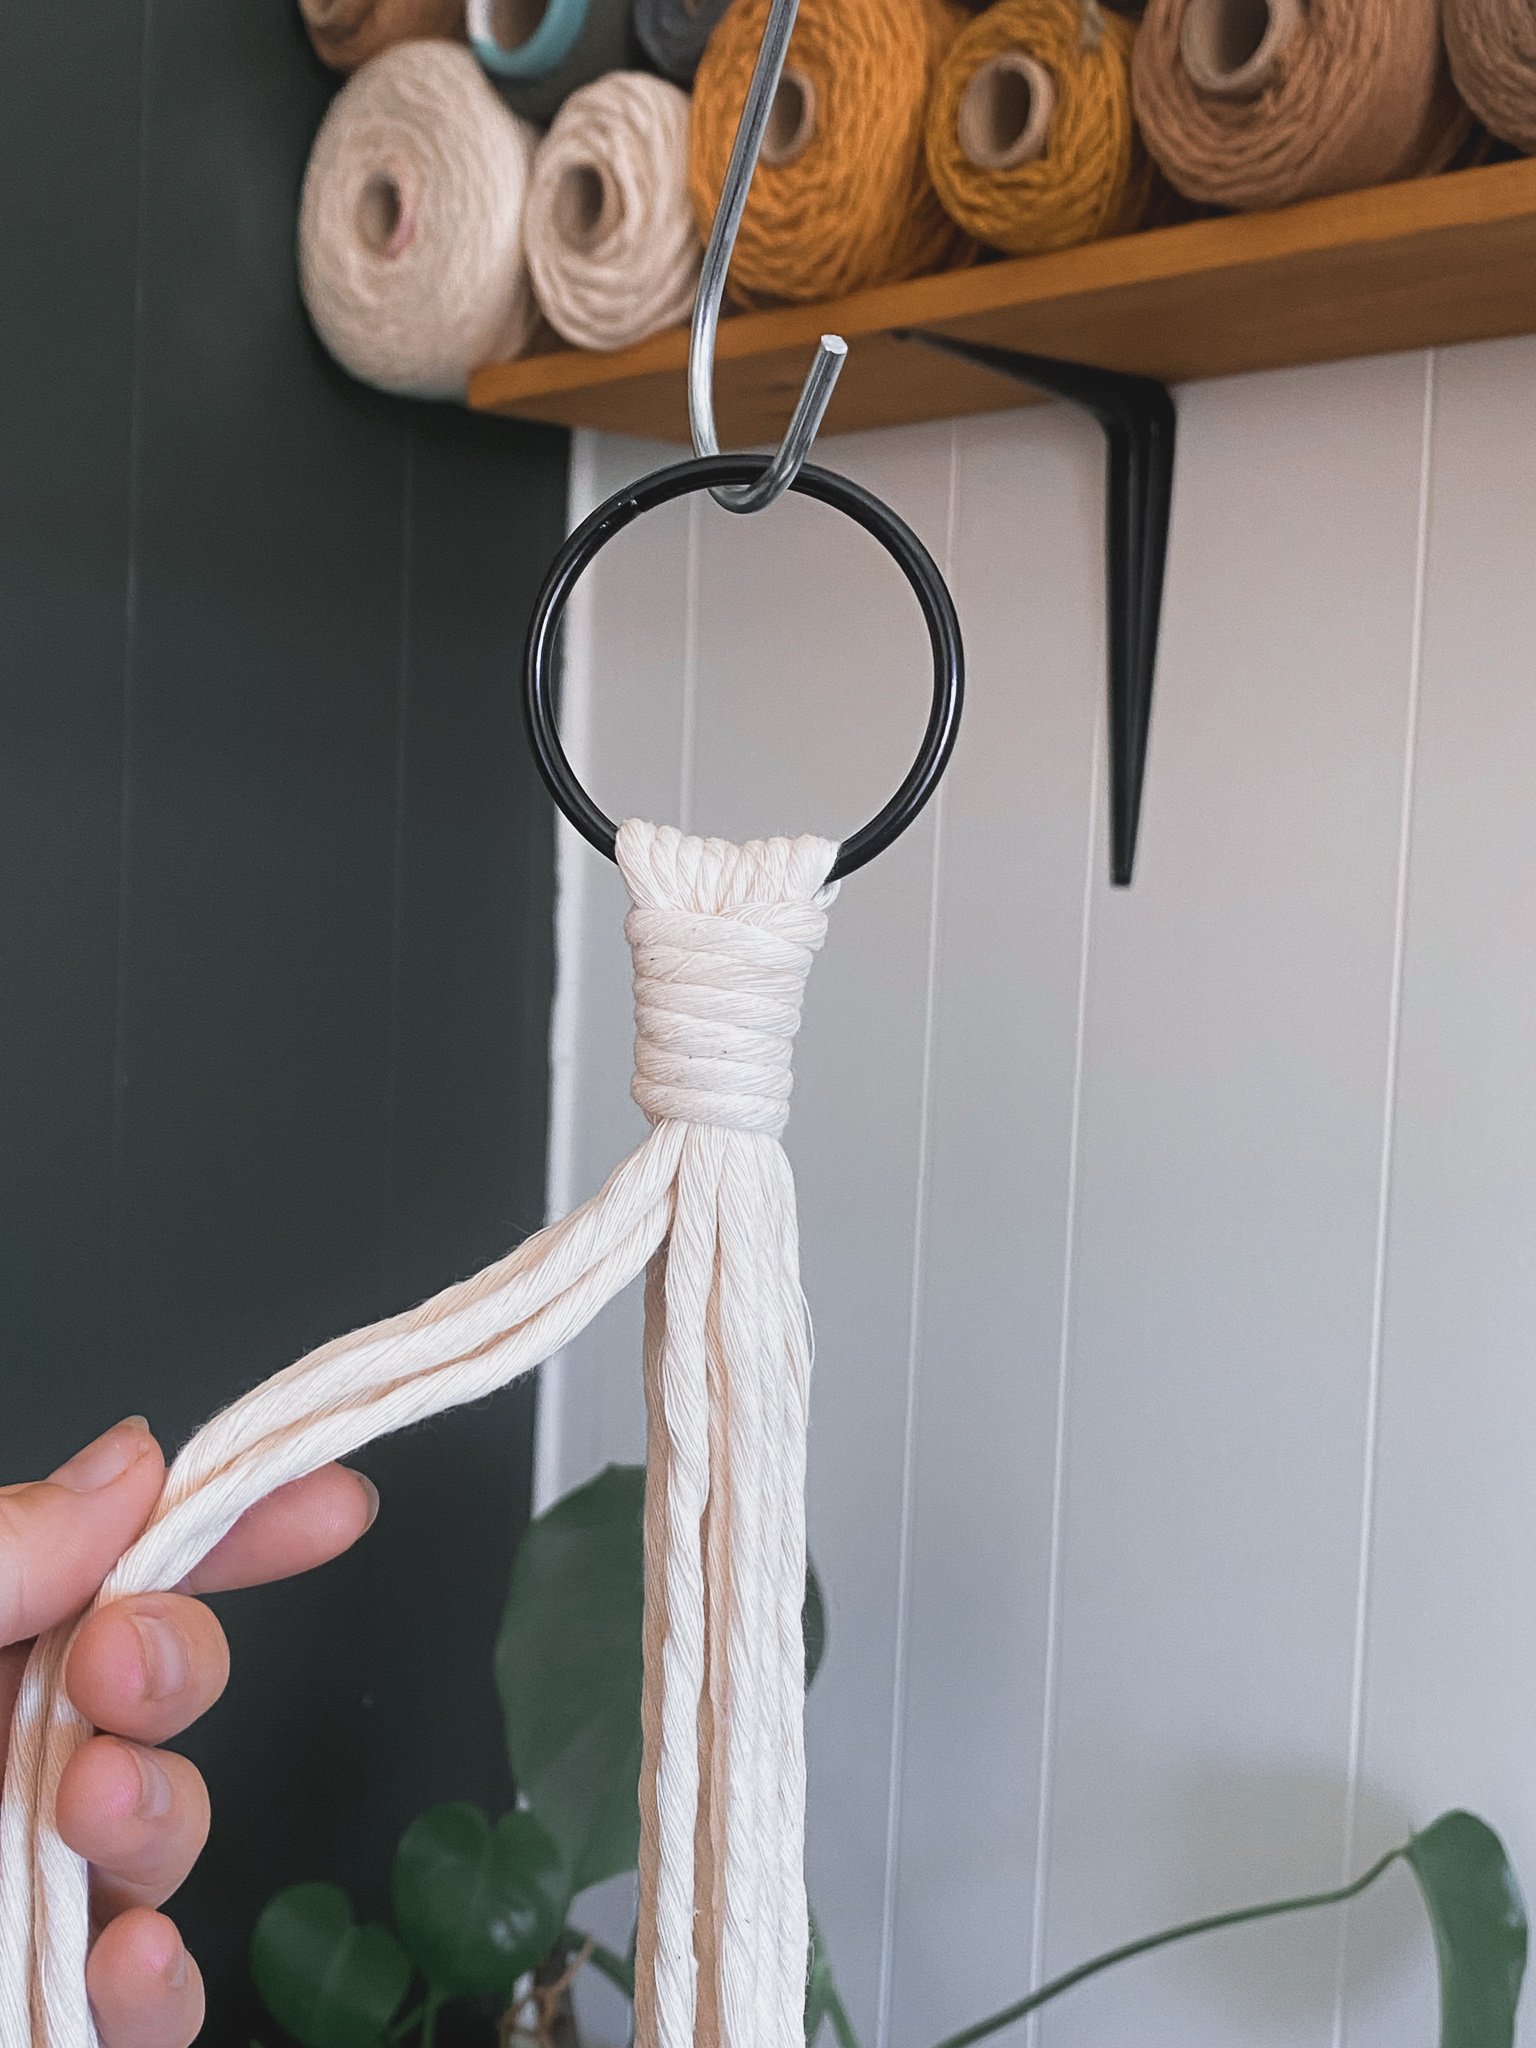
Once you cut the pieces of rope, place them on the ring. Make sure all the ends are even, meaning the middle of the rope will be centered on the ring. Also alternate the short and long ropes once on the ring, so the order of ropes will be short, long, short, long, ect.
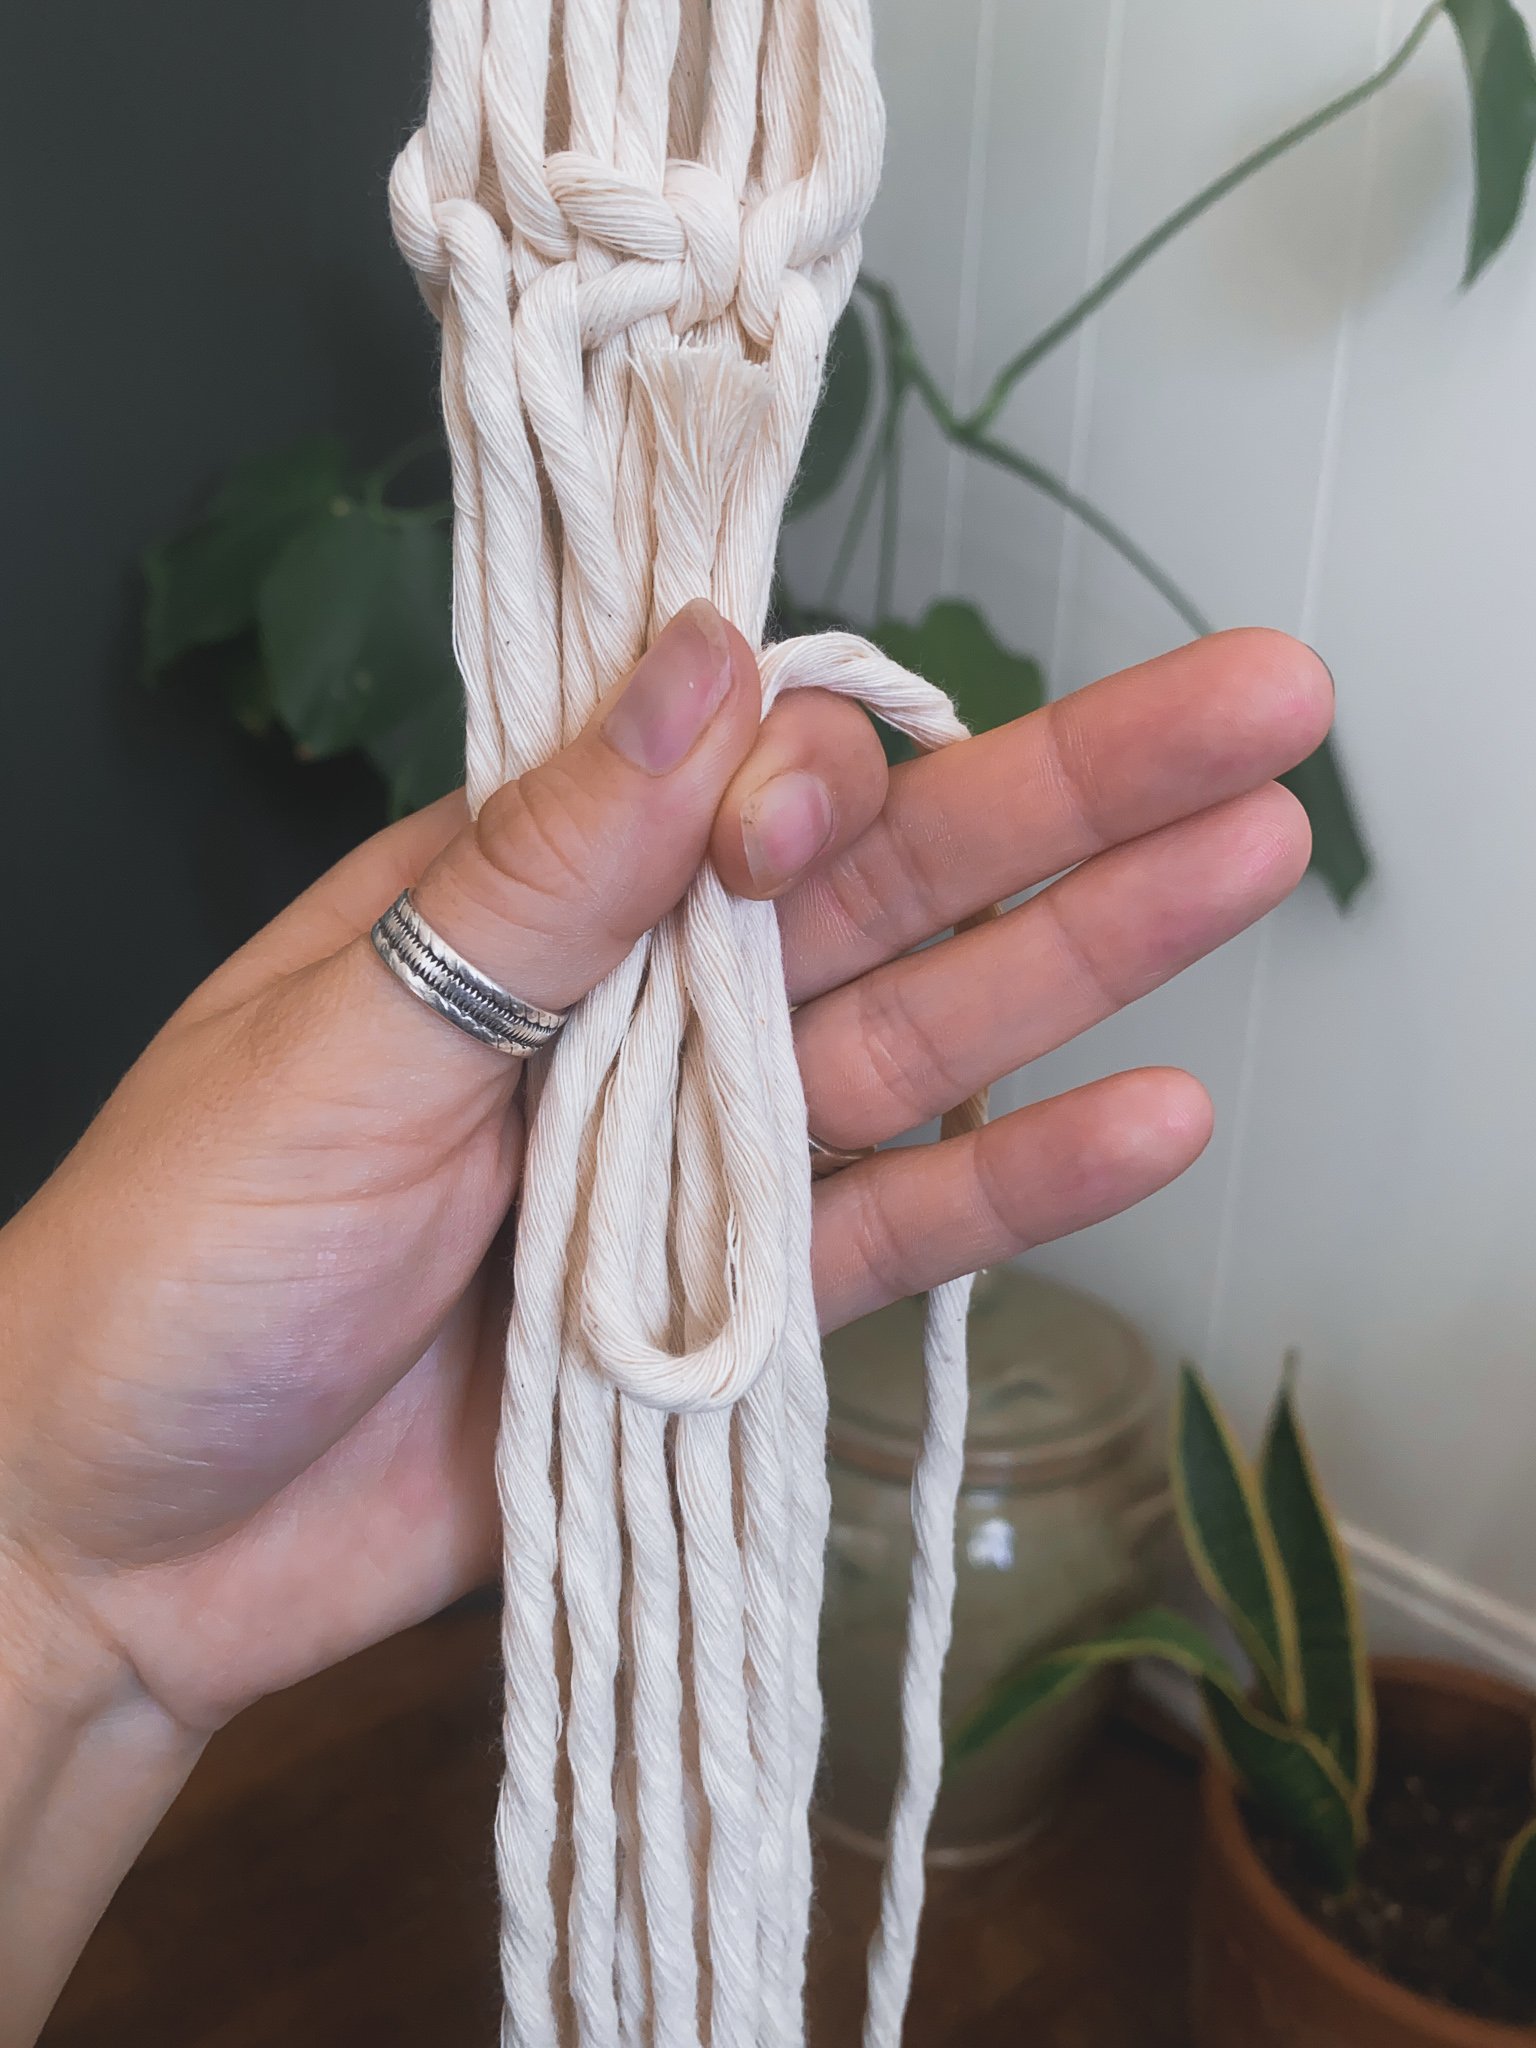
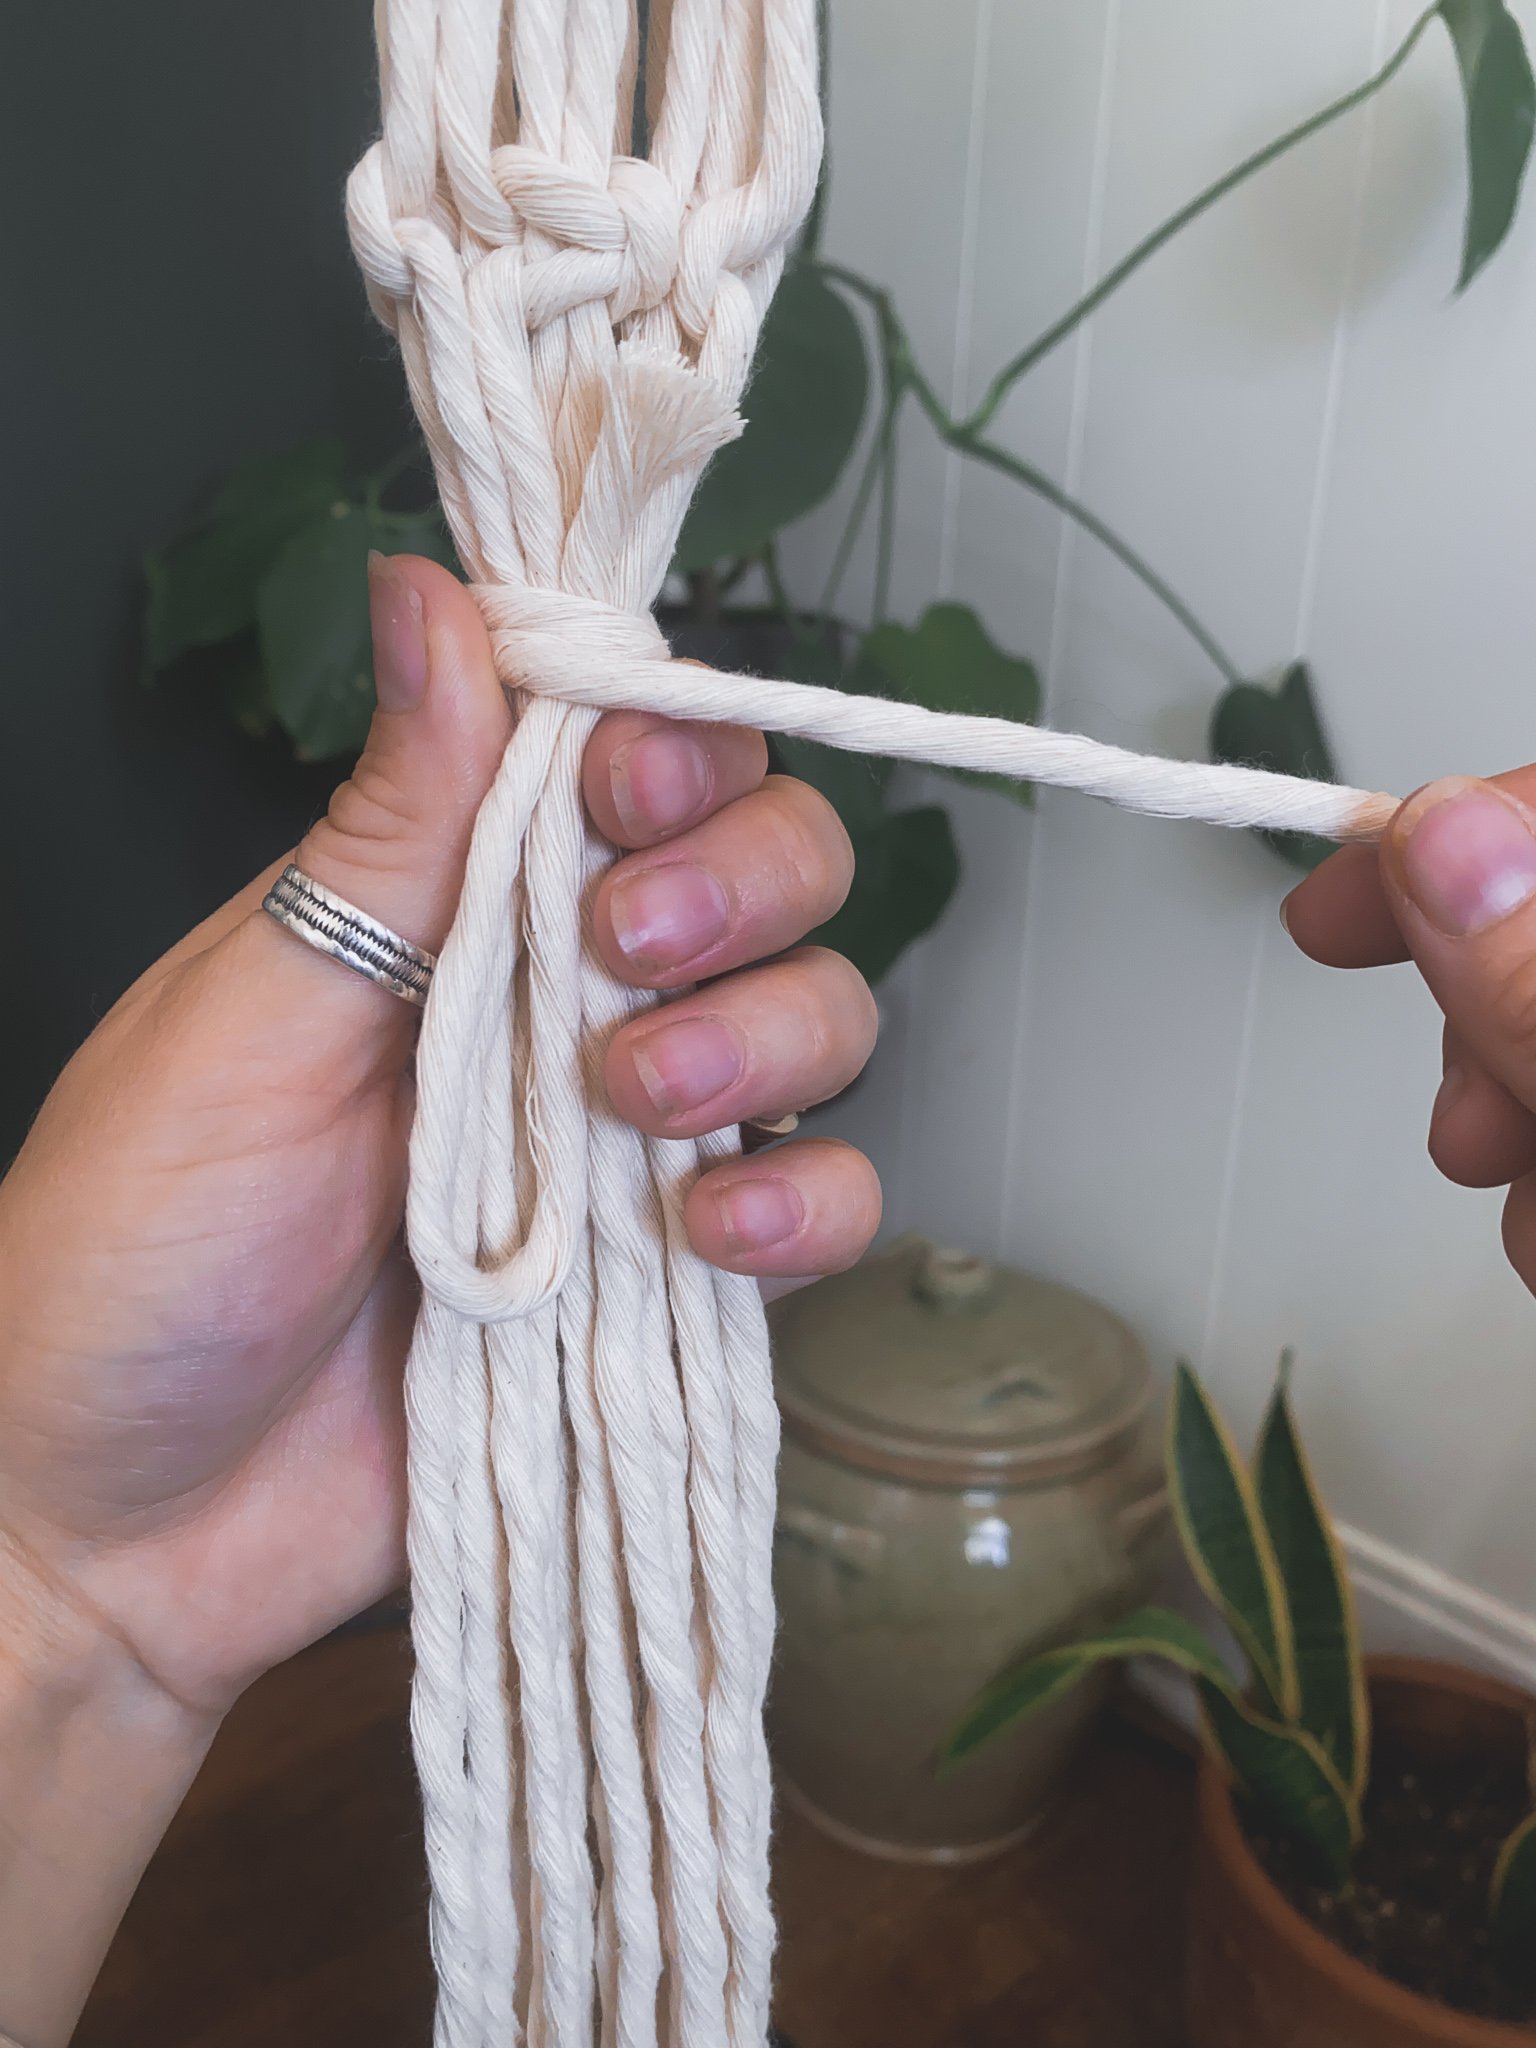
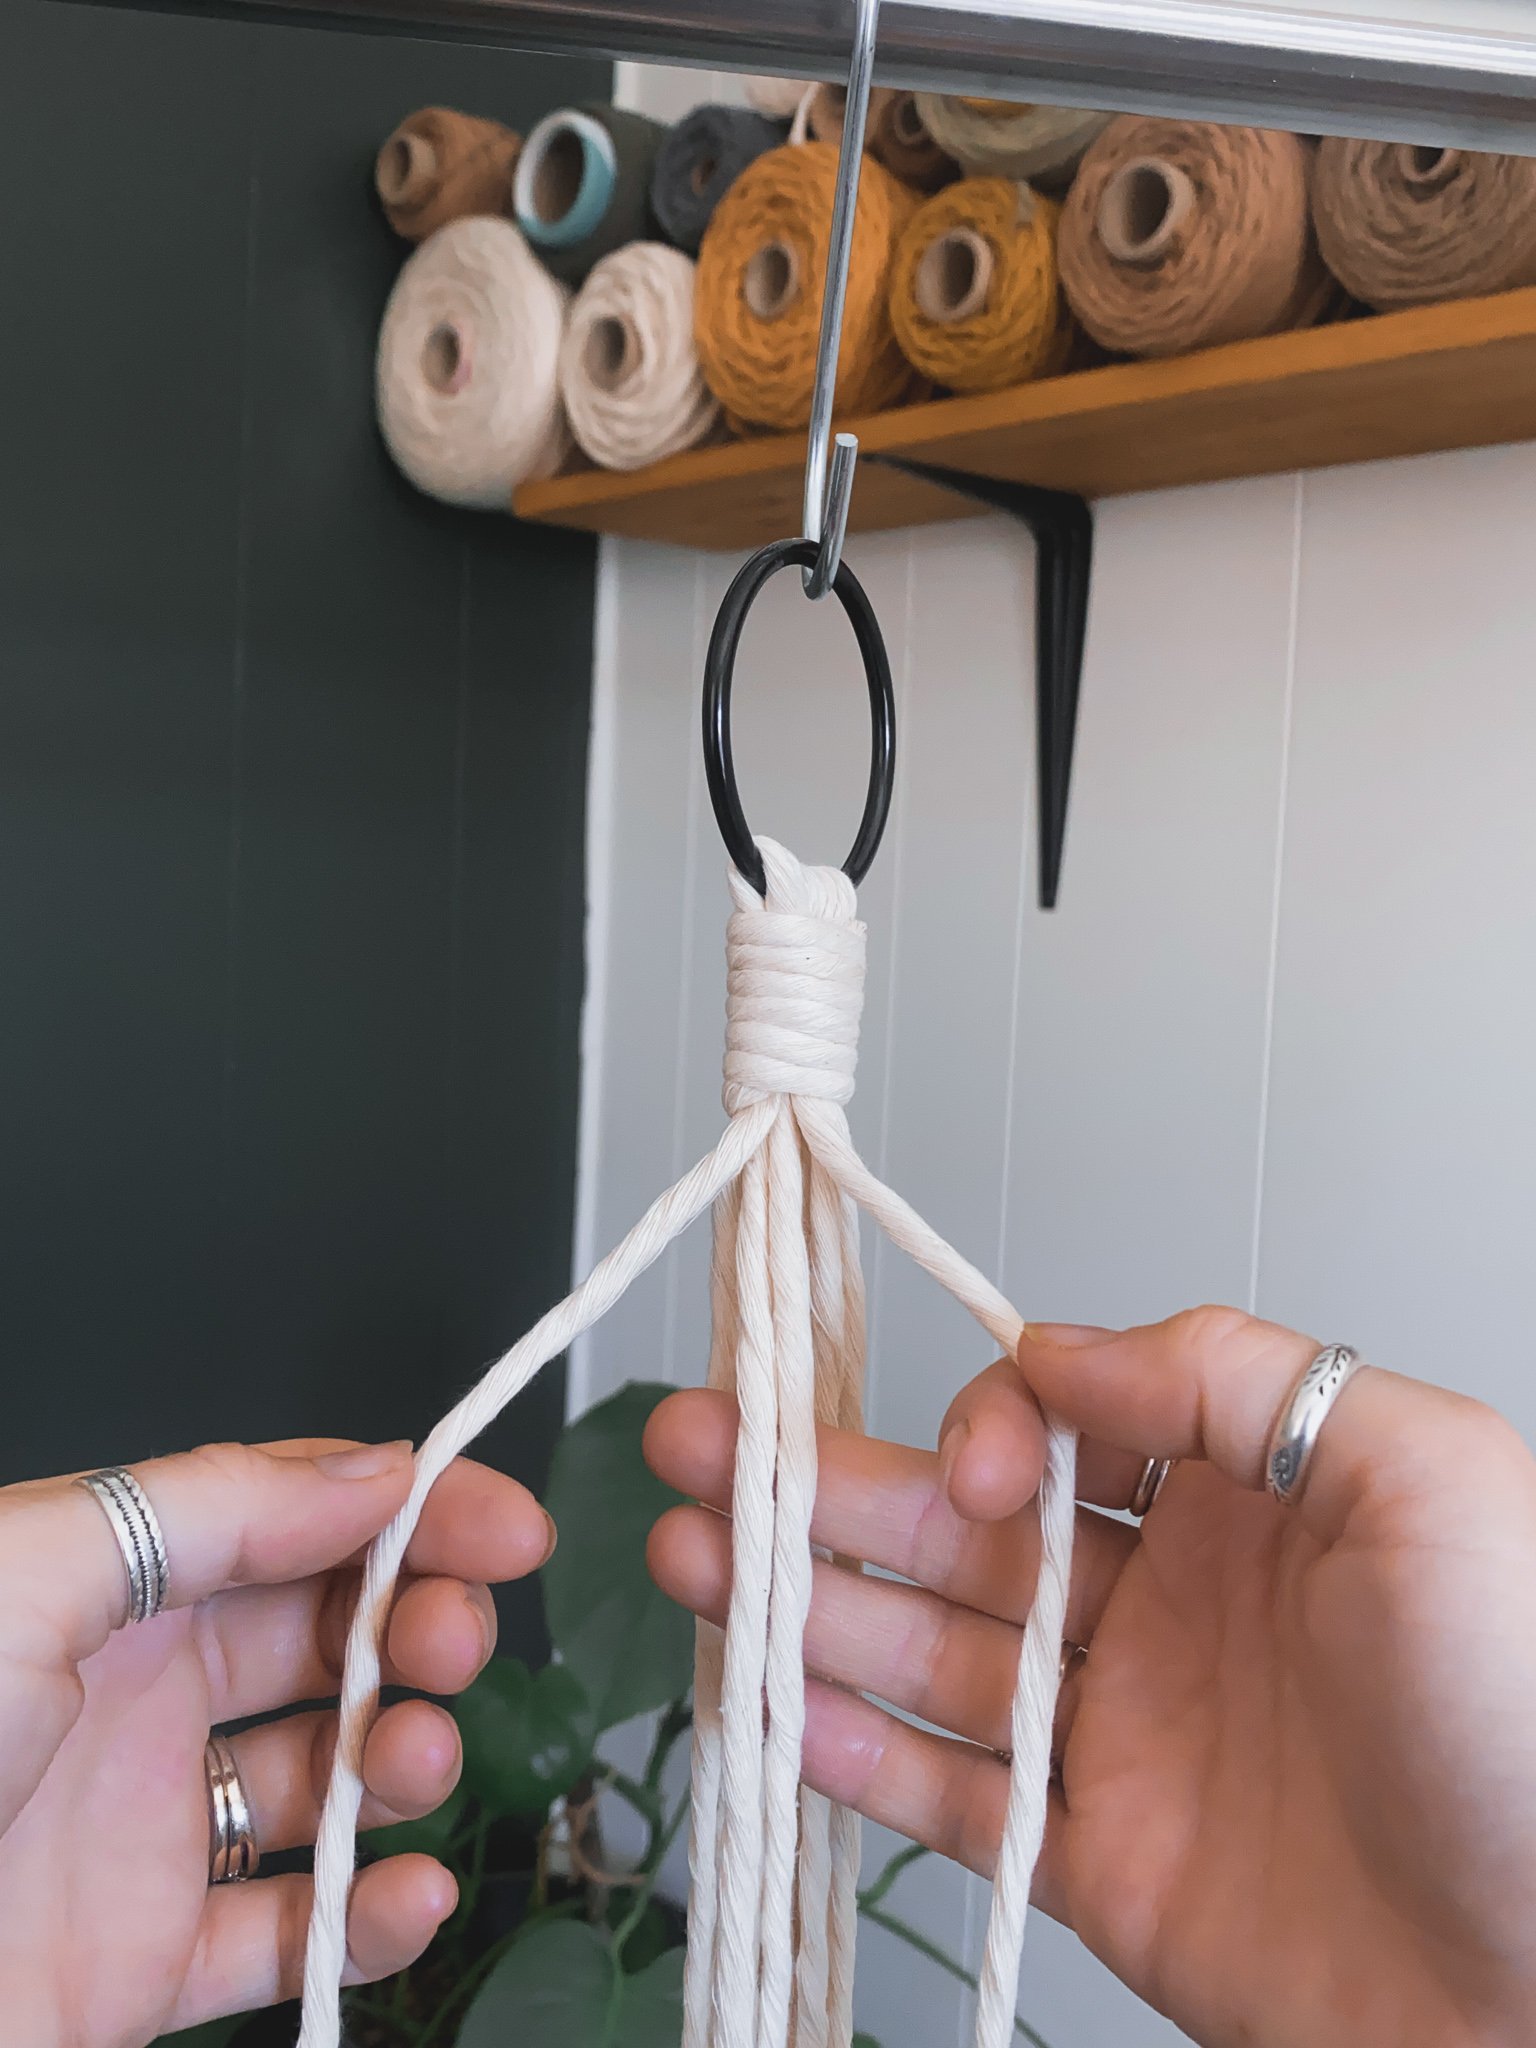
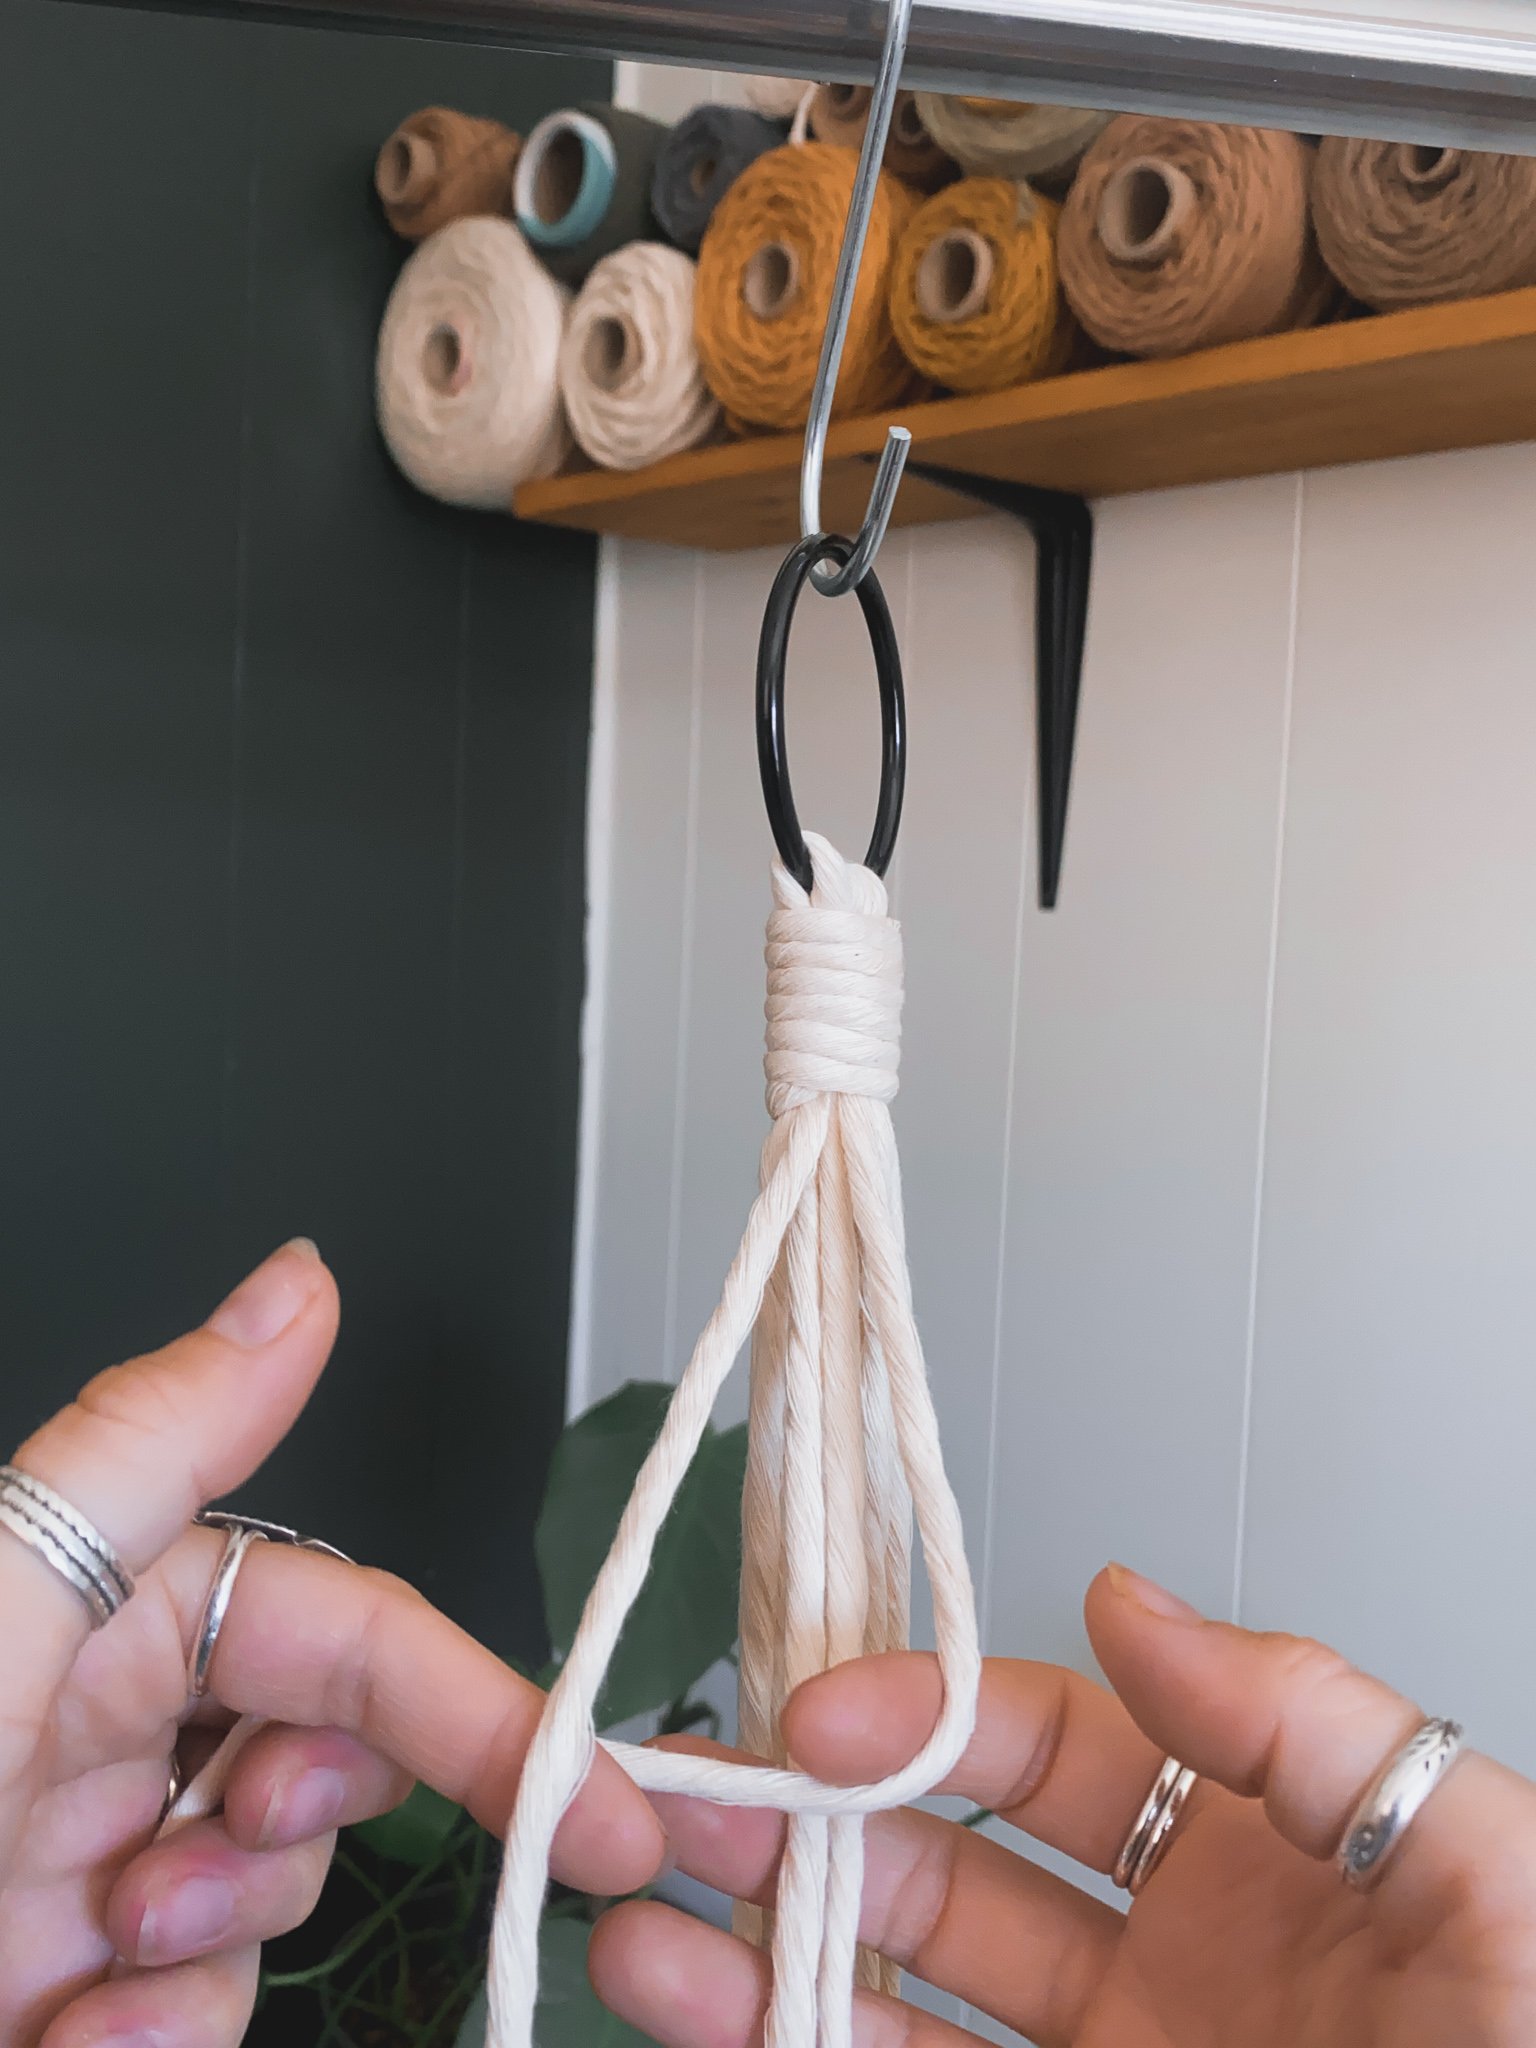
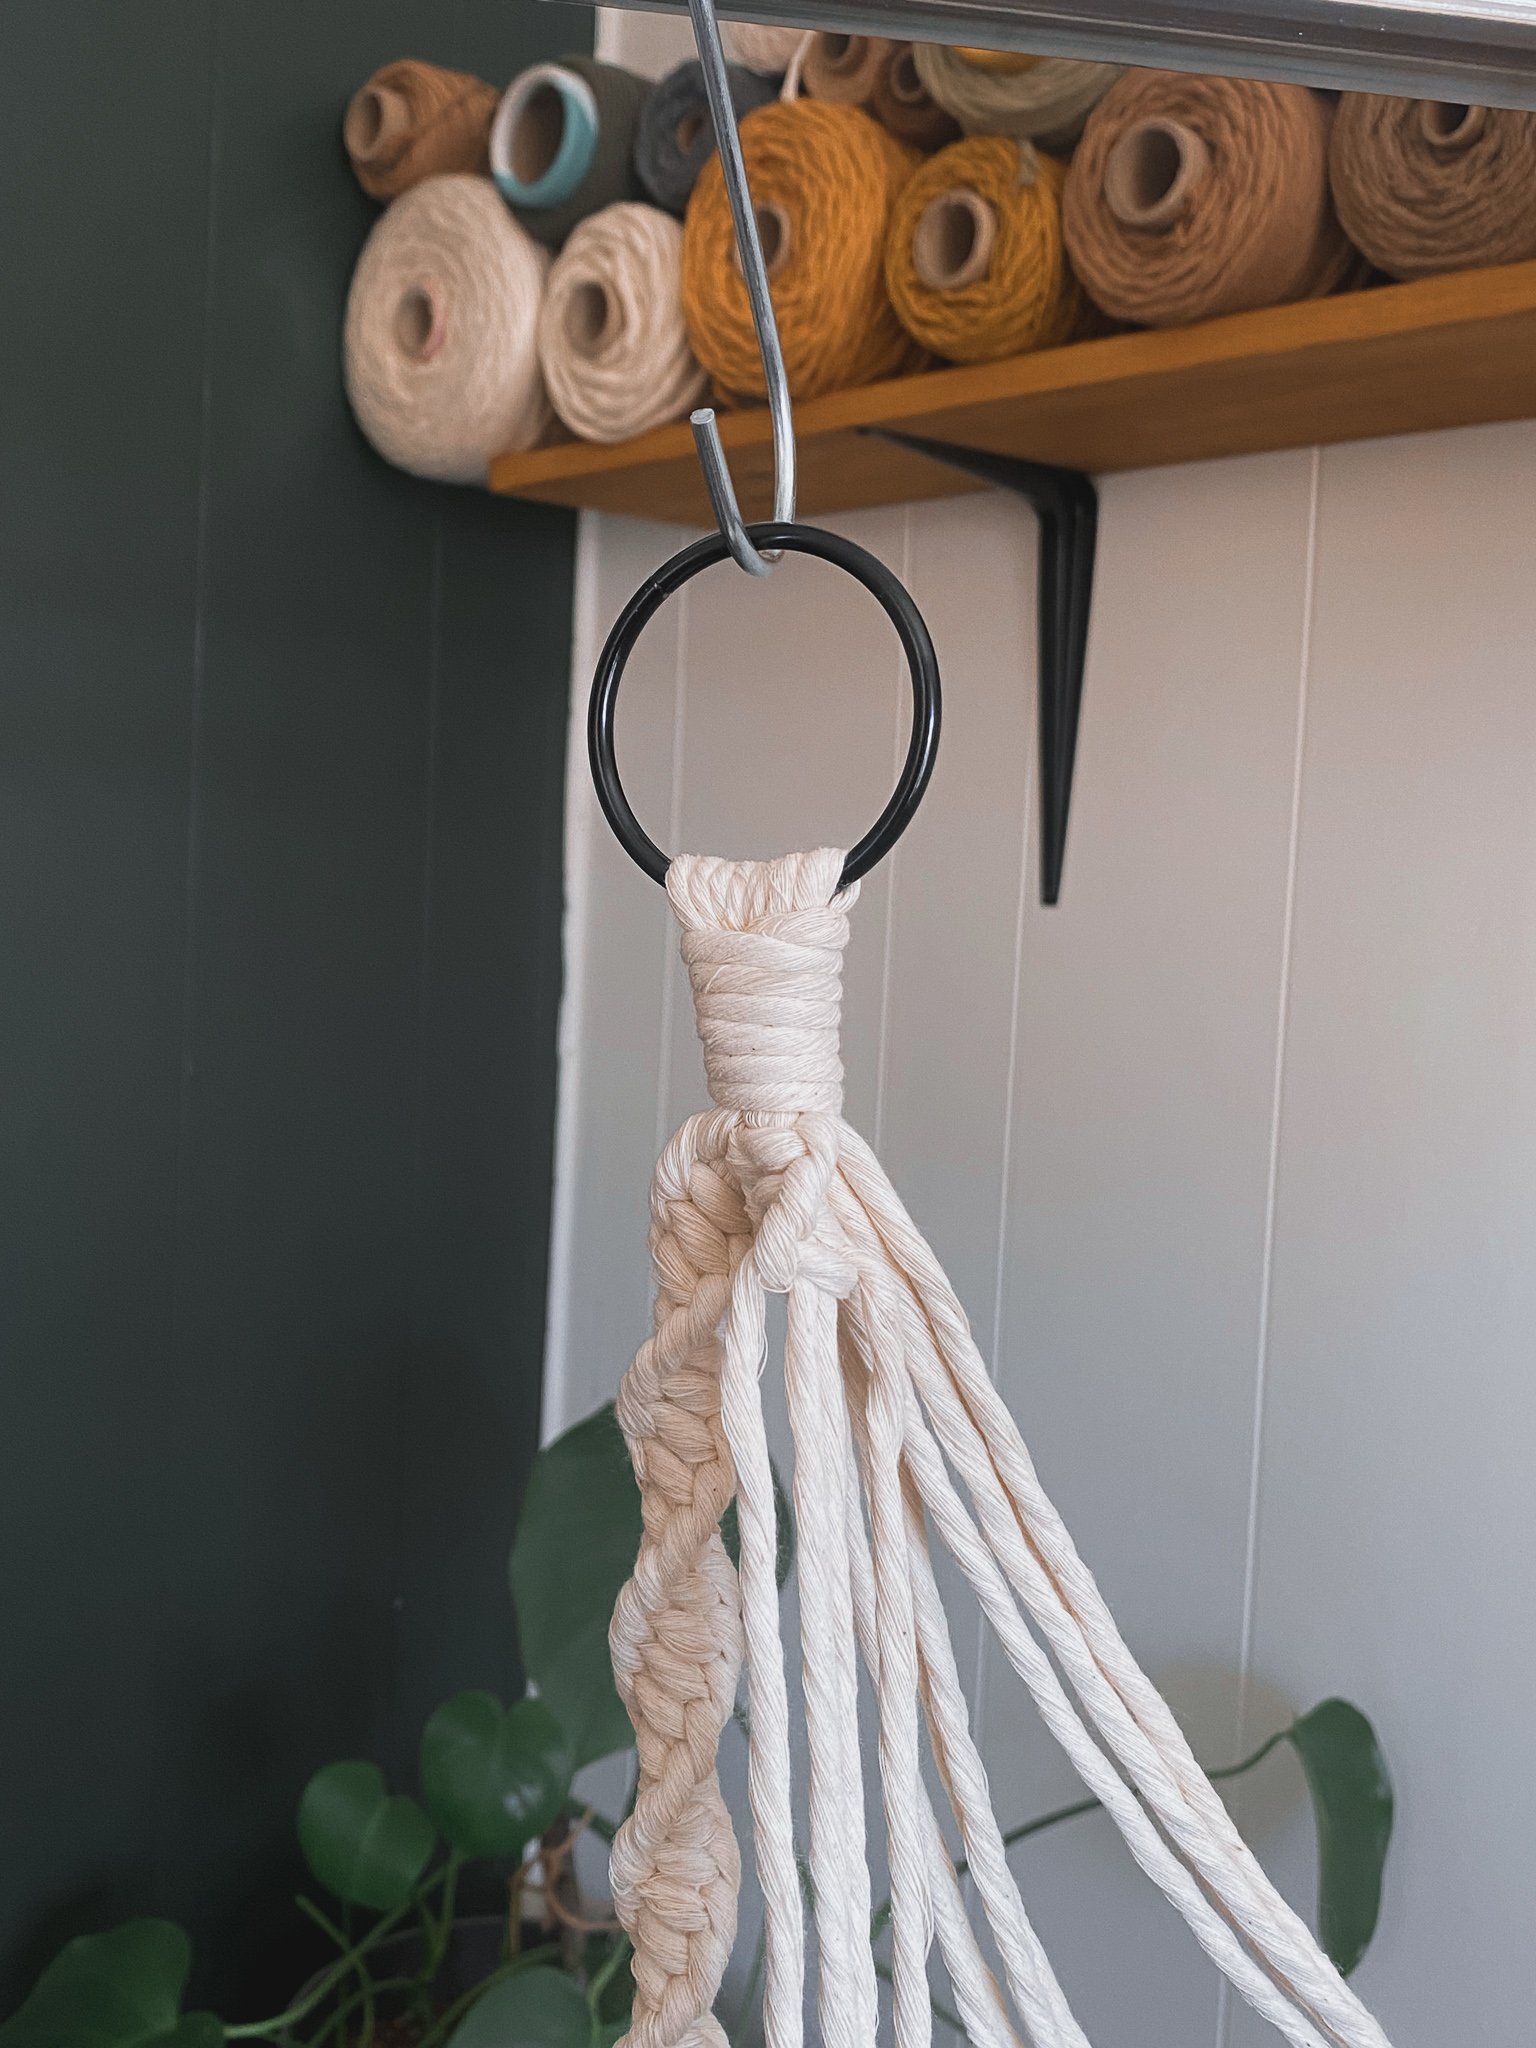
Step 3: Tie a gathering knot
To tie a gathering knot:
Cut a strand of rope measuring 30in long.
Place the rope over the rest of the gathered rope, and make a loop a couple inches down (see image 1).
Wrap the rope you brought back to the top around the gathered ropes about 8 or 9 times.
Place the end of the rope through the loop you left behind at the bottom of the knot.
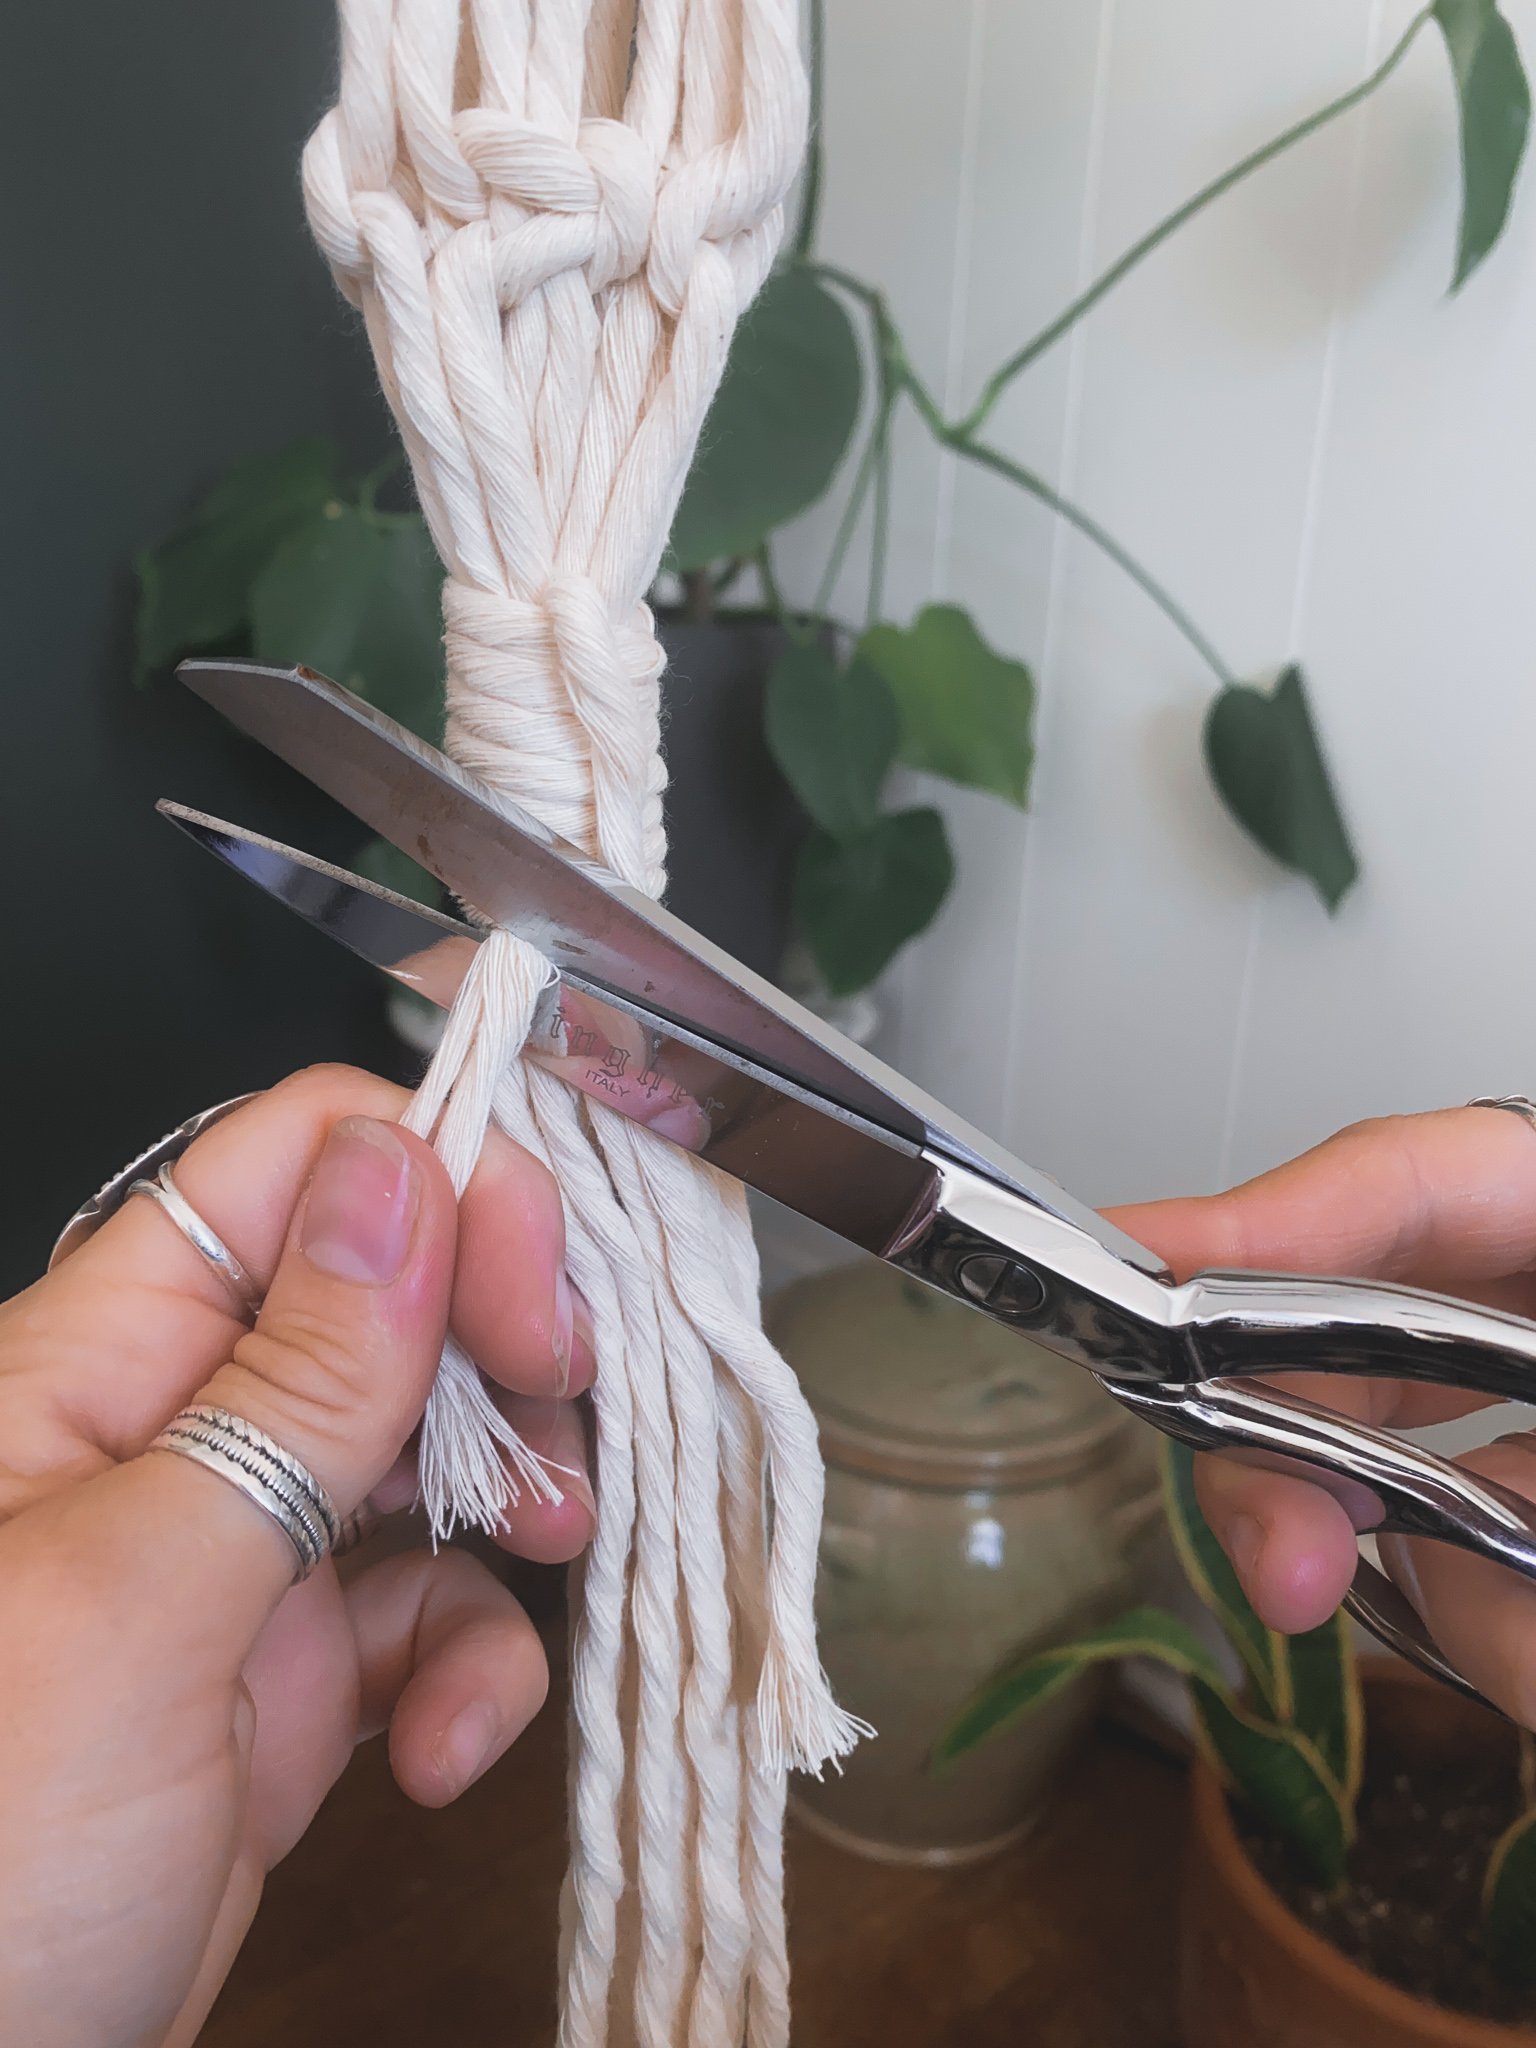
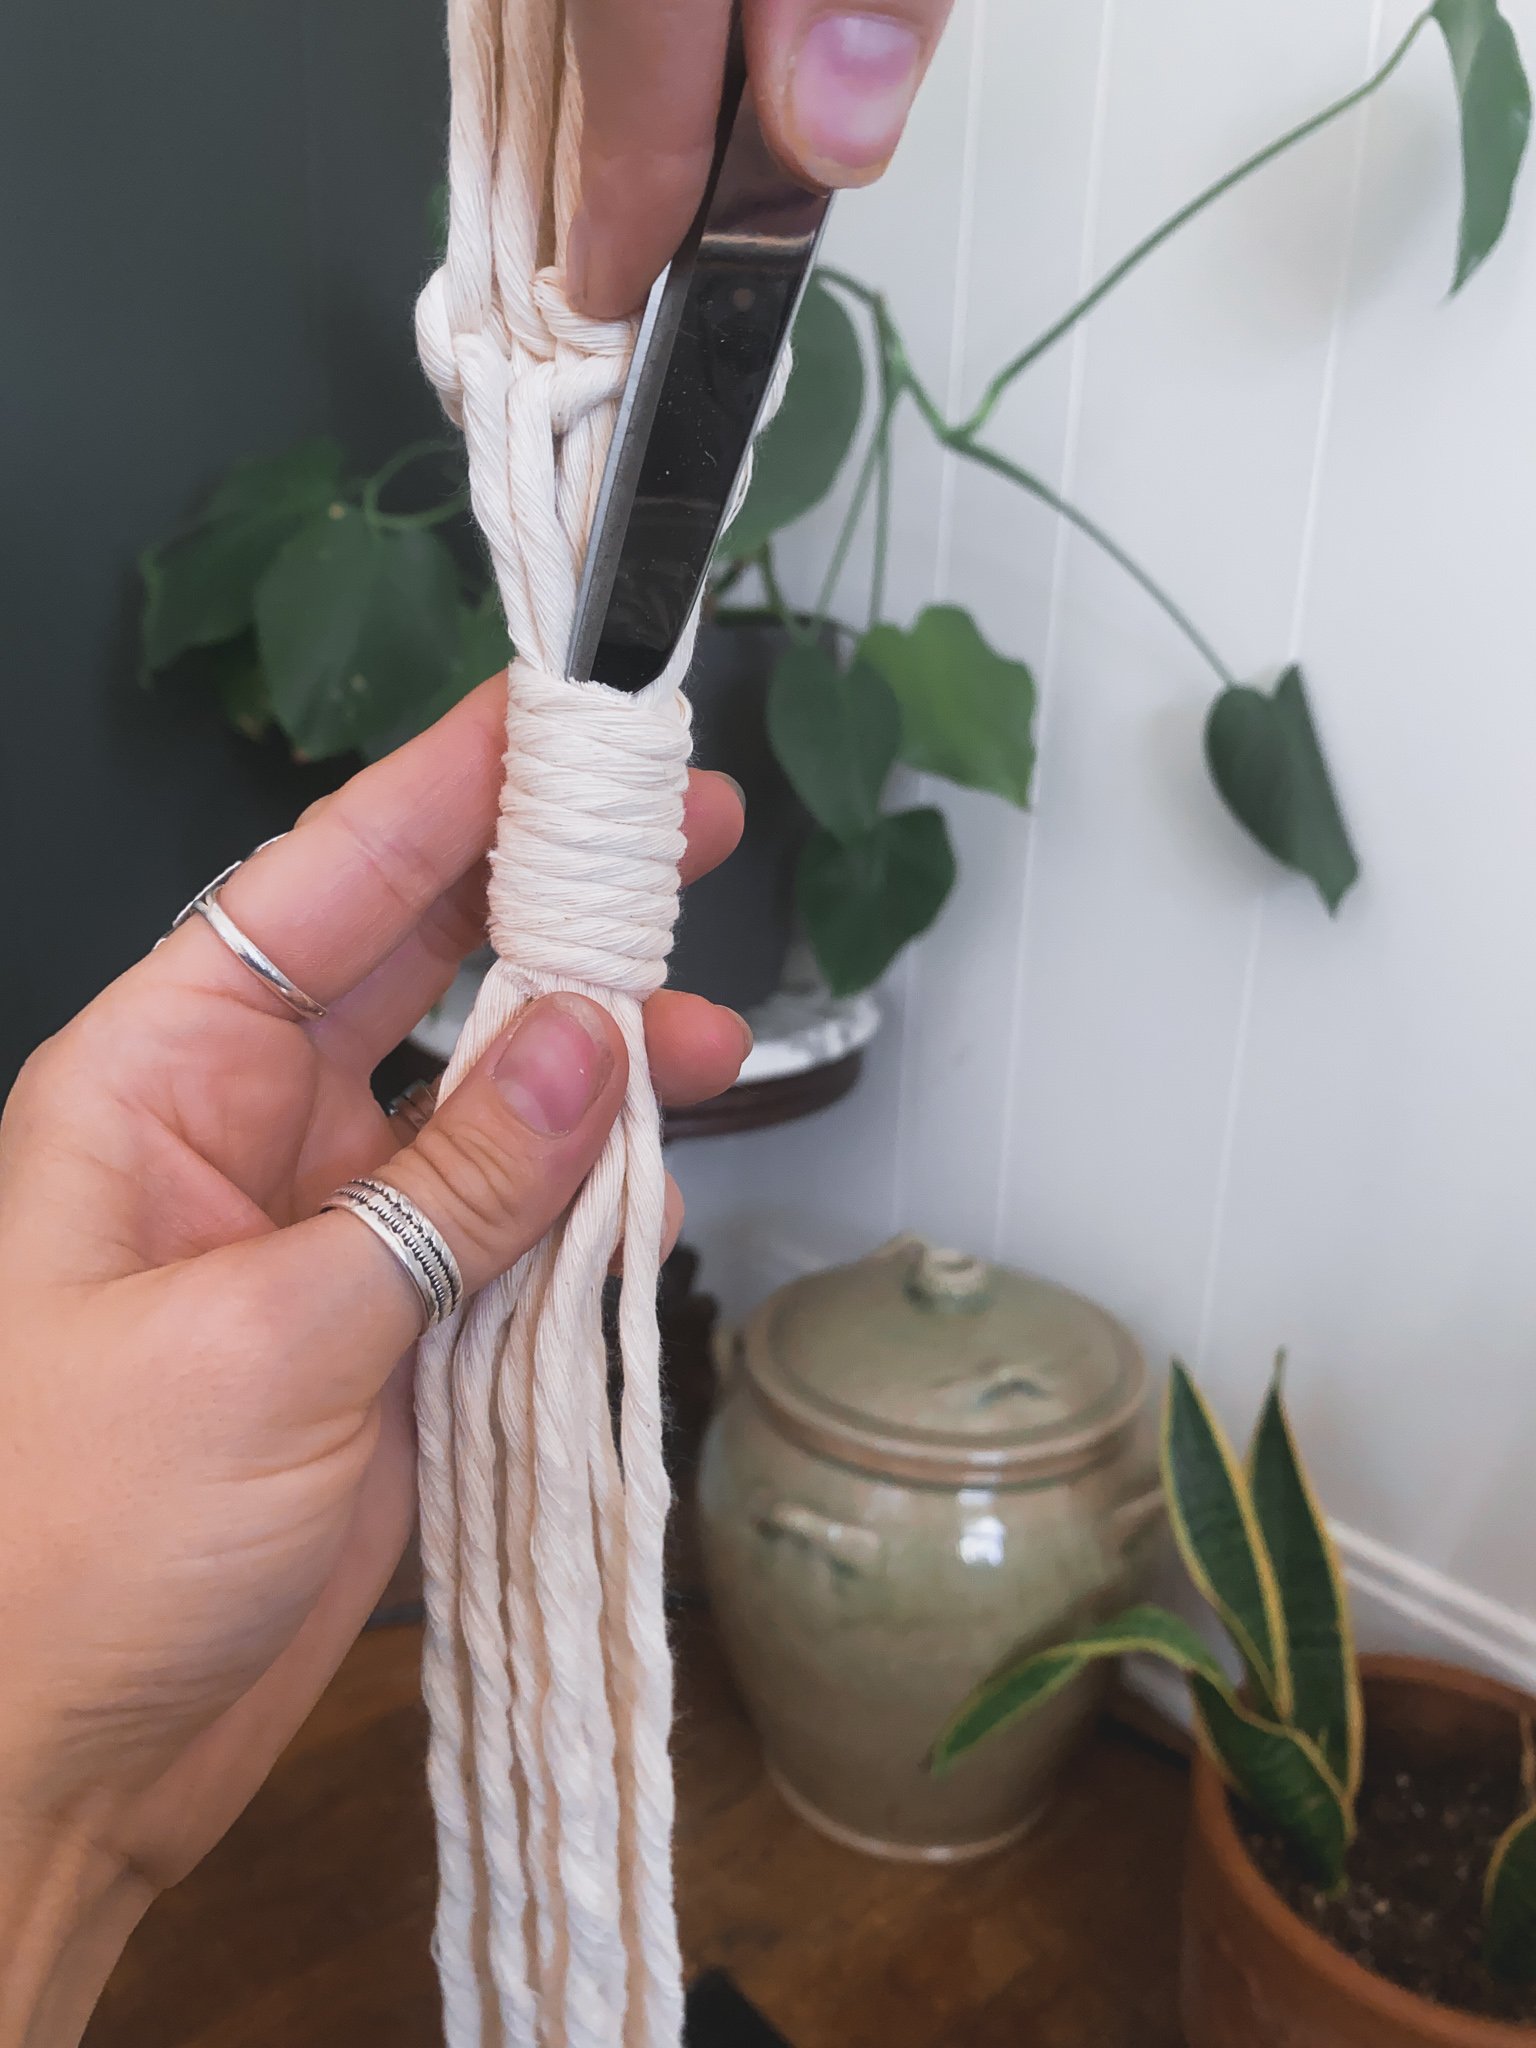
Pull the bottom rope up through the rest of the gathered rope with the strand sticking out from the top. Only pull the rope about halfway through the rest of the gathered rope, you don’t want it coming out of the top. If it does come out, try to pull it back through from the bottom or start the gathering knot over (sorry).
Pull both ends of rope to make it nice and tight.
Cut the ends of the remaining rope.
Tuck the remaining ends of the rope back into the gathering knot with your scissors on the top and bottom for a clean finished look.
Follow the ordered images below for a visual guide to tying this knot.
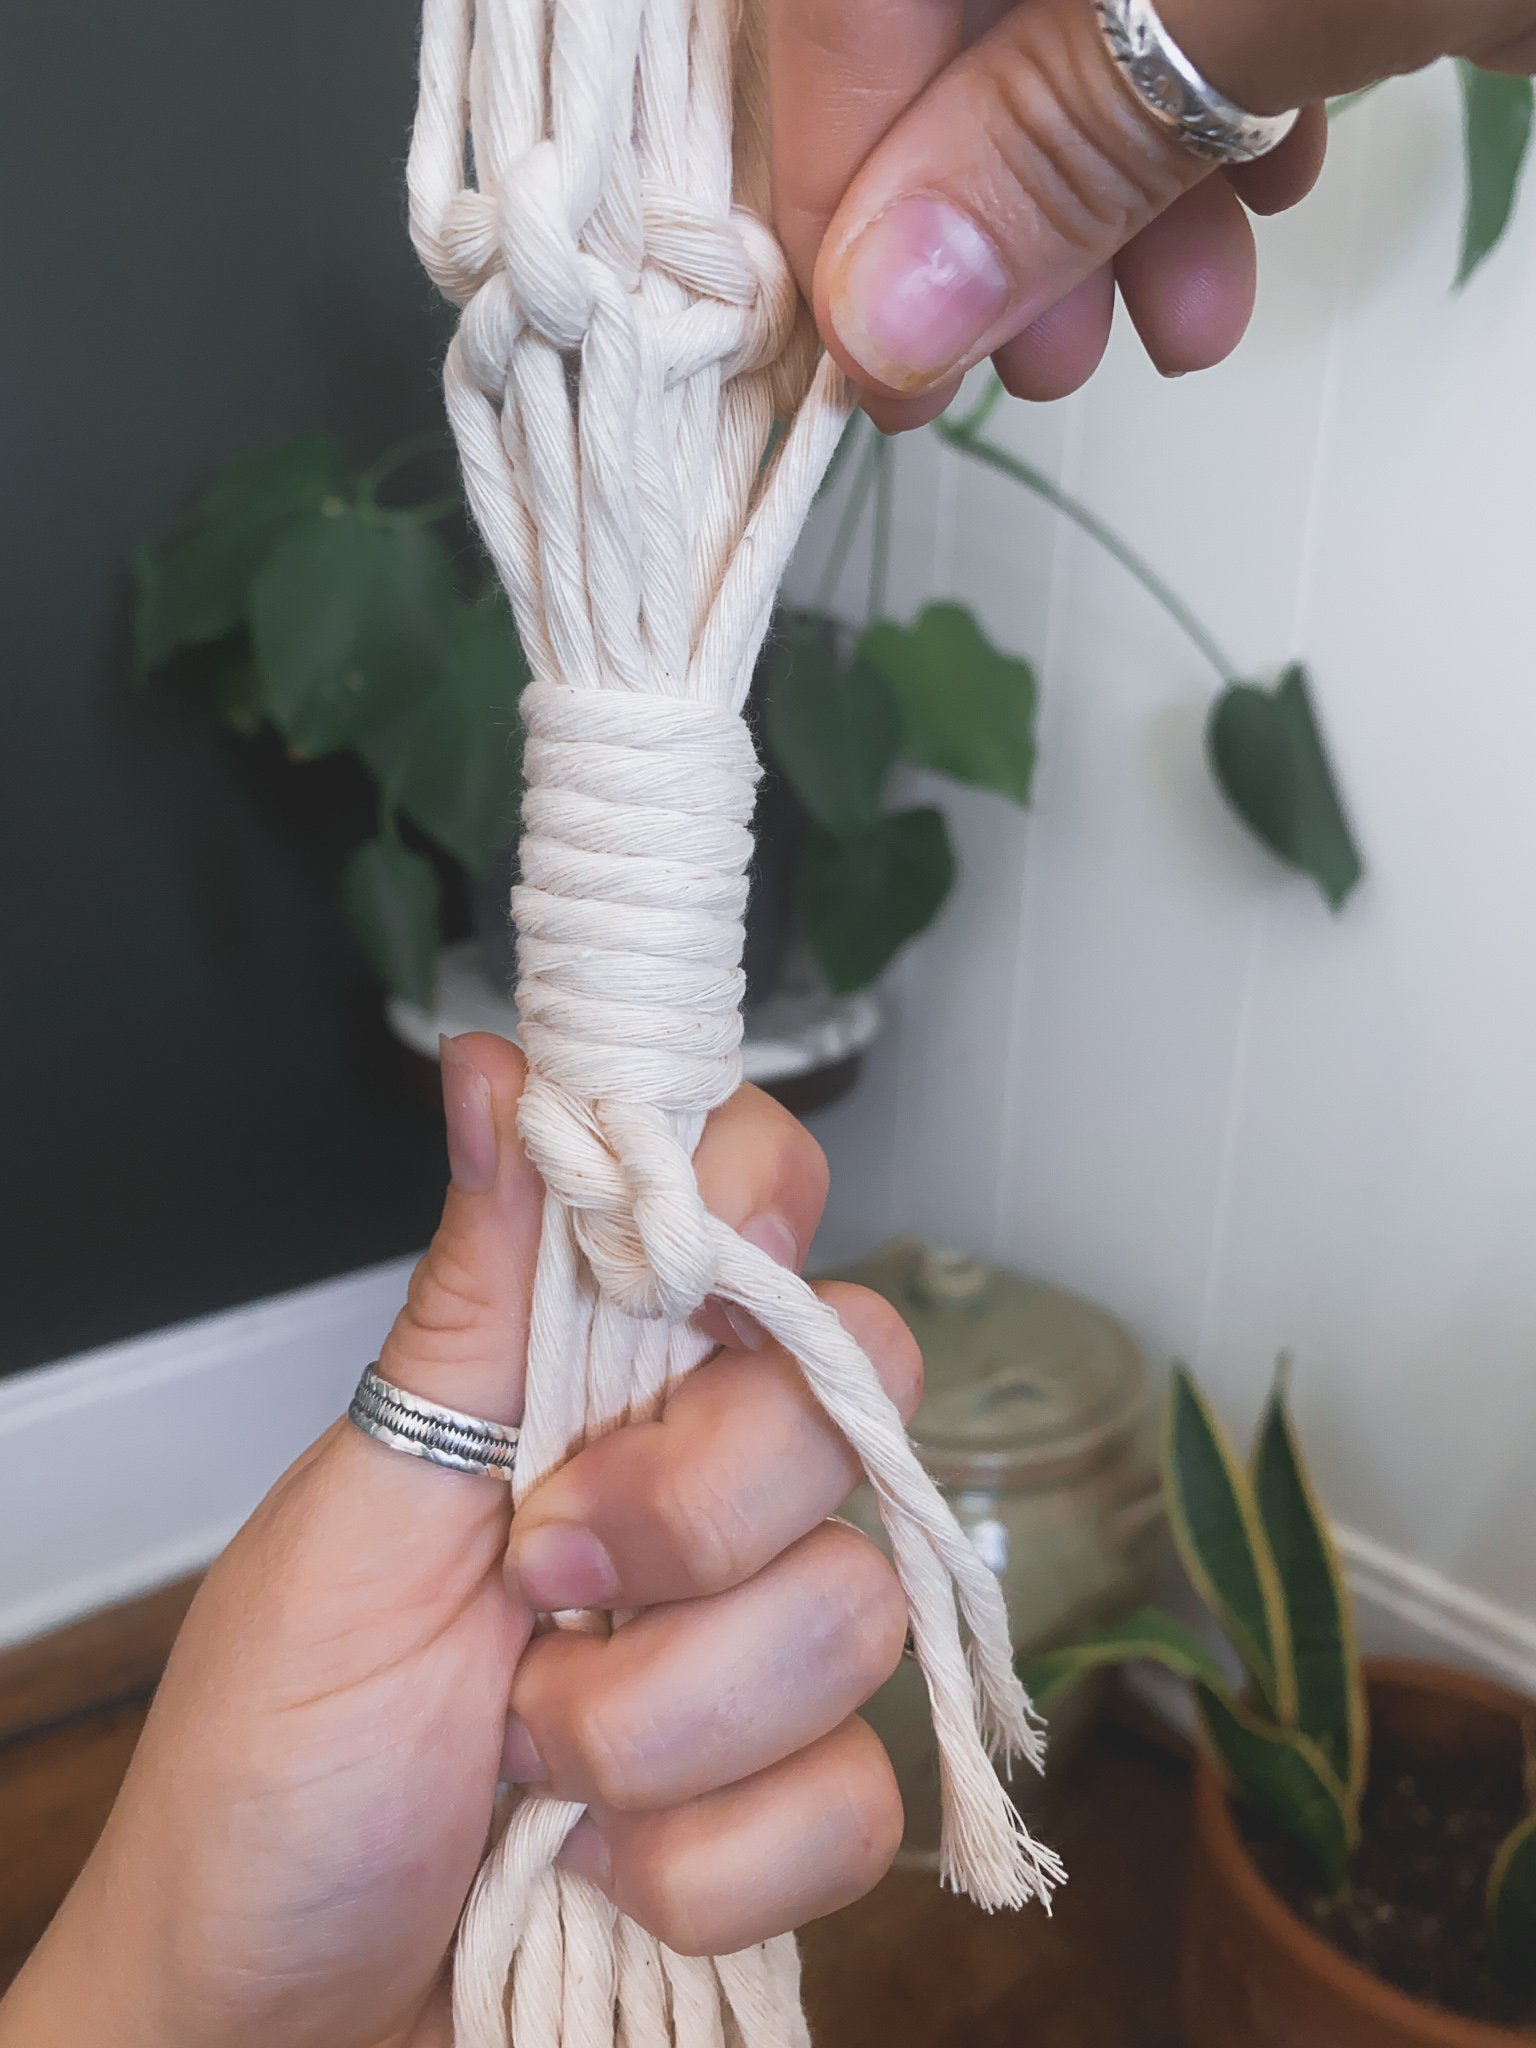
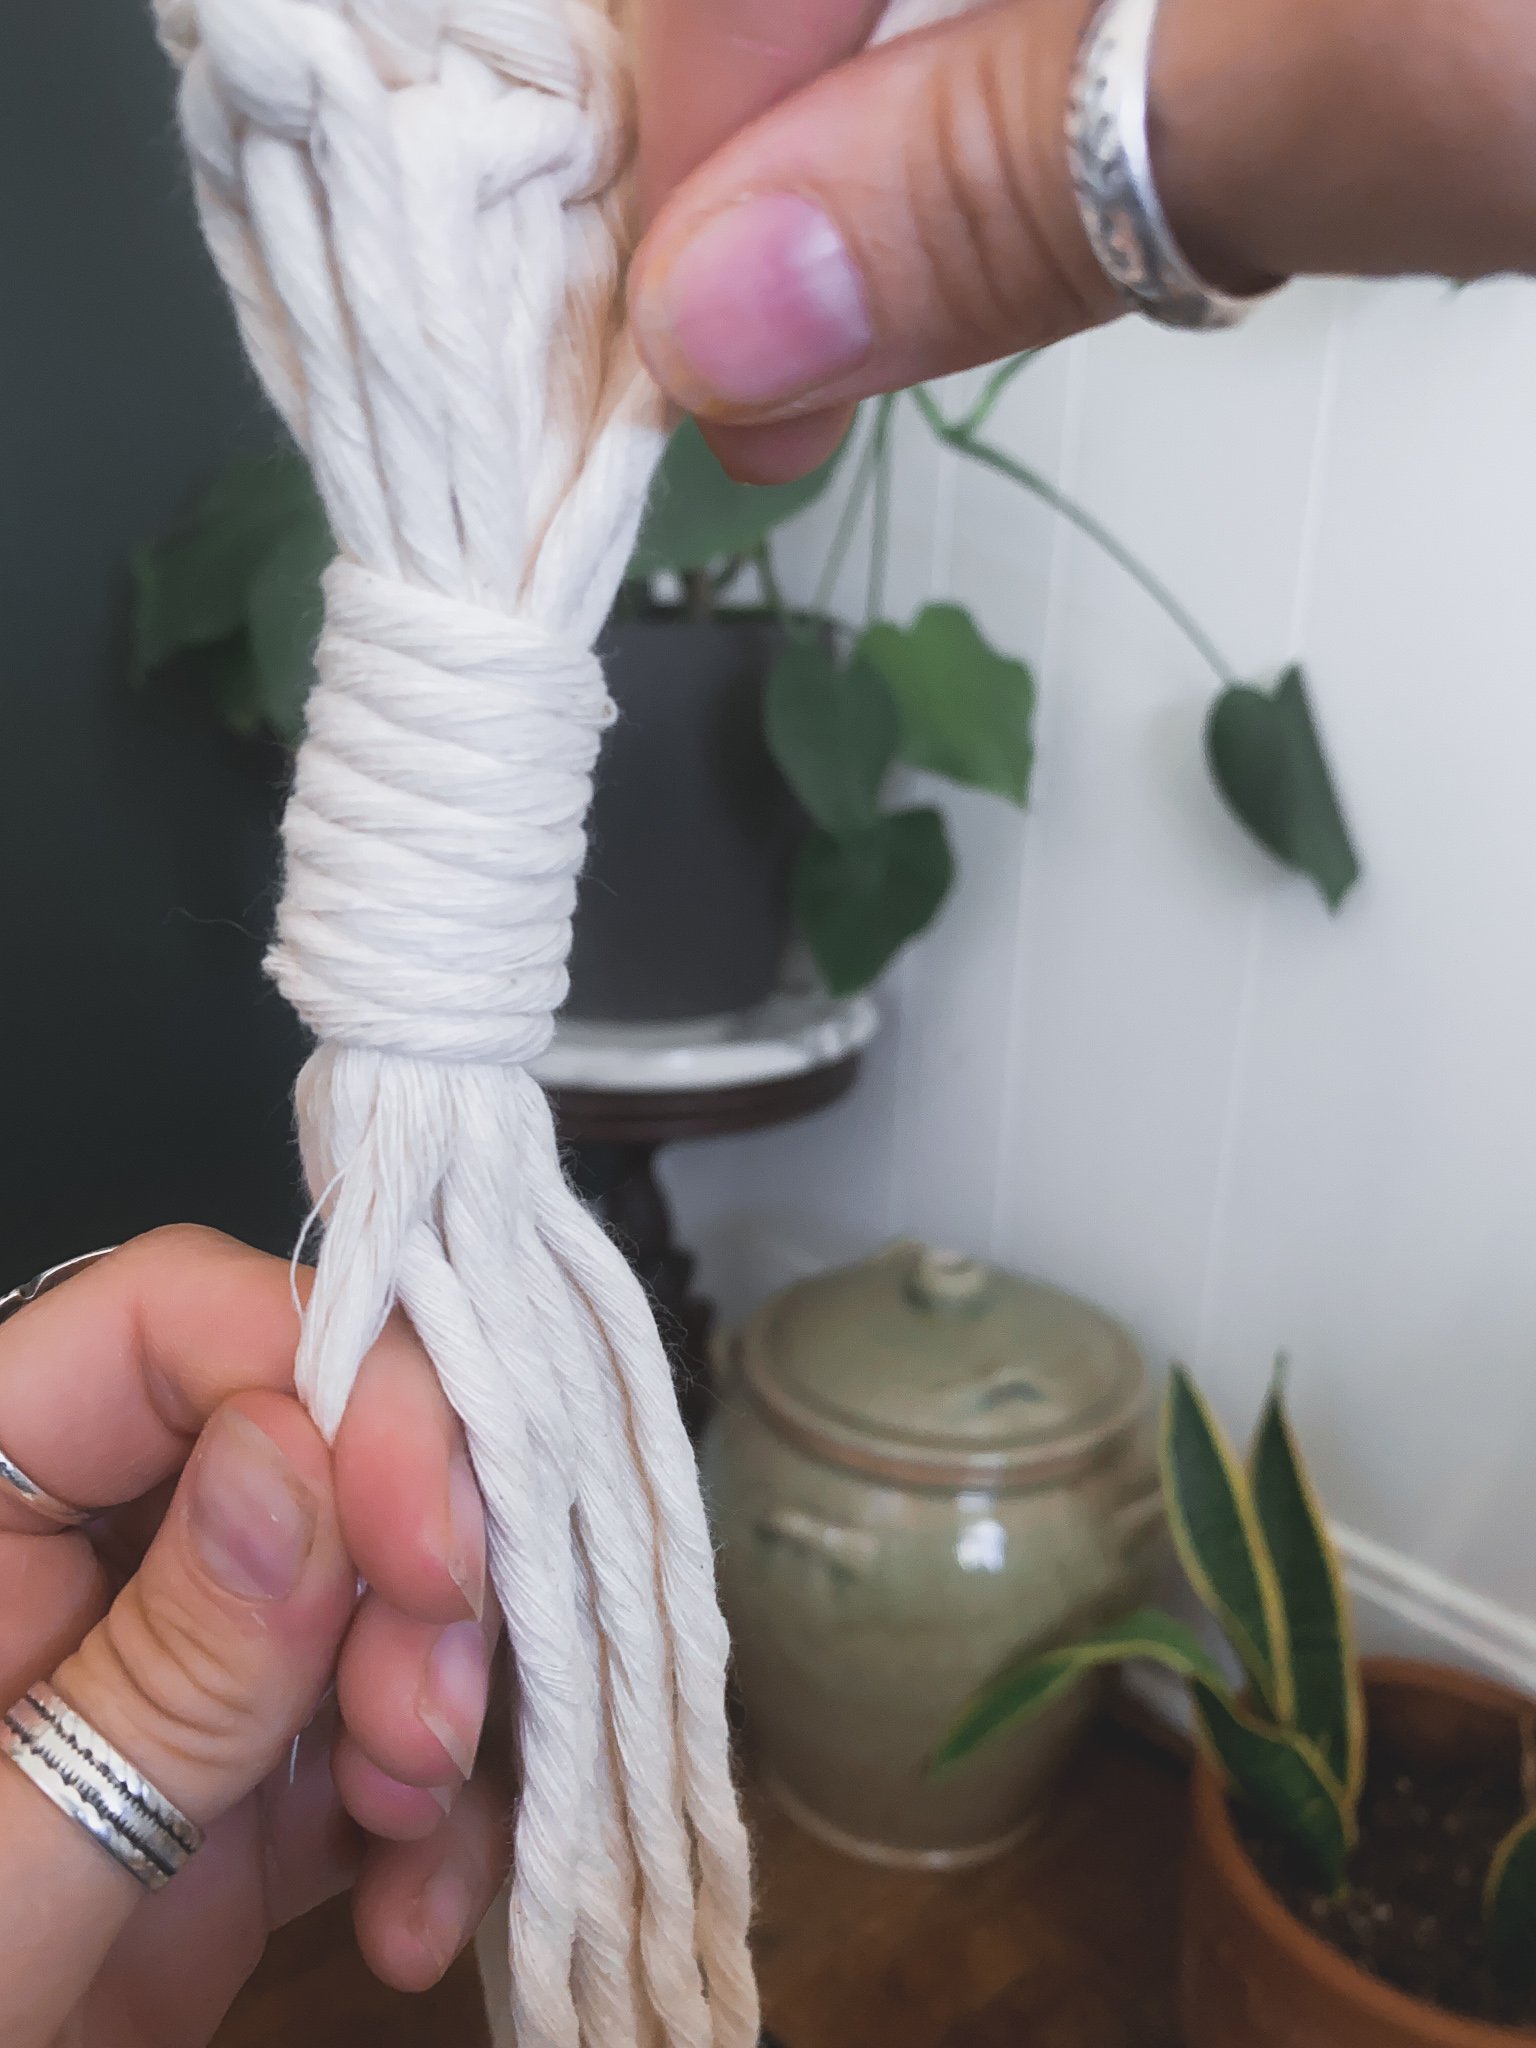
Also don’t be alarmed, but this gathering knot is from the bottom of the plant hanger. But since I am a silly goose and forgot to take how-to pictures of the beginning of the plant hanger, you get the one from the bottom. But it’s all the same so we gucci!
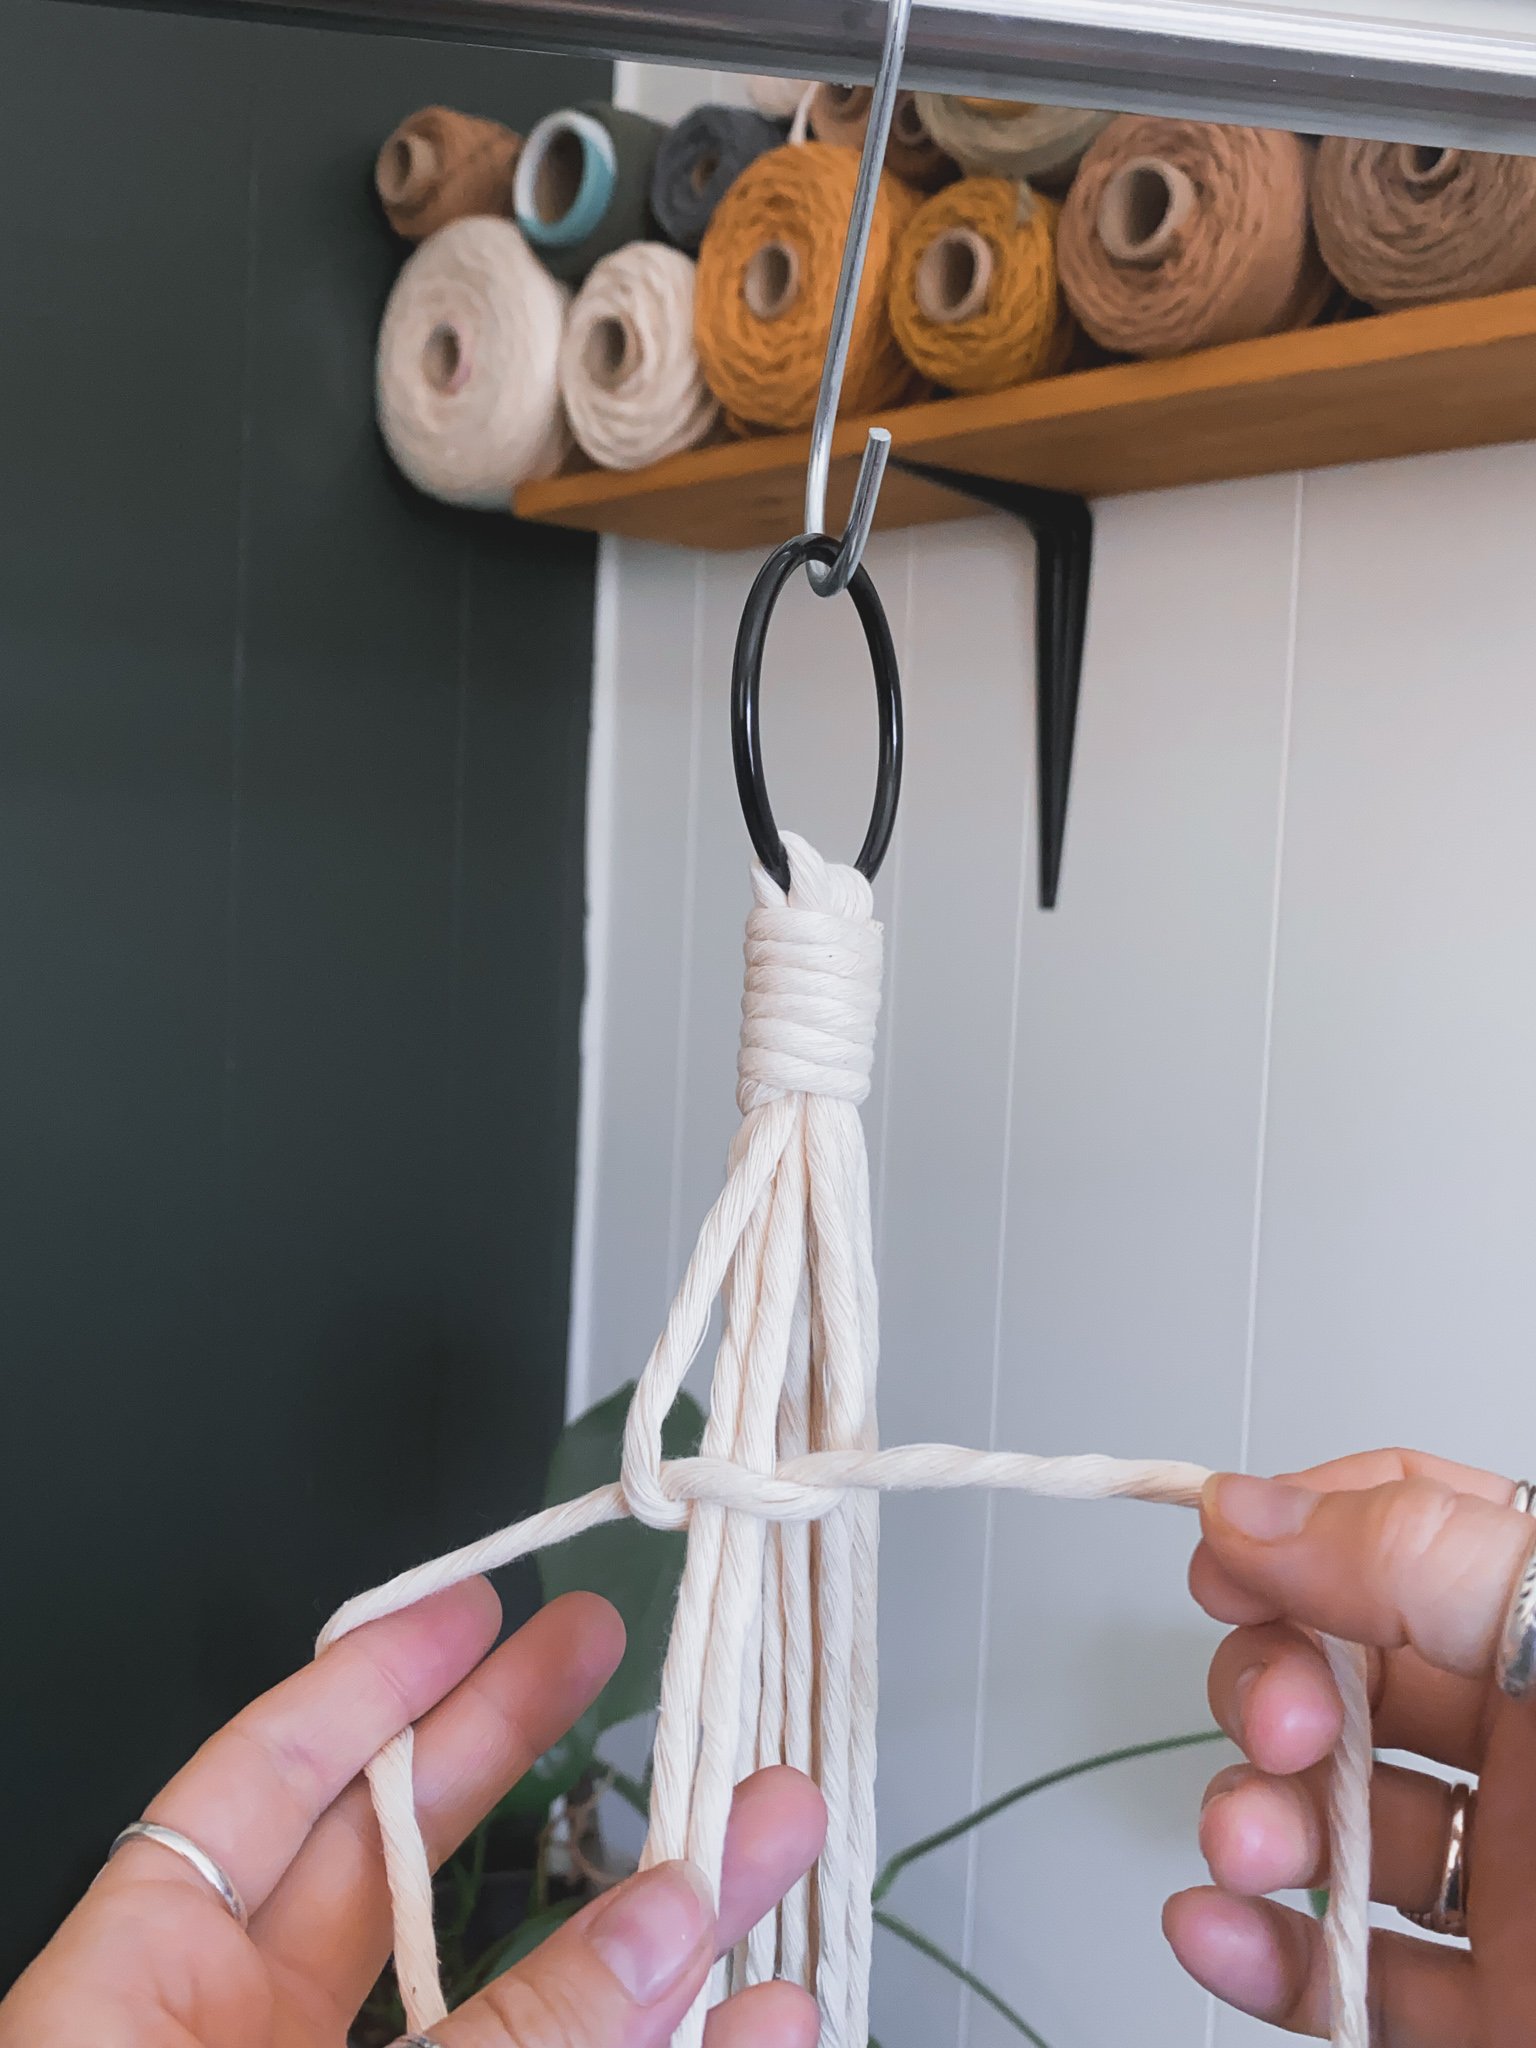
Step 4: Make Four Spiral Knots
Okay for this part, pay attention! You are going to want to separate your ropes into groups of four, each with two short ropes in the middle and two long ropes on the outer sides. The reason it is so important for the longer ropes to be on the outside is because once we start tying the spiral knot (also known as a half square knot) we will only be using the longer rope, therefore it will be getting shorter the more you tie. If you tie using the short rope, you will run out of rope real quick and have to start over (ain’t nobody got time for that)!
Tie a spiral knot:
Hold the two longer/outer ropes
Bring the right rope over the two middle ropes and under the left rope
Bring the left rope under the right rope, behind the two middle ropes, and through the hole next to your right index finger.
Make the rope tight by bringing it to the top.
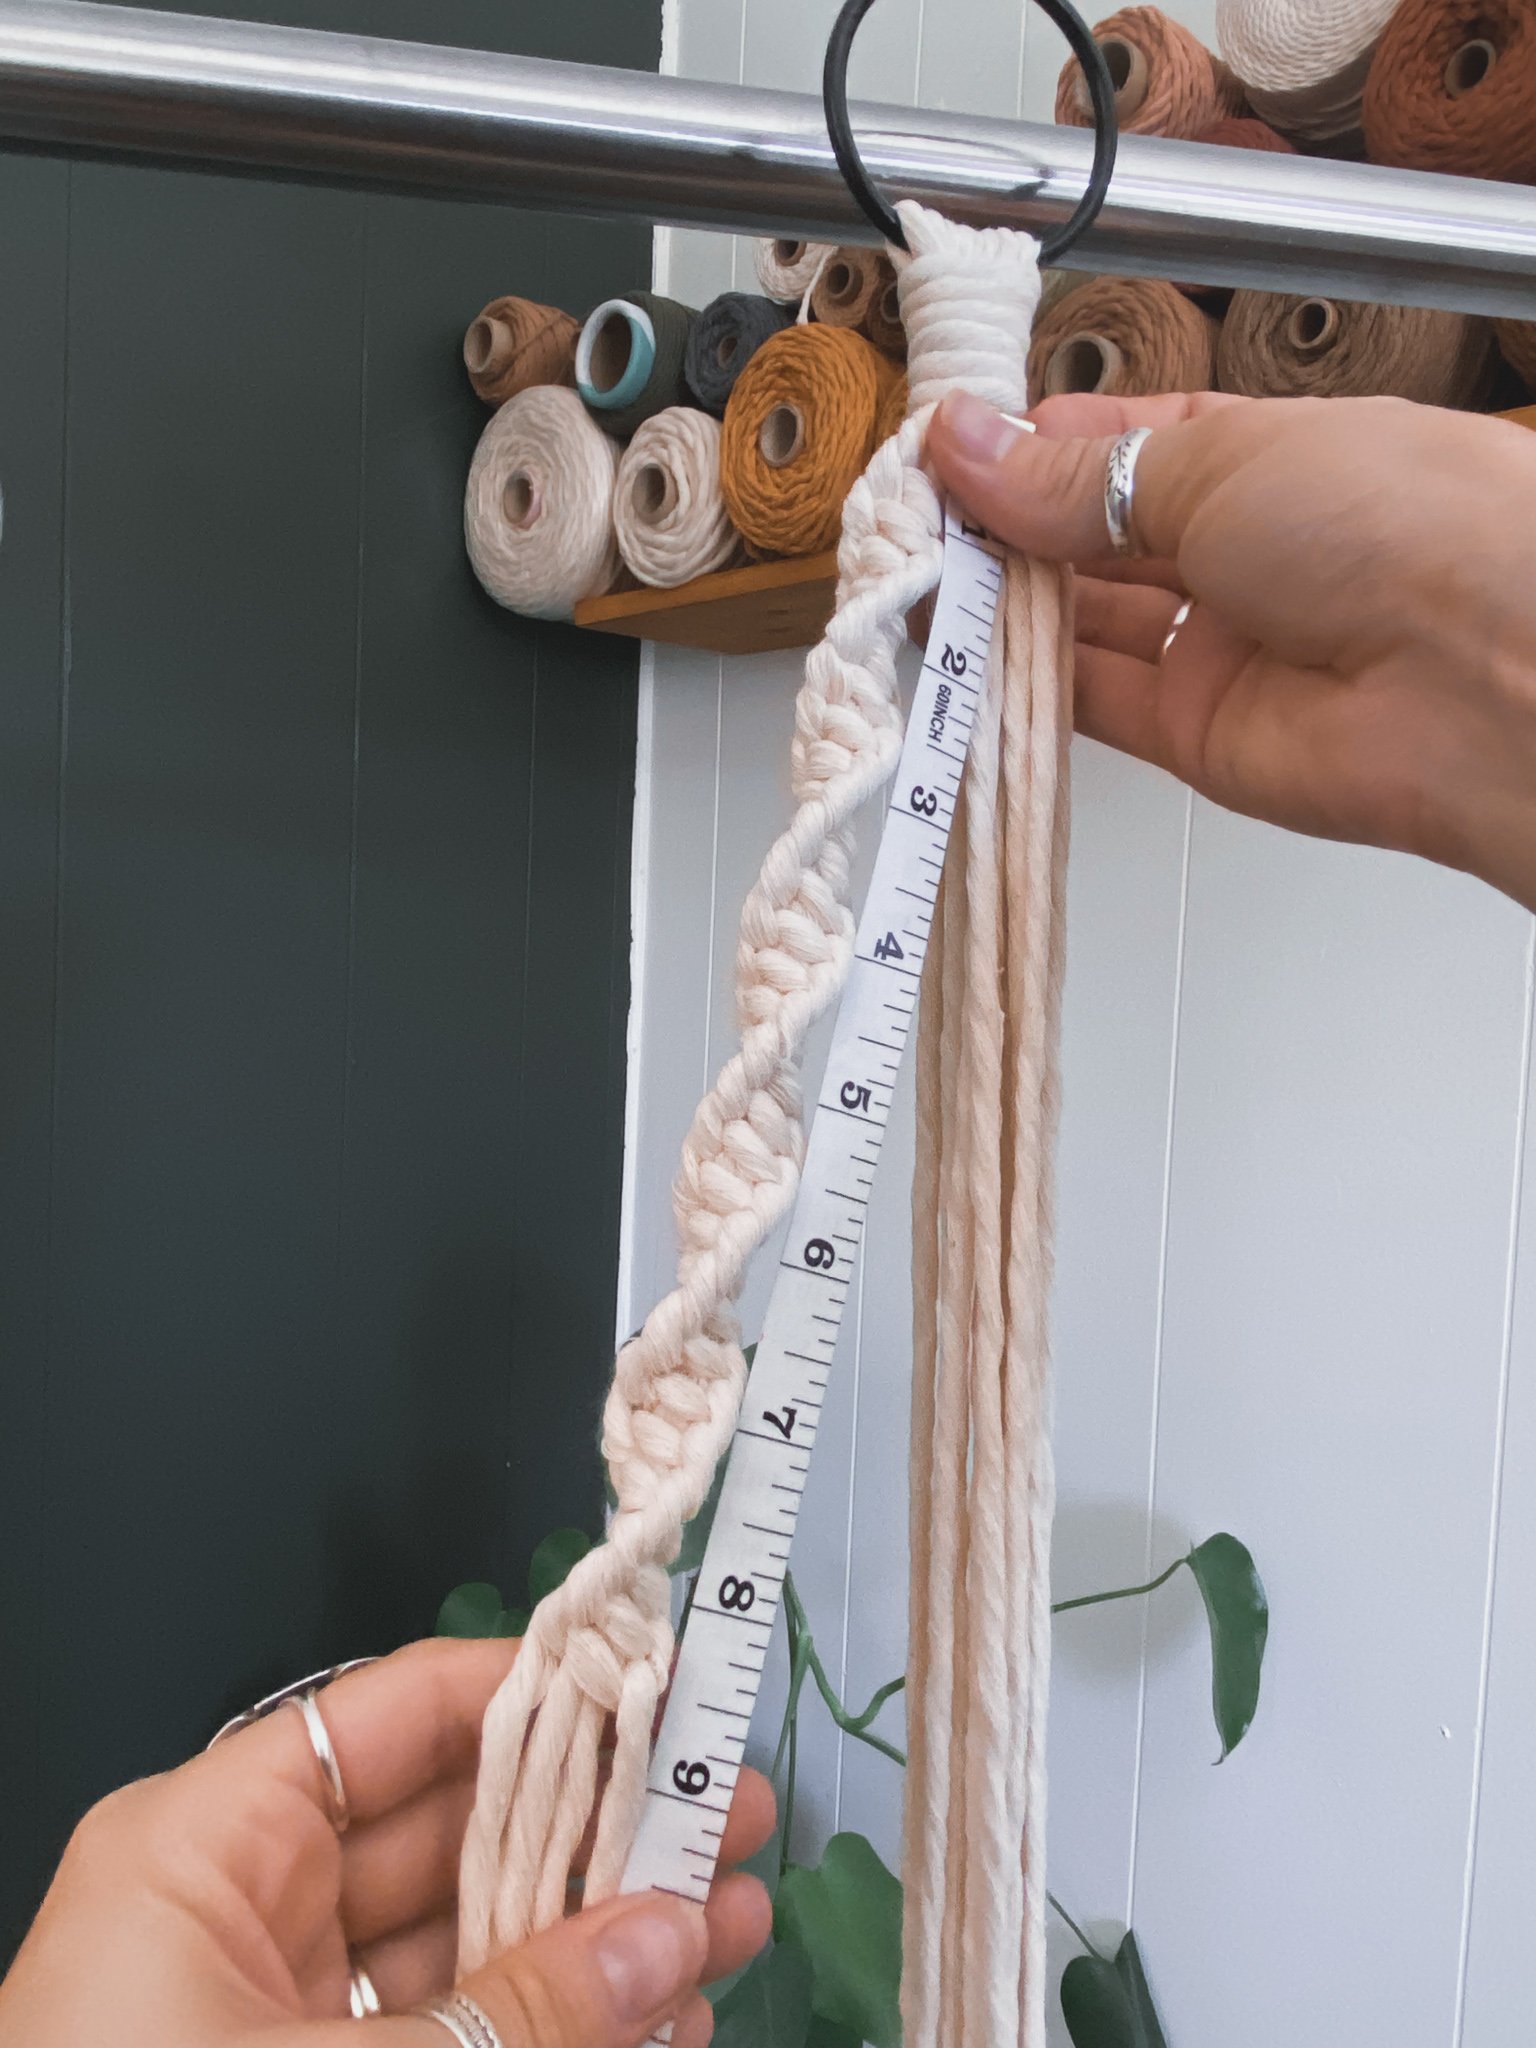
Repeat until you have created a 8.5 in spiral knot.

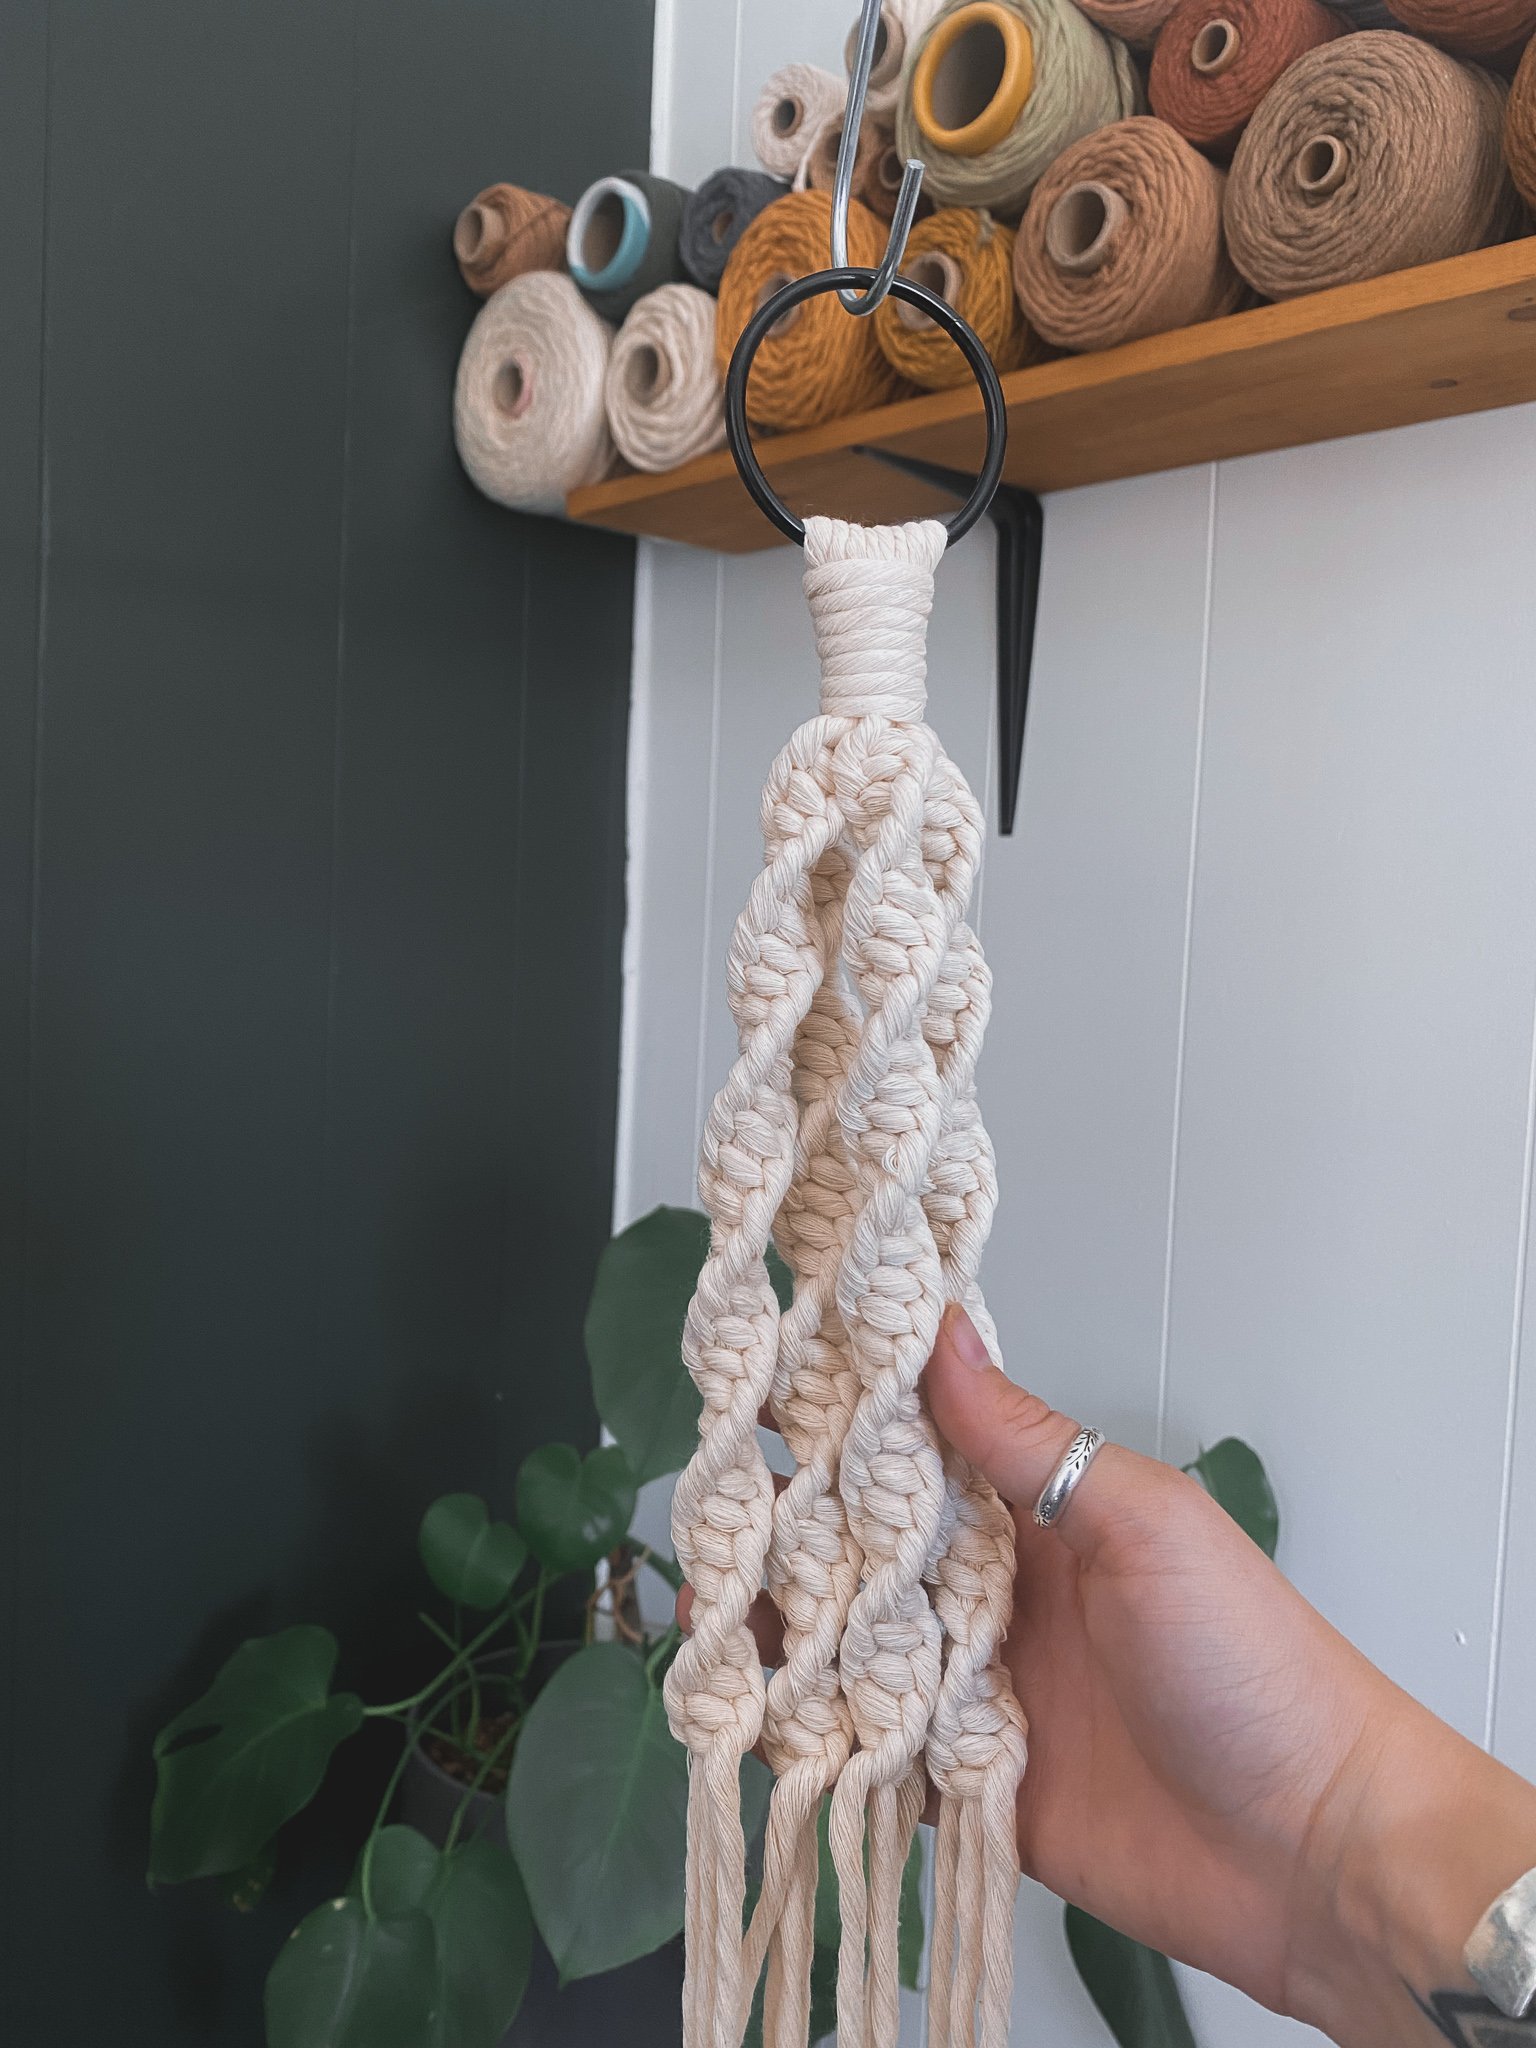
If that description with the images was confusing, here is a video tutorial on my youtube.
Step 4: Make Some Square Knots
After you have created 4 spiral knots, leave a 3.5in space under each and tie a square knot under each spiral knot (see images below).
To make a square knot:
Tie the rope as if you were tying a half spiral knot but just make one.
Now rather than taking the right side over the middle strands again, bring the left rope over the middle strands and under the far right strand.
Bring the right strand under the left, behind the two middle strands, and through the hold left by your left index finger.
Tie the knot and BAM you have a square knot. Do this under all four spiral knots.
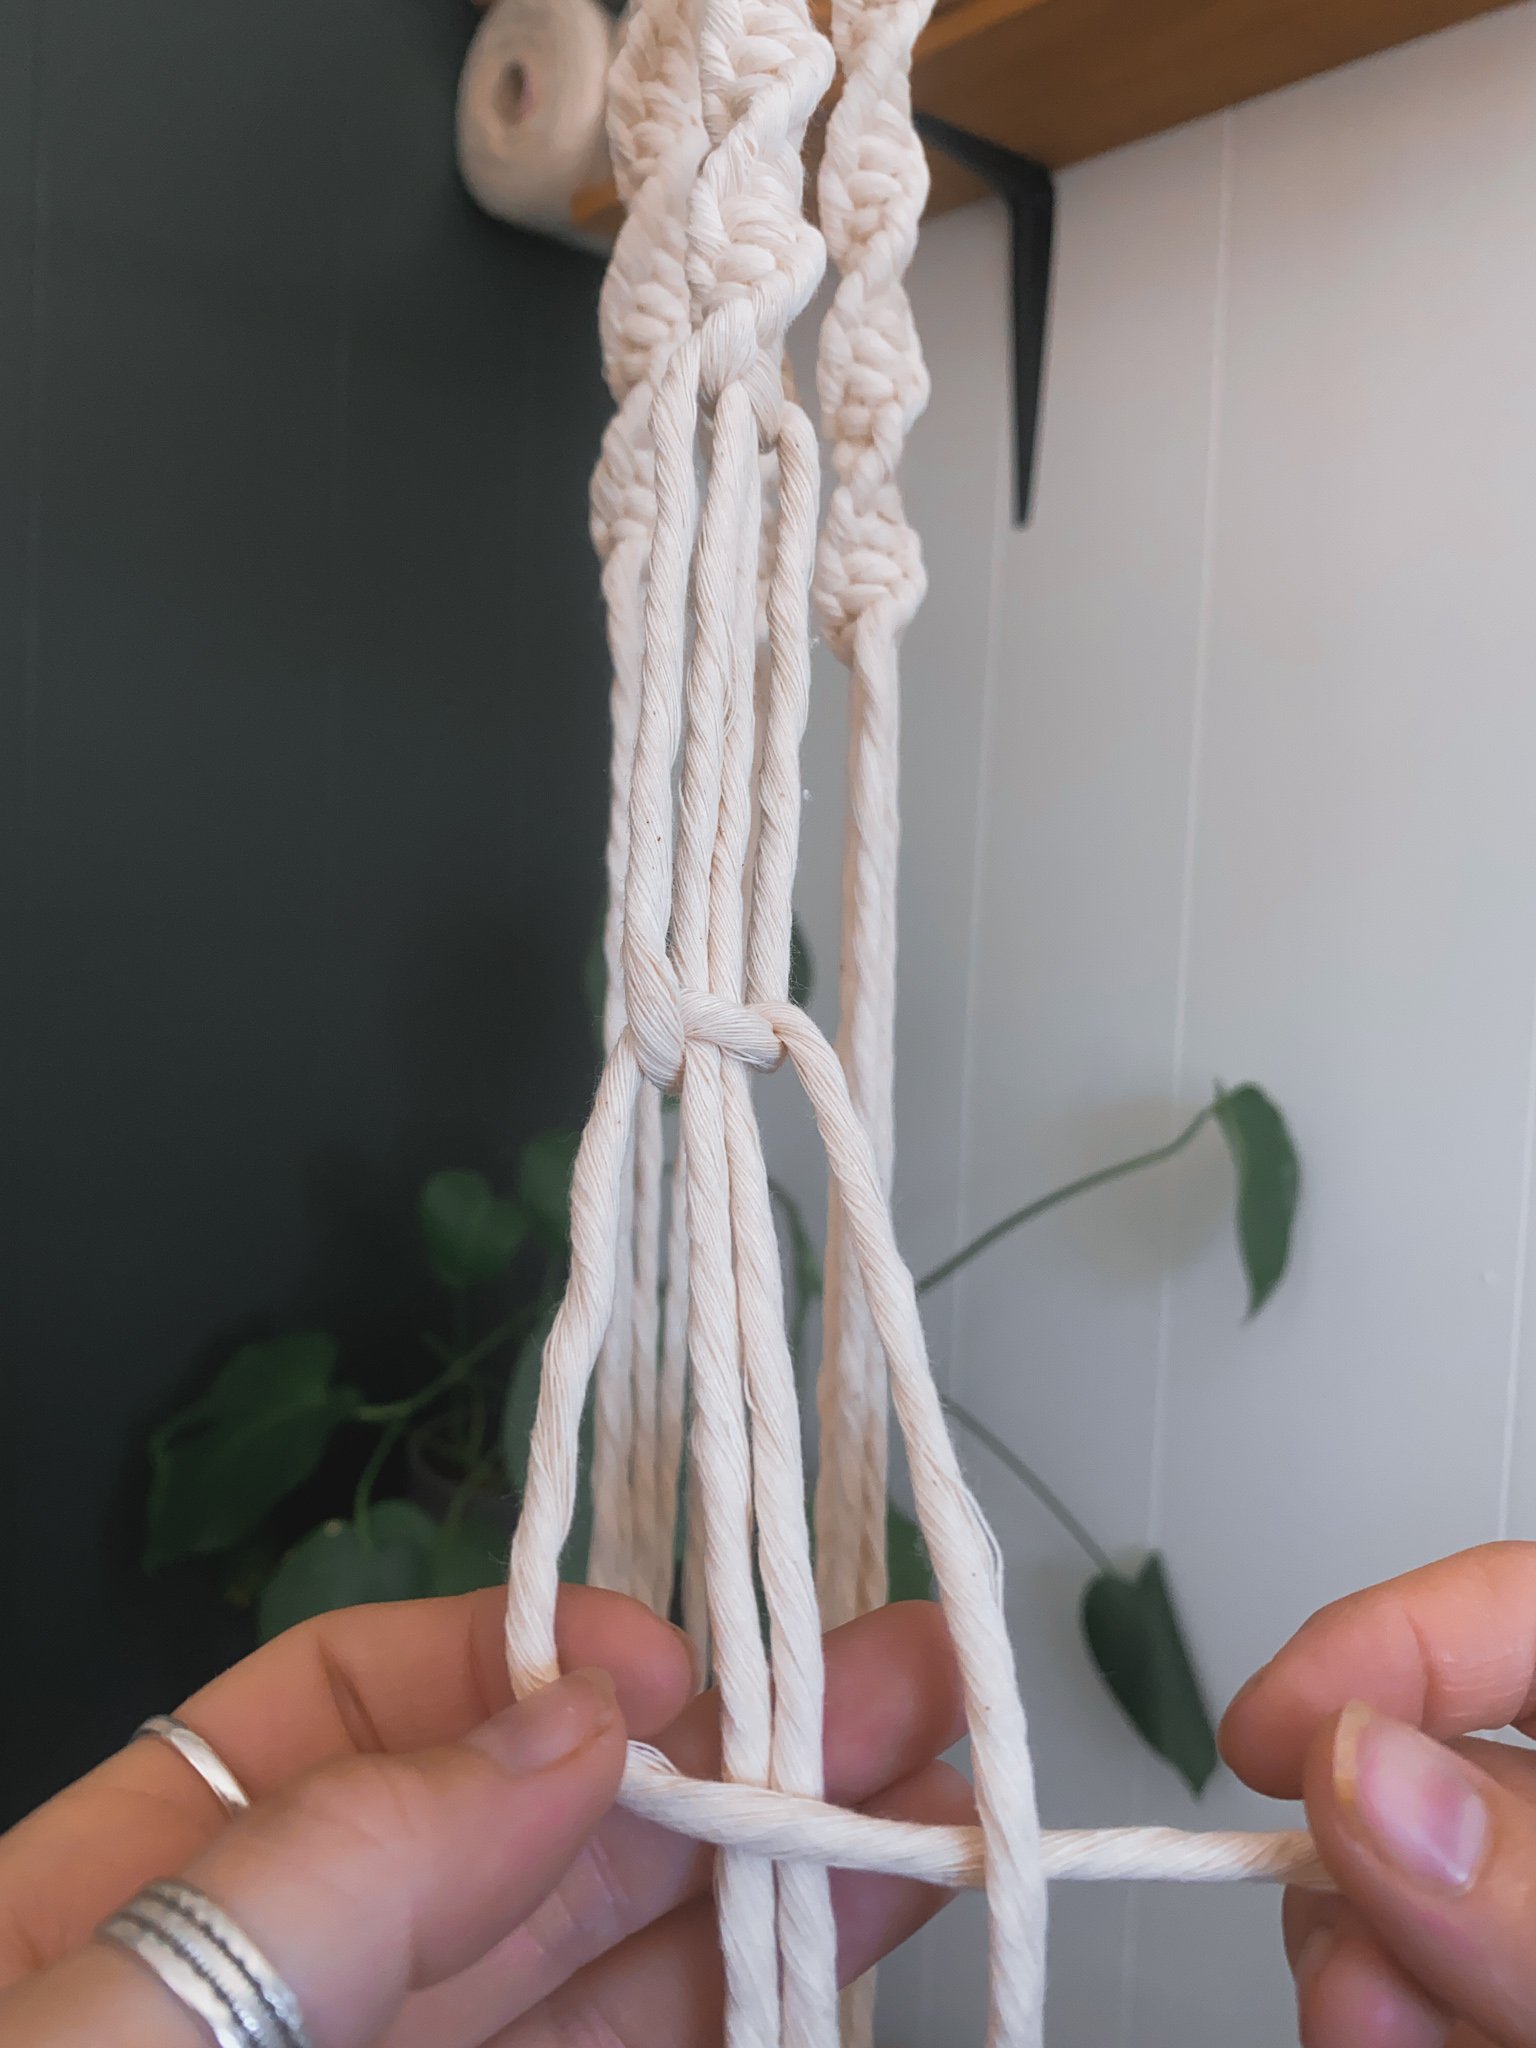
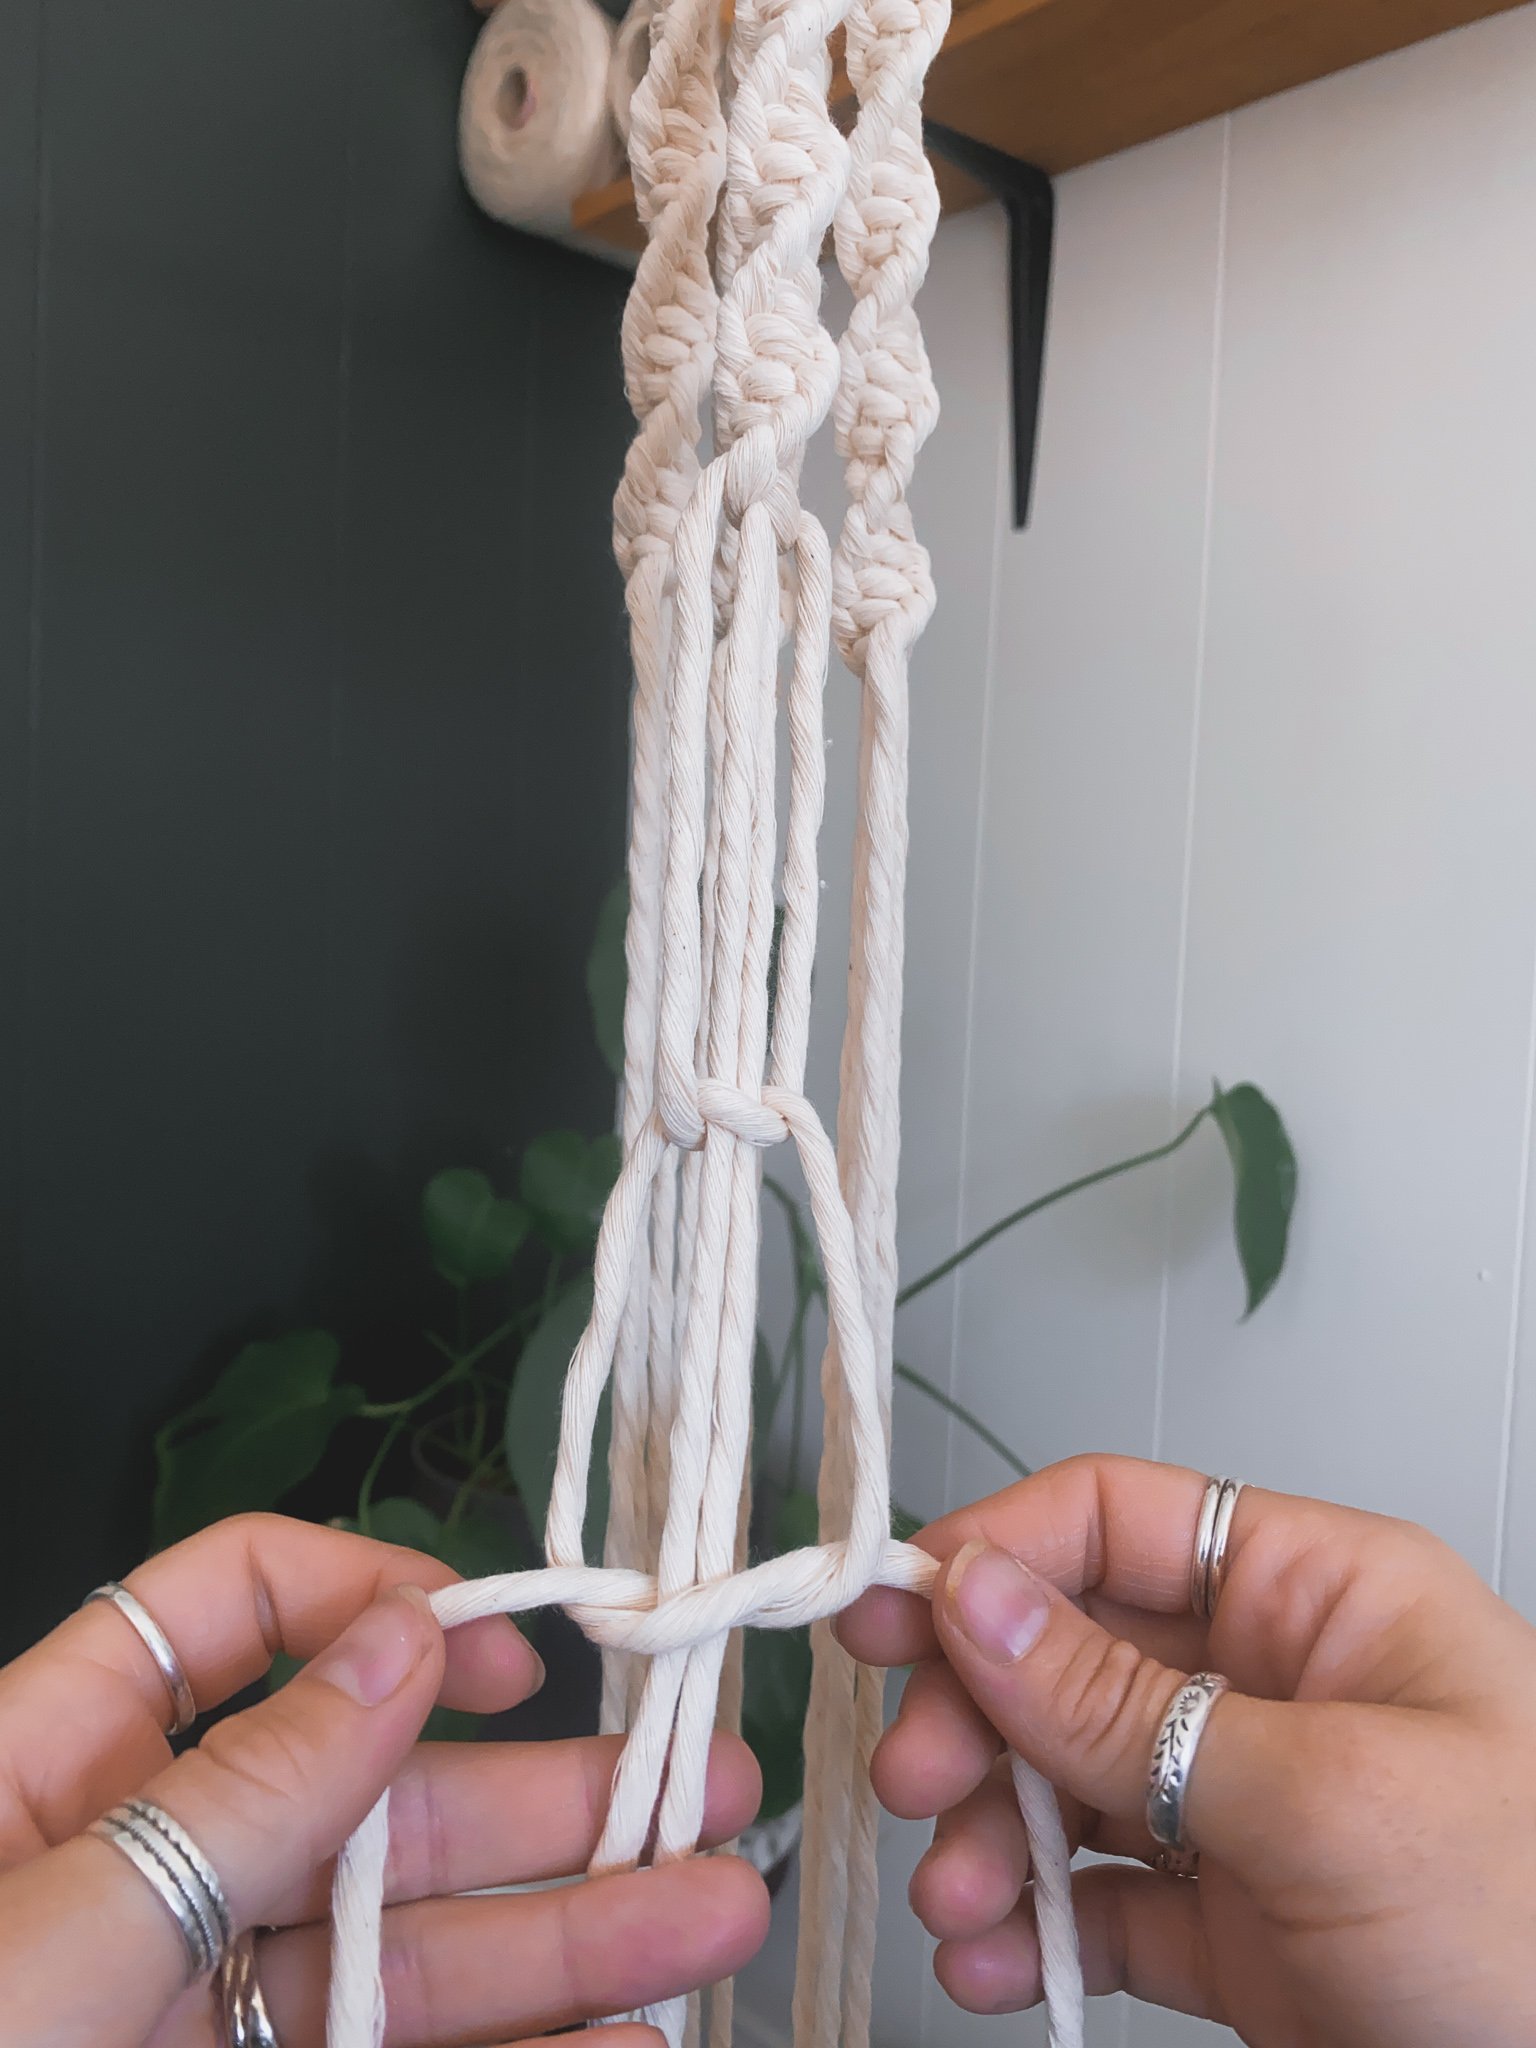
Repeat this process one more time and tie one more square knot 3.5in under your first square knot.
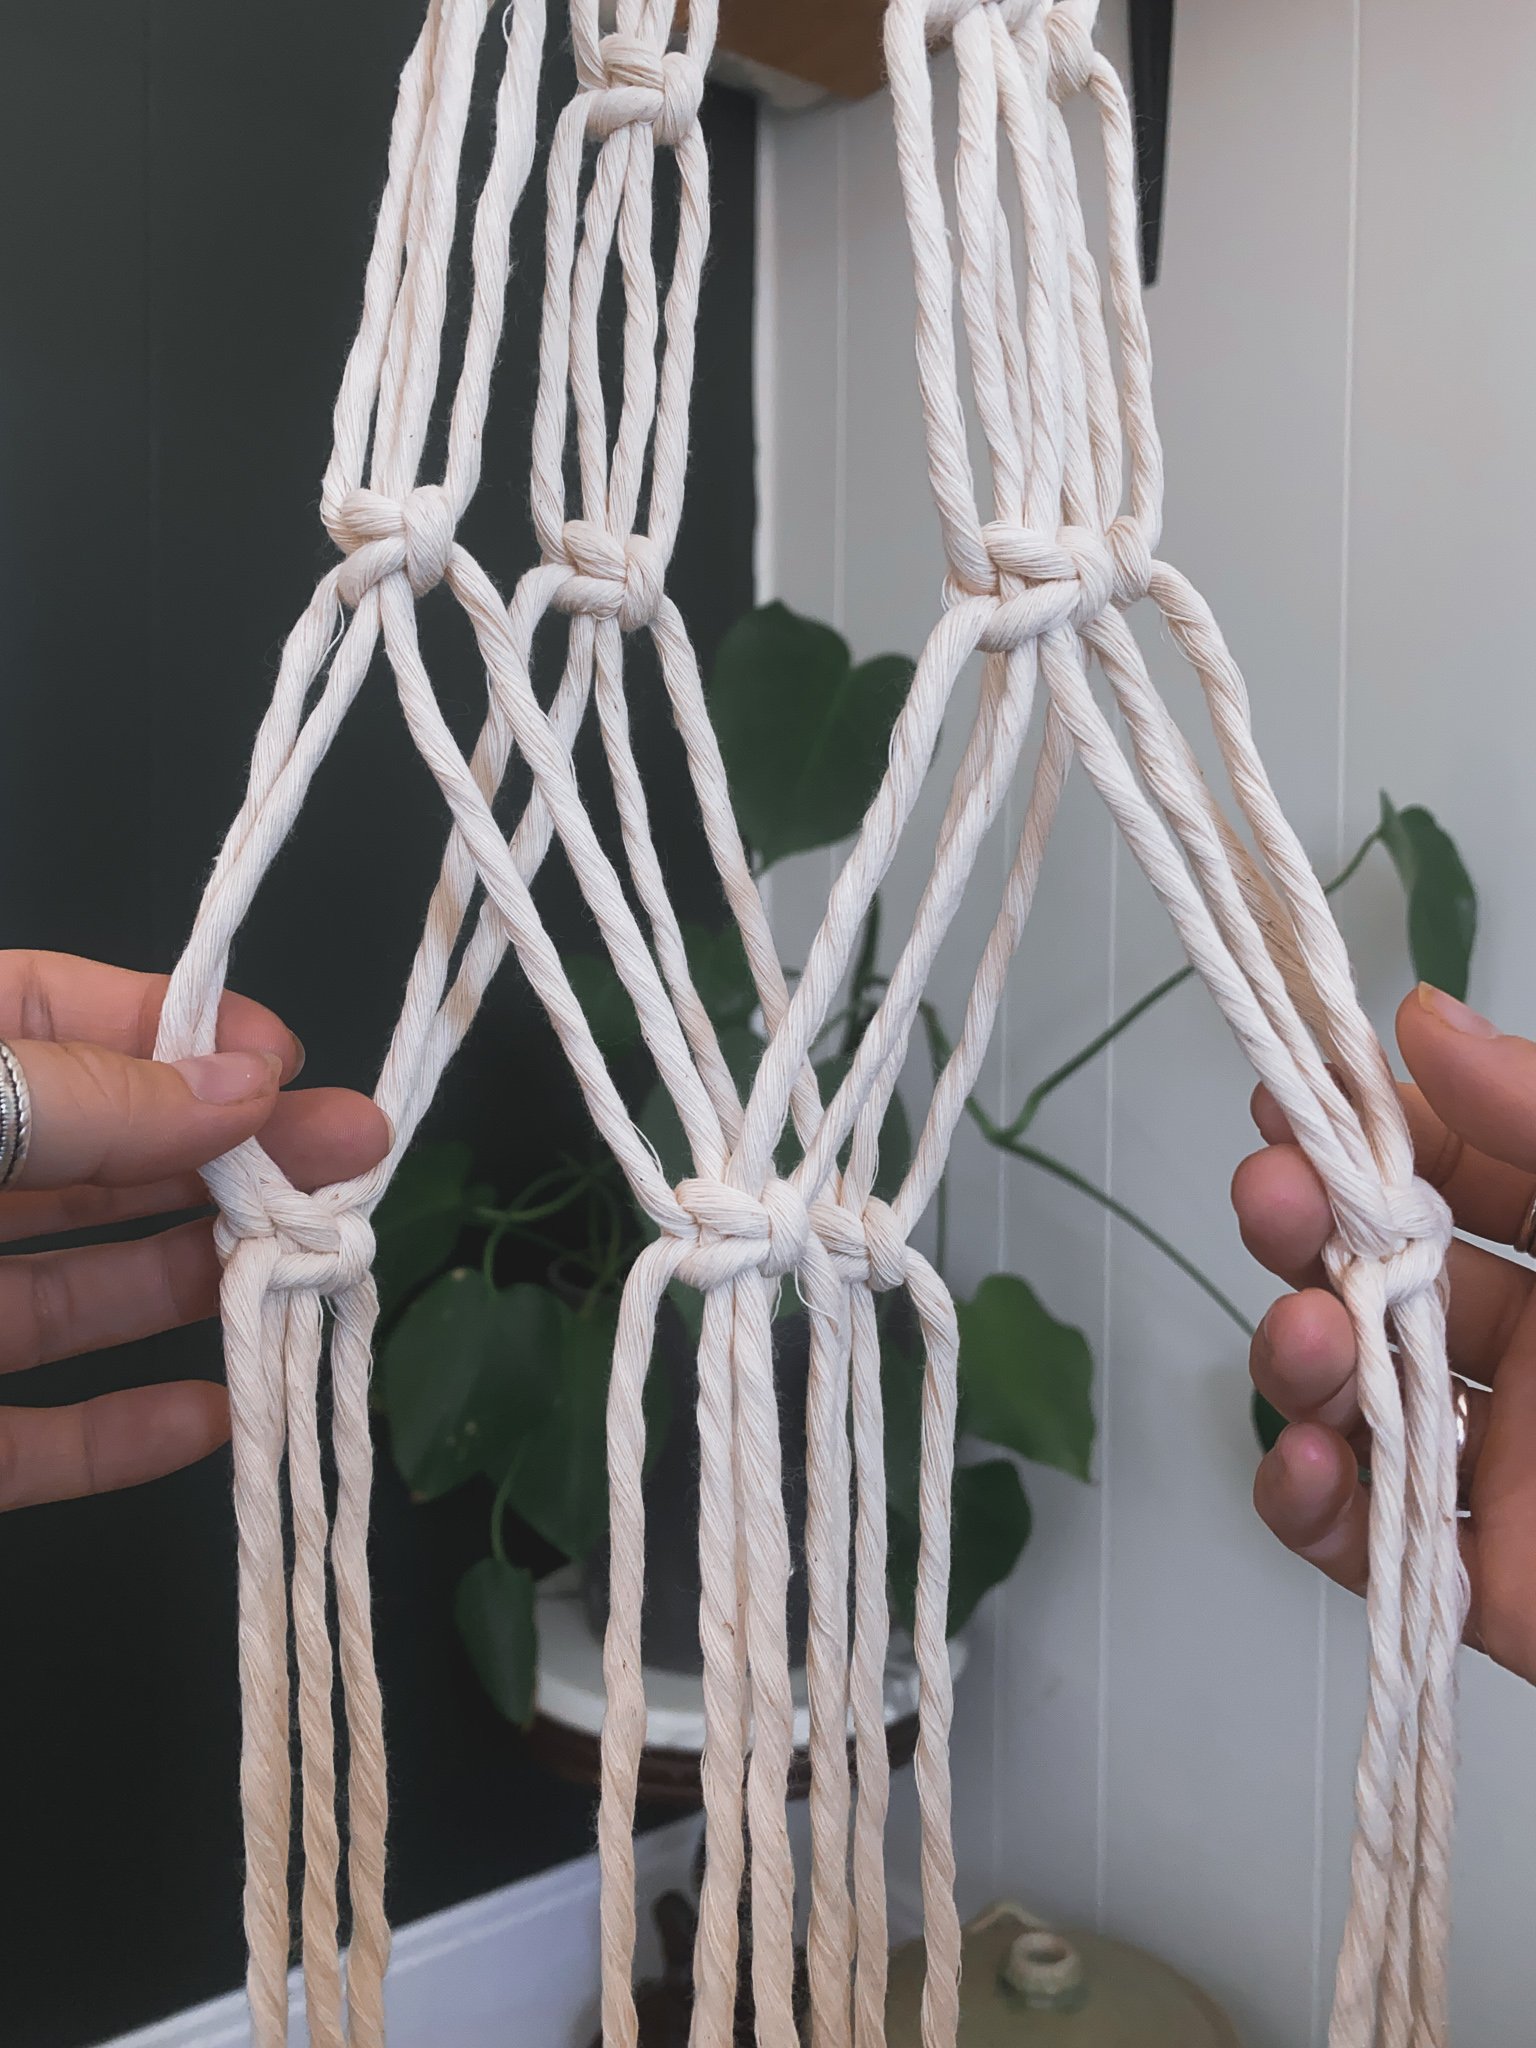
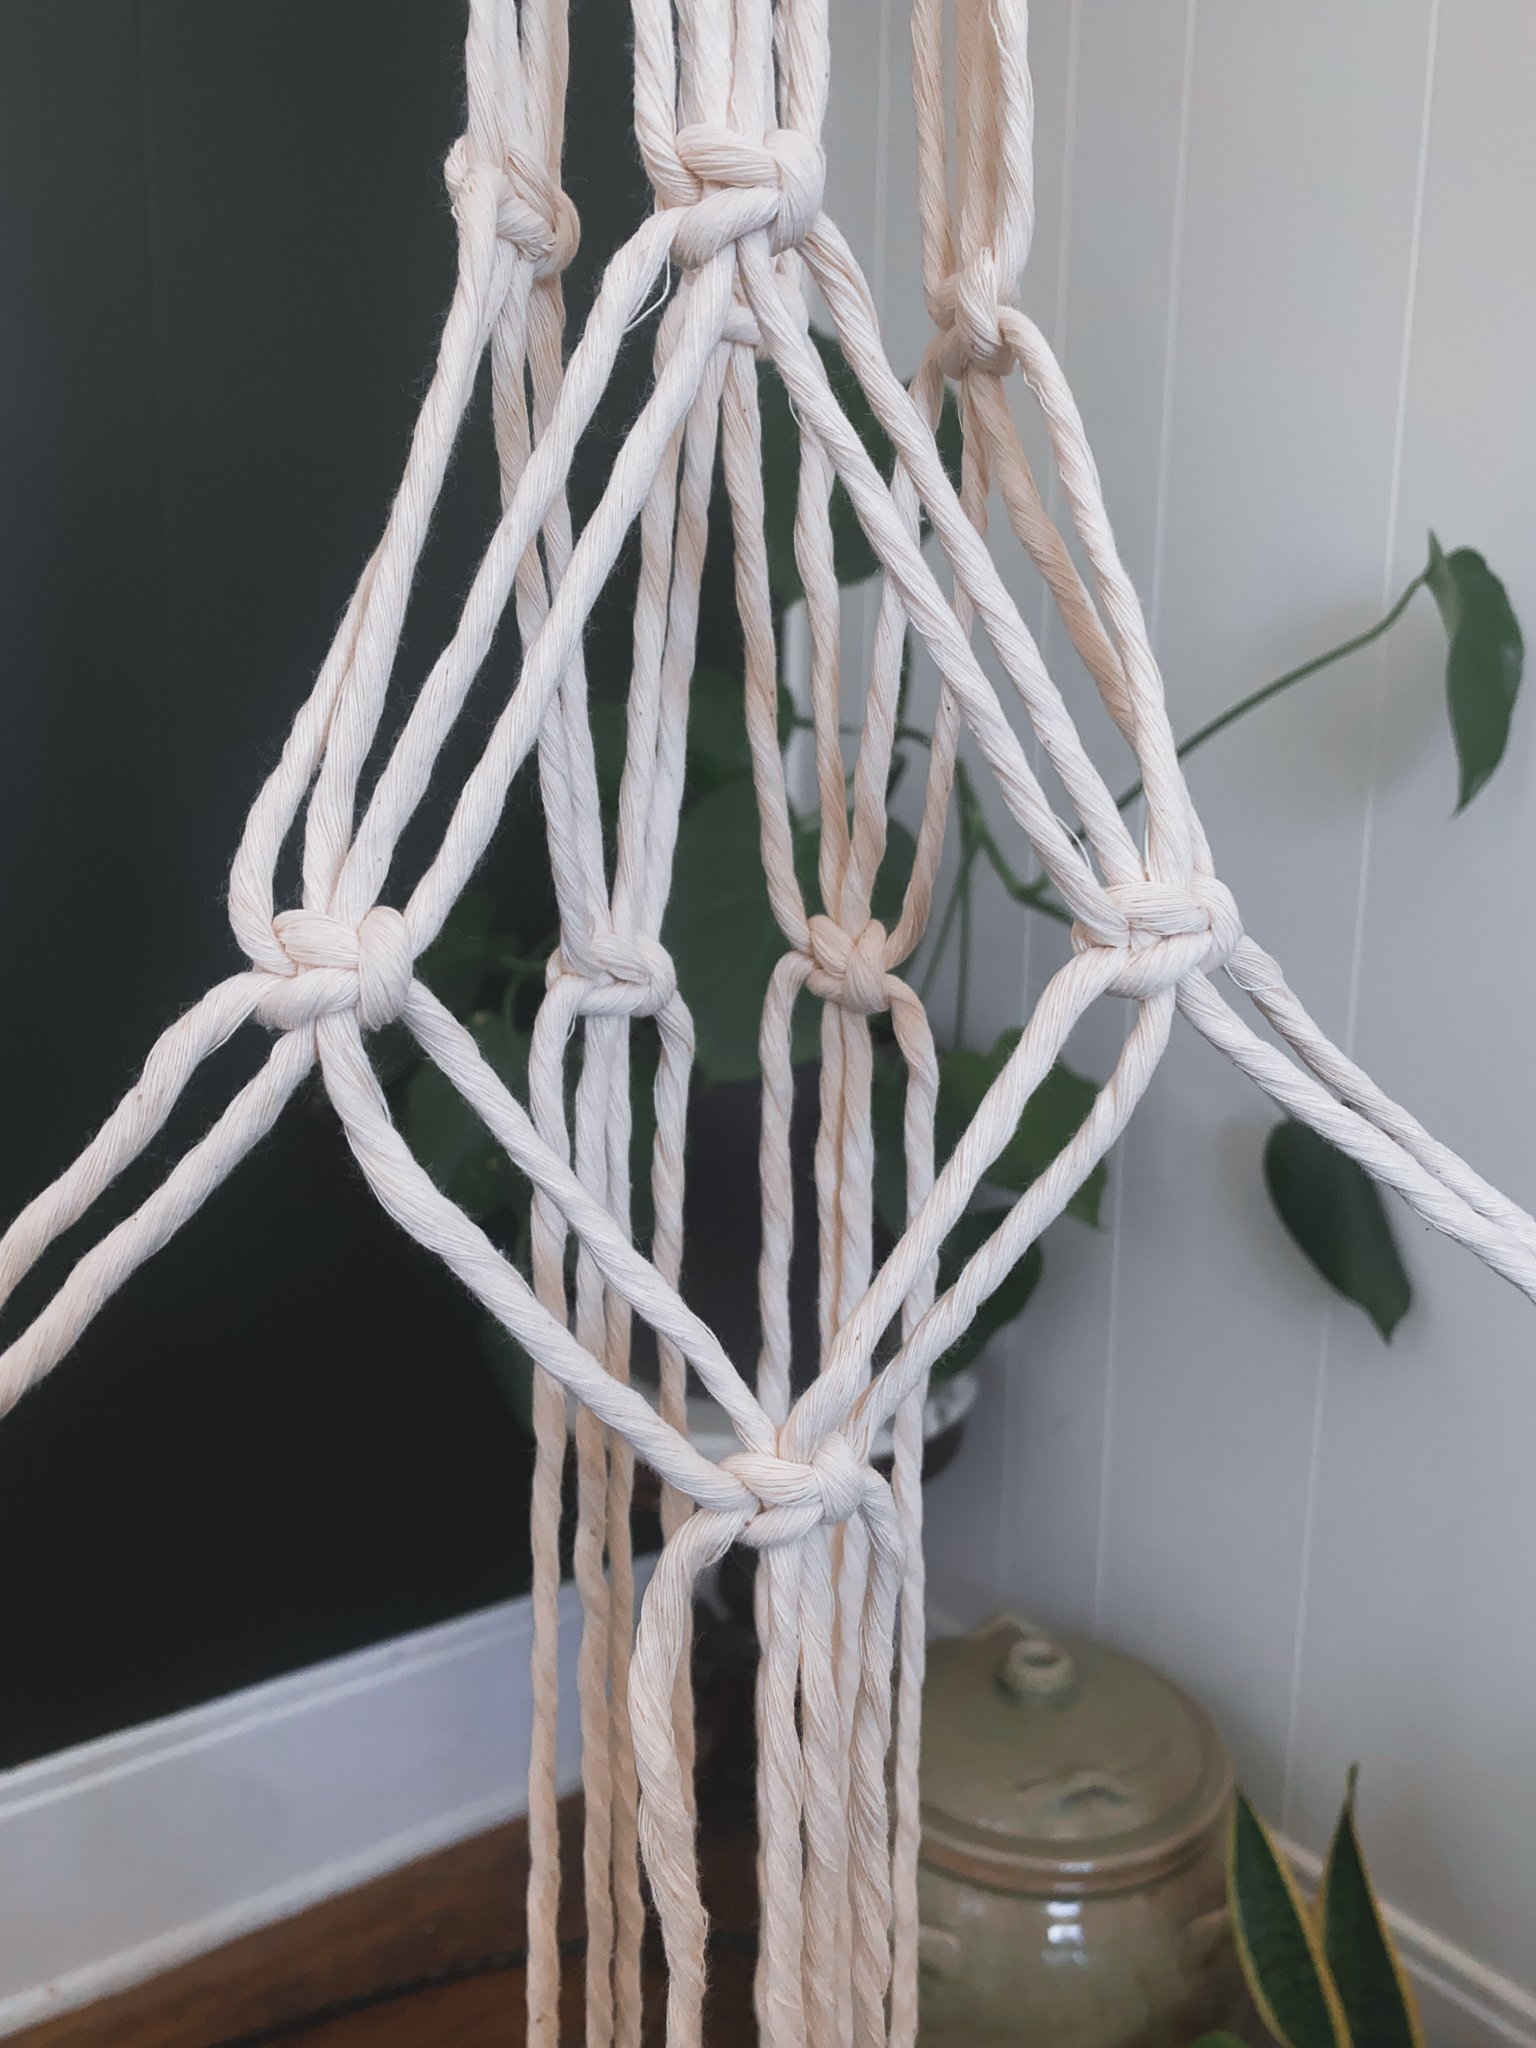
Next, we are going to make more square knots but this time we will be connecting the sections together, creating a diamond pattern. Go around and connect each section with a square knot, then alternate sections again creating another square knot. This will result in four diamonds around the plant hanger (all knots will be spaced 3.5in apart).

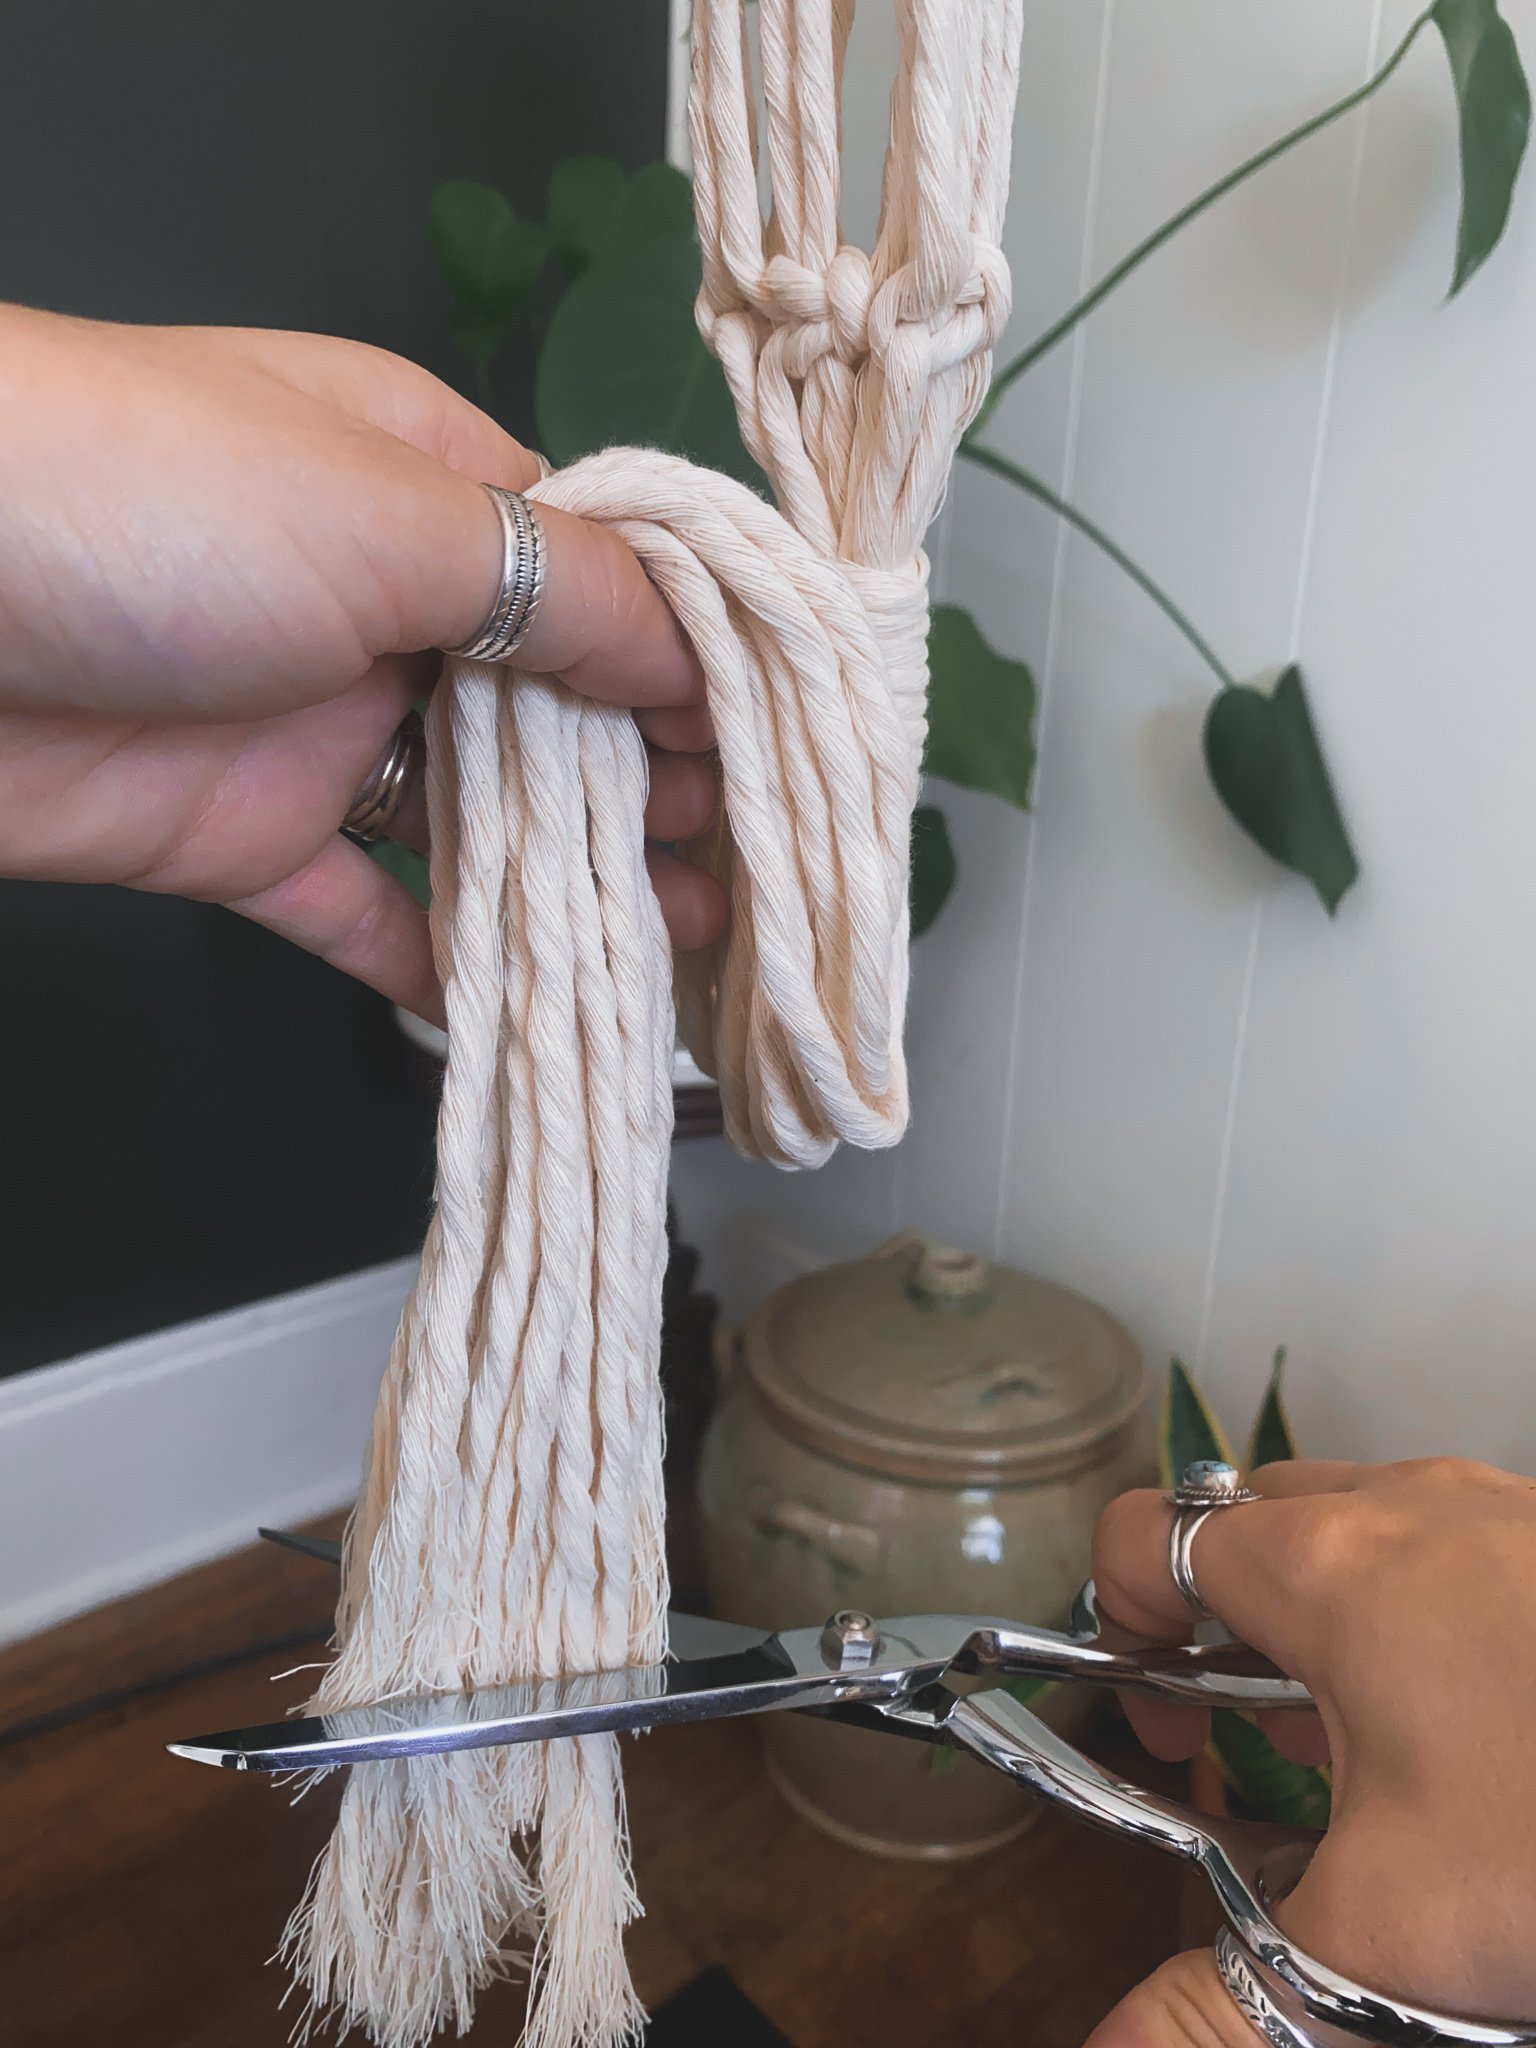
Step 5: Create another Gathering Knot
Once your four diamonds are complete, leave about a one inch space then tie your last gathering knot (refer back to step 3).
Step 6: Complete your Plant Hanger
Now your plant hanger is just about complete! All you have to do is trim the rope to your desired length! I like leaving the tail of the plant hanger longer (not sure if it’s actually called a “tail” but it makes sense to me so we are going with it). If you want to create yours the same length as the one pictured below, measure the hanger from the top down and cut the rope at 38in.
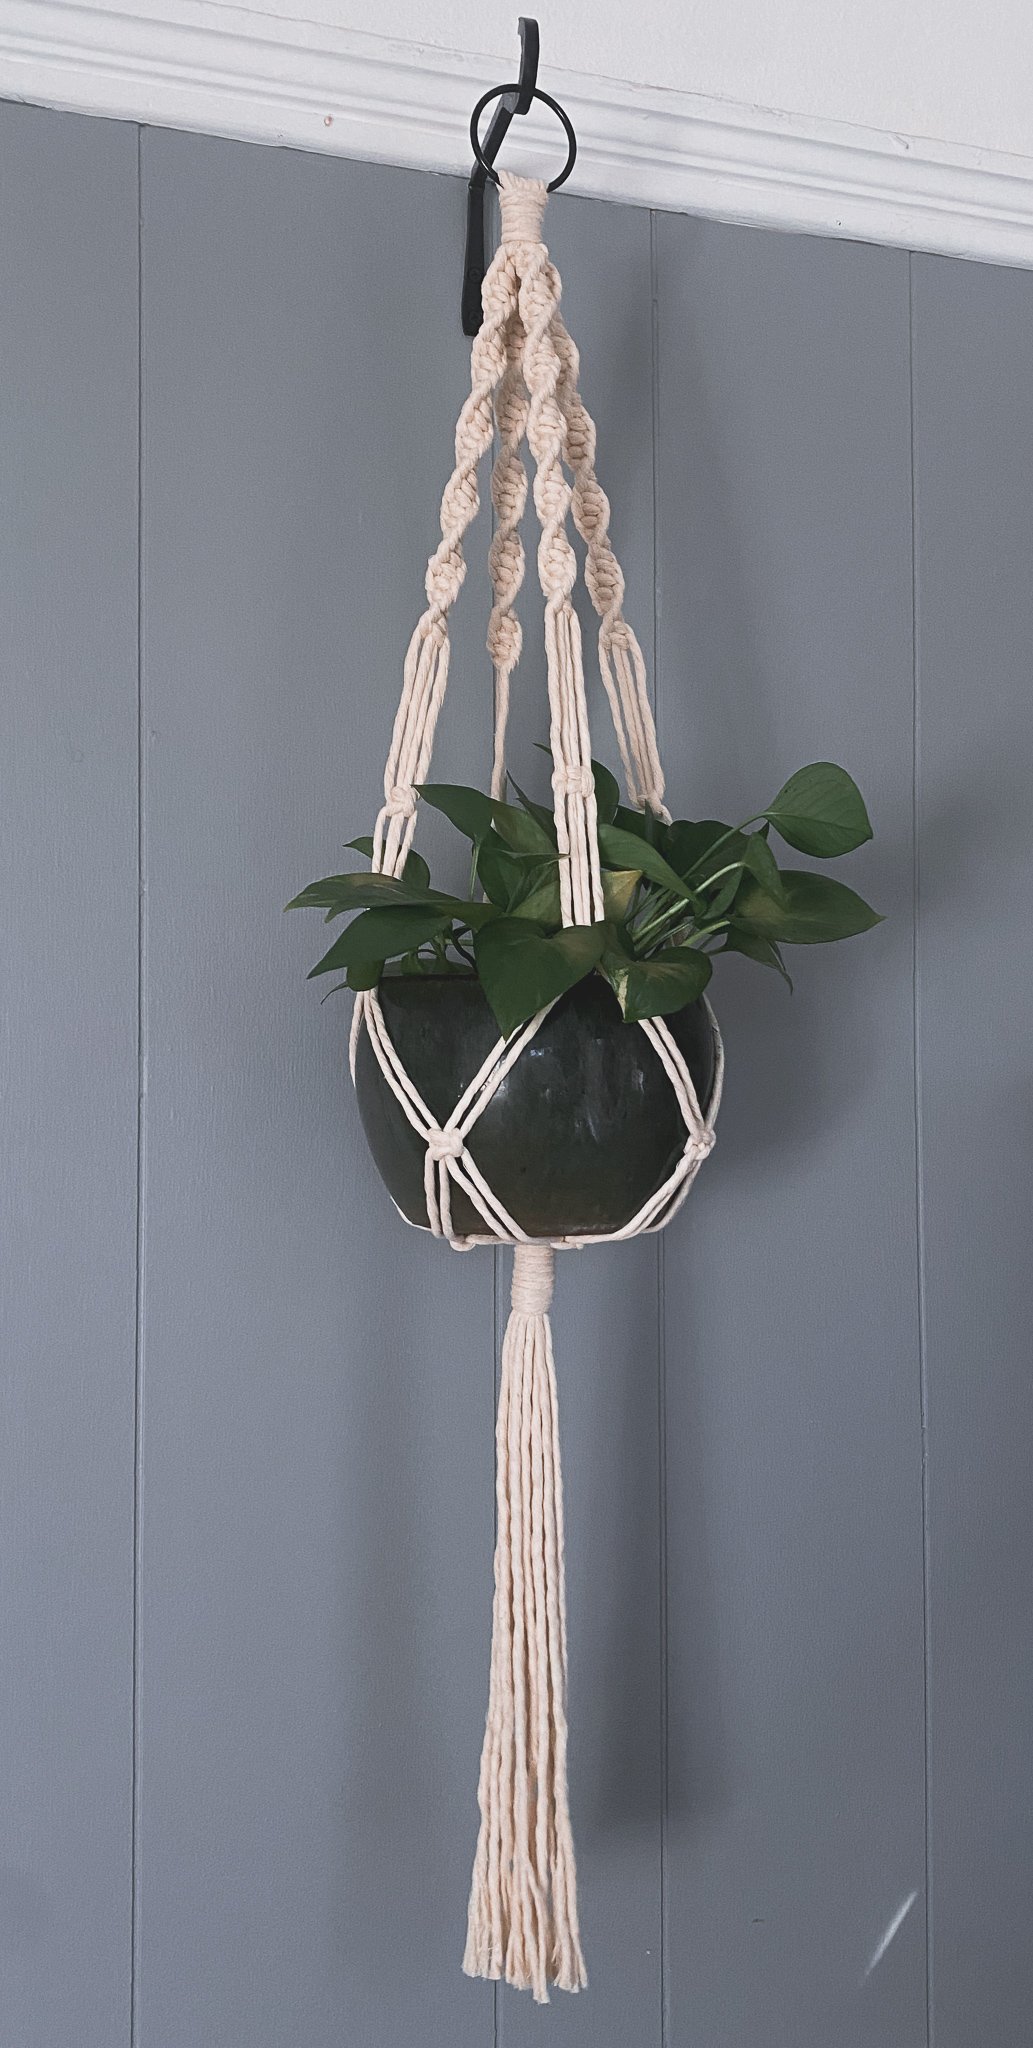
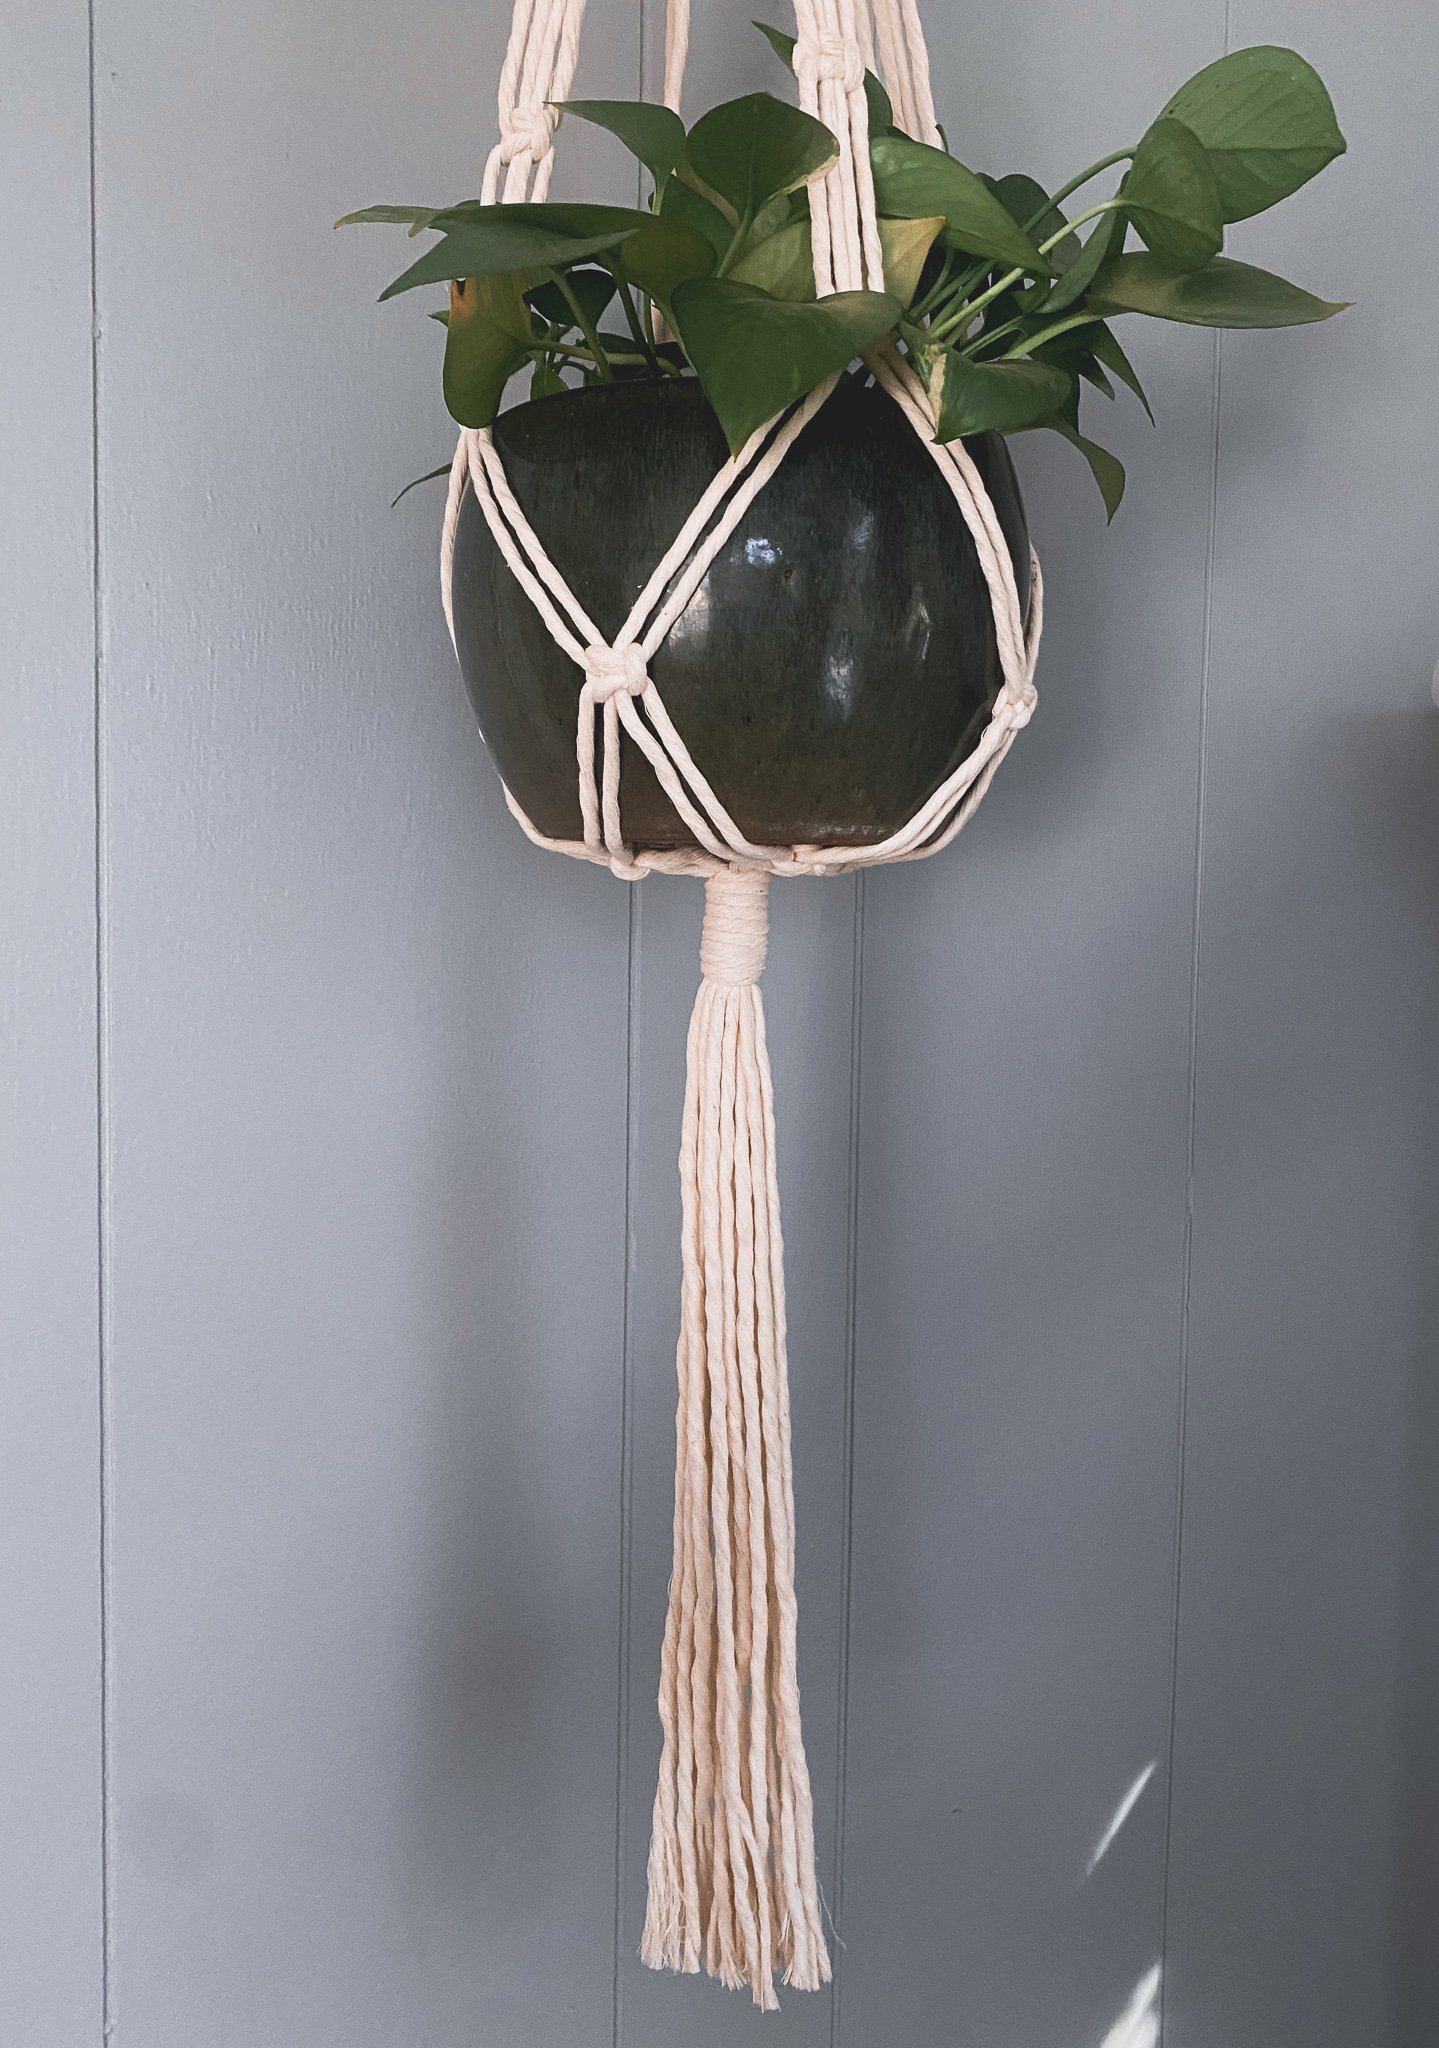
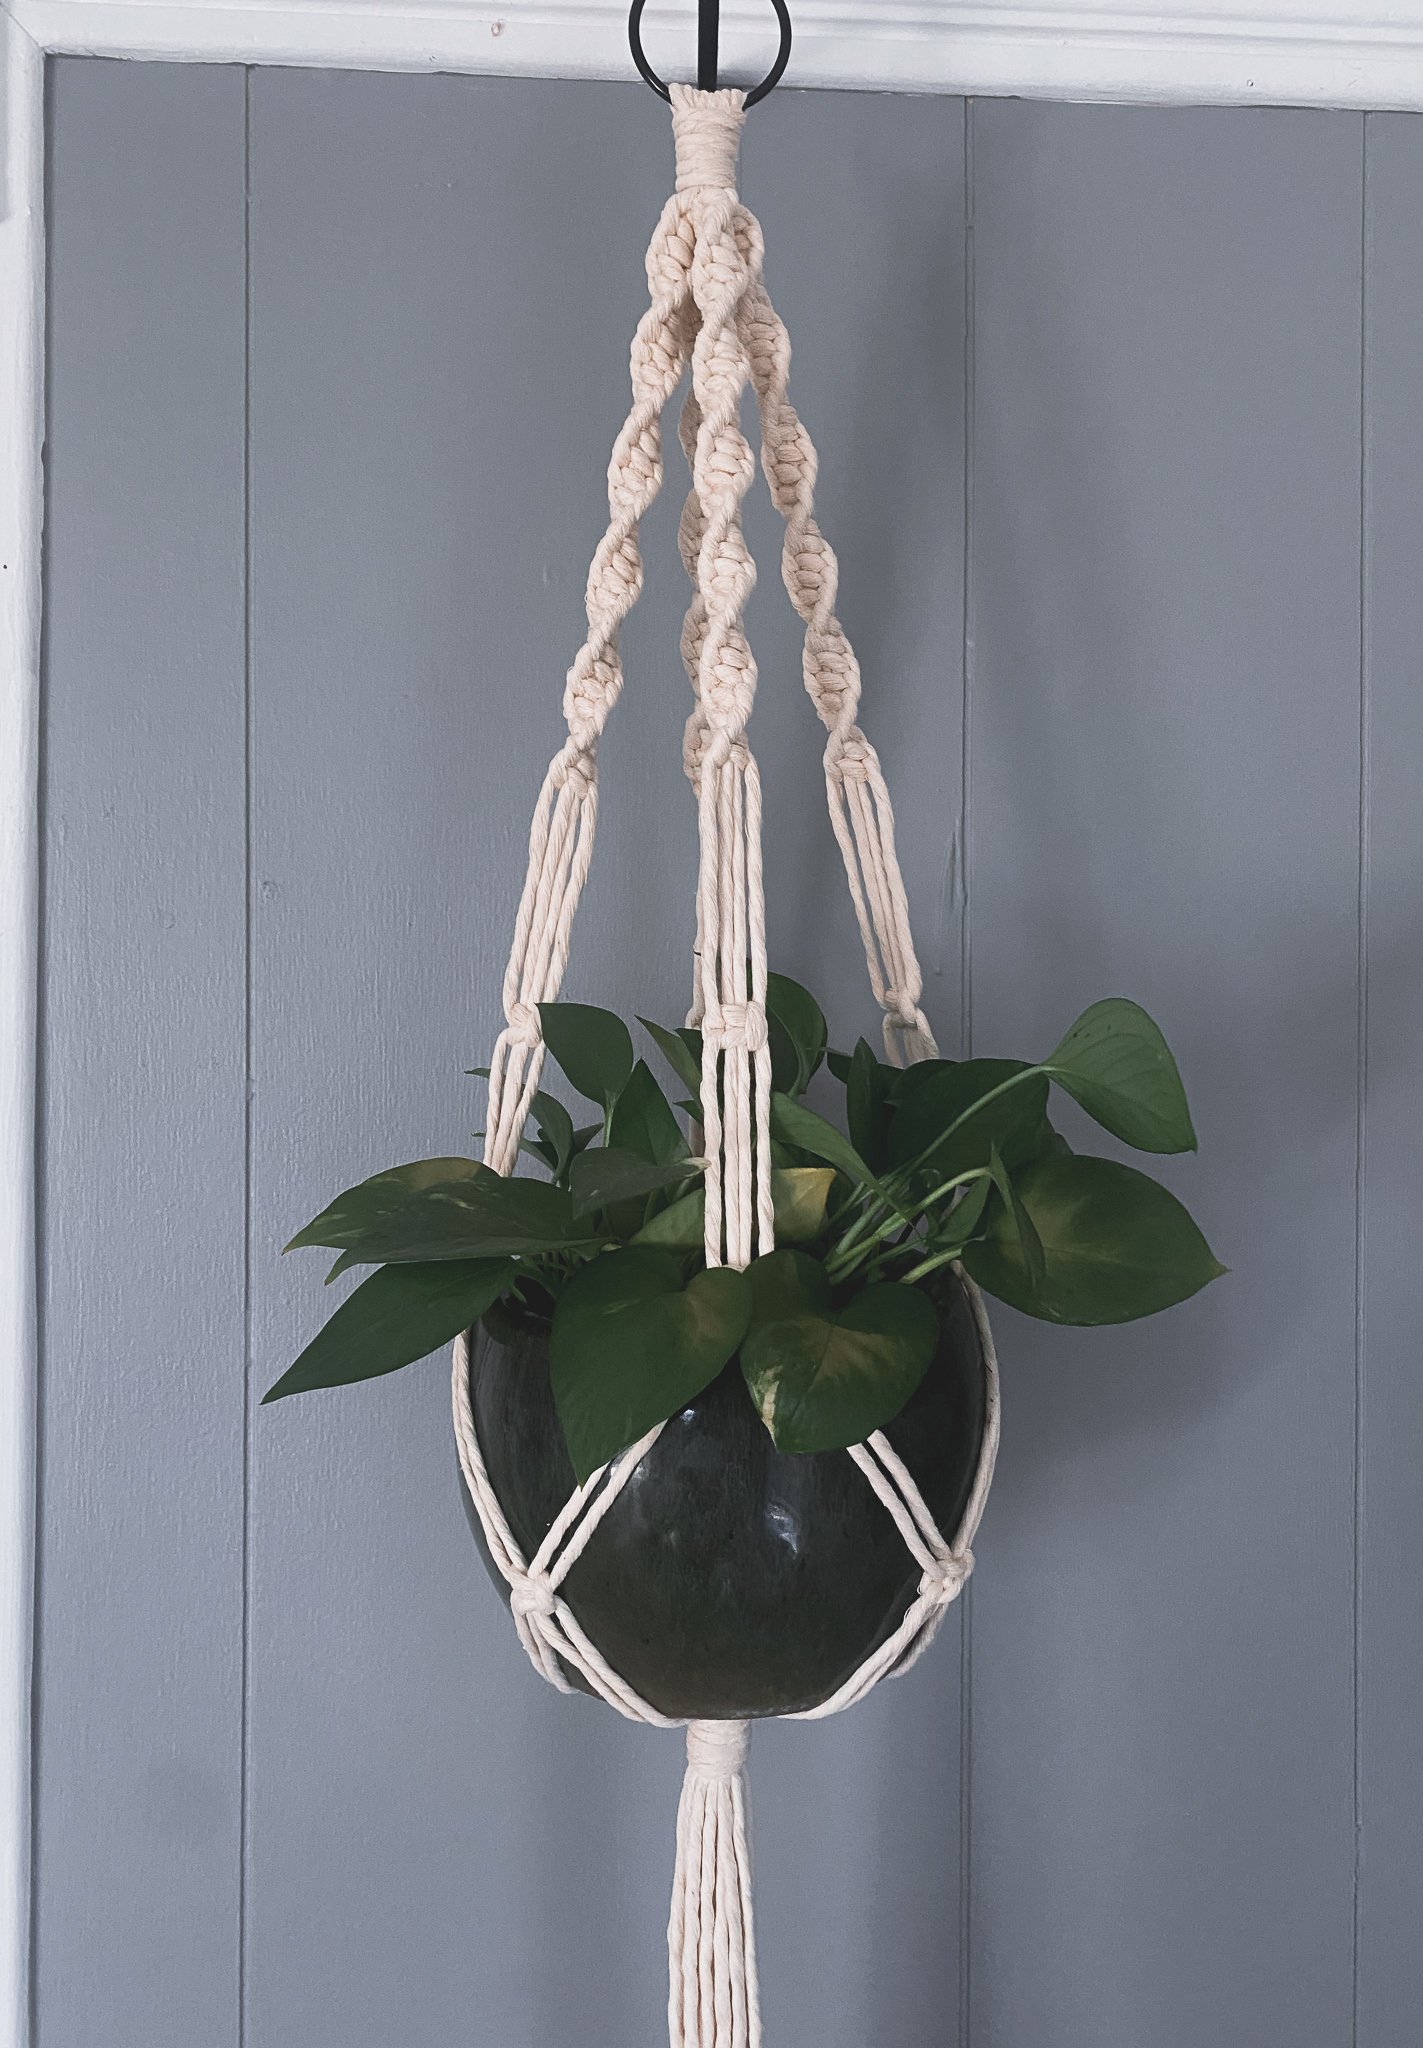
TADAAA!!!
YOU DID IT! You have just created a standard macrame plant hanger! Whether this was your first time creating a plant hanger or not, I hope this explanation helped and wasn’t too confusing. Now go and continue creating those beautiful macrame masterpieces!
Stay knotty friends!
XOXO,
Katrina